Getting started: Service Portal landing page
On this page
Select your language
Before you log into the Service Desk portal, you can select the language that works best for you.
On the login page, at the bottom left, you can the language used by your organization.

Use the dropdown arrow to display other languages and select the language you need.
After login, the language you selected is stored in your user profile. Future logins will automatically use that language.
Introduction
After logging into your organization's Service Desk, you arrive at the Service Portal landing page, also referred to as the home page. On the home page is an interactive overview that highlights several functions of the service portal and enables you to jump to any functionality quickly and seamlessly.

On the service portal home page you'll find helpful information and links to even more information.
Left navigation panel
Notice the 5 menu icons on the left:
![]() Home lets you quickly and easily return to the service portal home page from anyplace in Service Desk.
Home lets you quickly and easily return to the service portal home page from anyplace in Service Desk.
 My Tasks displays an index page of all tasks assigned to you.
 My Incidents displays an index page of all incidents assigned to you.
 Service Catalog offers all the services you can request directly from the portal.
 Knowledge Base articles can help you better understand processes within your organization.
Welcome message & title
The service portal title is front and center.
The welcome message describes the services offered. It can include important information or urgent messages pertaining to your organization. You can find links that direct you to additional areas, fun images, and anything else included within the Service Portal.

Your company's administrators can customize the service portal. Some things you might find on your own service portal include links to important lists, such as articles in the knowledge base or pages where you can create a new incident ticket or service request. Your company might also choose to include a contact phone number and hours of service.
Portal Announcement
The Portal Announcement gives your organization the opportunity to post urgent or important messages to the home page of your SolarWinds Service Portal. This feature allows real-time updates for known issues and could prevent you from having to submit a ticket.
Alternatively, an announcement can include updates such as a down server in a specific office location.
If you are experiencing any issues SolarWinds recommends first checking to see if there are any important announcements. These announcements could be related to vital systems in your organization, planned outages, or even free food in the break room!
If you would like to navigate away from the portal announcement, just click the exit button located to the right of the announcement bar.
Universal Search
The Universal Search bar can be used to search everything you can access or view via the Service Portal. This includes Service Catalog items, which you can use to create a request. You can also search for solutions your organization has created to help you resolve issues on your own.
There are two ways to access the Universal Search feature from the Service Portal. Each will generate identical results.
Search from the search bar on home menu view
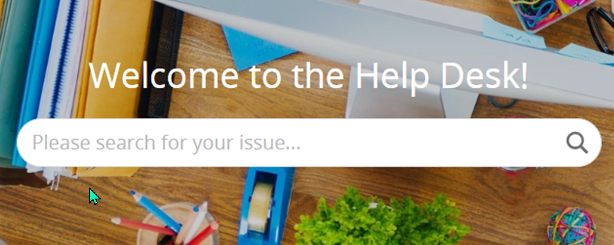
The first place is the search bar located front and center on the home menu view, below the title and in the search field labeled "Please search for your issue...". Type your search words into the field and click the magnifying glass.

For accounts with Advance and Premier plans, Service Desk displays a pop-up containing suggestions that might help you find the information you are looking for. See Artificial intelligence (AI).
Search match suggestions are categorized by type, for example Services and Articles. You can click on a suggestion to open it, or create a new ticket if the suggestions do not provide what you are looking for.

Search from any menu in the service portal
You can also access the universal search feature from any menu on the service portal by using the search bar in the top right of the screen. This search bar follows you around while you access the various menus of the service portal.

Search results
Any search query typed into either location will take you to the Search Results page. There you will find all related service catalog items (change requests) and solutions.
For example, if you were interested in a new laptop, you could type new laptop into the search bar. The search would reveal the results page containing a New Laptop Request Service Catalog item. All you need to do is fill out the required details and click Request Item to initiate the request process.
Always be sure to type carefully into the search bar to see useful information. In the example you can see result of typing new labtop instead of new laptop.

You can create a new incident or request an item from the service catalog if you don’t find what you are looking for.

User Profile Card
The User Profile Card allows you to view information regarding your personal user account. You can edit various information and see your service catalog requests and any submitted incidents.
To navigate to the user profile card, click your user icon in the top right of the screen to reveal a dropdown menu, and then select Profile.

From the Profile tab you can see information associated with your user account. For example, information such as:
- Title
- Phone
- Role
- Site
- Time zone
- Department
- Group membership
The user profile card also gives you the option to edit some of the information located on the card. As a user with the Requester role, the information you can edit may be limited. To edit, click the pencil located toward the top of the card.

After clicking the pencil icon, you see the various fields you can edit. This includes your user profile Image, any field that is not greyed out, your time zone, and your email signature.
To edit your user profile image, click Upload Image and choose a file from your computer. You can also click into any one of the text fields that are not greyed out to edit the information. This could include your name, title, and phone numbers. You can also edit your SolarWinds password by using the Change Password button. Scroll to the bottom of the edit screen to edit your email signature if your organization allows. This signature will be included in all emails sent from SolarWinds on your behalf.
Highlighted Services
The highlighted services section displays a list of Service Catalog items which your organization has deemed as popular or most used. These services are listed here for your convenience.
You can also select the View all button to jump to a list of all services available in the Service Catalog through the Service Portal.

Popular Solutions
The Popular Solutions section of the Service Portal Home menu highlights solutions your organization regards as useful and more commonly used solutions. These solutions are highlighted for ease of access.
You can also click View all to jump to the Solutions/Knowledge Base menu of the Service Portal.
My Requests
The My Requests section displays all active or closed incidents or service requests you submitted in Service Desk.
By default, you see all active incidents or requests that you have open. This includes any new, assigned or resolved items. You can click into any item in the My Requests section to see more details regarding a specific incident or service request.
If you would like to view your closed requests, access from the dropdown menu.
You can also click more info at the bottom of this list to view the My Requestsindex page of the Service Portal.
Chat
Notice the chat window on the right side of your screen. Your IT team is readily available to answer basic questions and save you time. If you can’t find what you're looking for in the Useful Services or Useful Articles lists, feel free to ask your chat representative.
After your questions have been answered, simply click End Chat.
If needed for reporting purposes, the chat agent can create an incident using the correspondence between the two of you.

@Mentions
If you have access to a ticket, you can use the @mention feature in the ticket, which tags the individual you @mention. Just type the @ symbol, then select the appropriate user's name from the pop-up list of users.