Global response templates
On this page
Introduction
Response templates are available to customers with the Advanced or Premier subscription plan. Response templates are responses that administrators and agents can create and save for reuse in ticket comments. They are available in both incident and service request tickets.
Administrators can create global responses for all agents to use. Agents can only create personal responses that are available to them.
By creating global templates, your service desk can standardize a response and the tone of a response that agents use when responding to users. Agents can reduce the need to manually type out a response multiple times per day when they:
-
Accept a ticket and want to let the requester know who they are and provide next steps.
-
Need to notify the requester and use standardized language when closing a ticket.
-
Need to notify an end user to look for a password reset email.
Response templates are created at the service provider level. For example, if you have only one service desk, you can have one set up global response templates. For ESM customers, who have multiple service providers, each provider will have its own set of global response templates.
Global response templates
Create a global response template
Only administrators can create a global response template.
Method 1
-
Navigate to Setup > Service Desk > Global Response Templates.
-
Click the Add icon
 in the upper right.
 -
In the Create Global Response Template dialog you can do the following:
-
Name the template.
-
Add the content in the description field.
-
Format the content using the rich text formatting options.
-
Add variables to the Name and Description fields.
Available variables are:
- {{requester_full_name}}
- {{requester_email}}
- {requester_site}}
- {{requester_department}}
- {{requester_phonenumber}}
- {{assignee_full_name}}
- {{assignee_email}}
- {{incident_number}}
- {{incident_category}}
- {{incident_subcategory}}
-
Method 2
-
From an open incident or service request, select the Comments tab.
-
Type the comment you want to add.
-
Click Response Templates.
-
Click Save in the upper right of the Response Templates popup.
-
Name the new Response Template.
-
Change the scope dropdown to Global.
-
Save.
Edit a global response template
Only an administrator can edit a global response template.
-
Navigate to Setup > Service Desk > Global Response Templates.
-
From the All Response Templates index page, click the name of the template you want to edit.
-
In the Edit Global Response Template dialog, make changes.
-
Click Update.
Personal response templates
Create a personal response template
Anyone can create a personal response template.
Method 1
-
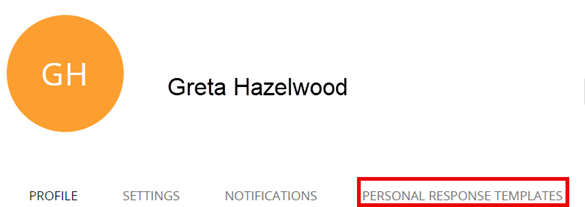
Click your avatar in the upper right corner and select Profile.
- From the list of tabs, select Personal Response Templates.
-
Click Add
to the right of the Personal Response Templates heading. -
In the Create Personal Response Template dialog you can do the following:
-
Name the template.
-
Add the content in the description field.
-
Format the content using the rich text formatting options.
-
Add variables to the Name and Description fields.
Available variables are:
- {{requester_full_name}}
- {{requester_email}}
- {requester_site}}
- {{requester_department}}
- {{requester_phonenumber}}
- {{assignee_full_name}}
- {{assignee_email}}
- {{incident_number}}
- {{incident_category}}
- {{incident_subcategory}}
-
Method 2
-
From an open incident or service request, select the Comments tab.
-
Type the comment you want to add. Add variables as needed.
-
Click Response Templates.
-
Click Save in the upper right of the Response Templates popup.
-
Name the new Response Template.
Edit a personal response template
Only the original creator can edit a personal response template.
-
Click your avatar in the upper right corner and select Profile.
- From the list of tabs, select Personal Response Templates.
- From the list of Personal Response Template, click the name of the template you want to edit.
- Make changes, and then click Update.
Add a template response to a comment in an existing ticket
-
From an open incident or service request ticket, select the Comments tab.

-
Click the dropdown arrow next to Response Templates.
-
From the Response Templates pop-up, select the appropriate tab for the templates you want to display: All, Personal, or Global. Templates appear in alphabetical order.

-
Select the Response Template name and click Add
. -
If appropriate, edit the text in the Comments text box as needed before posting the comment. You can also format the text, choose to make the comment public or private, add variables, and add attachments.
Navigate from the Response Templates popup
In the upper right, the Response Templates pop contains three navigation icons.

They are:
-
Go to Global Response Templates index page
-
Go to Personal Response Templates
-
Save Current Response as Response Template