Manage SAM application monitor templates and application monitors
As described here, a SAM application monitor template is the blueprint for an application monitor that can be used to monitor nodes and processes. It is a collection of component monitors designed to monitor a server, application, or process. You can use the templates included in SAM "as is", copy a template and customize it for your needs (recommended), create a template from scratch, or import templates from THWACK.
SAM API Poller templates are also available.
This topic describes basic template tasks, including:
- Create a template
- Assign a template to a node
- Edit a template
- Copy a template
- Delete a template
- Tag a template
- Change between 32-bit and 64-bit polling
Additional topics in this section include:
- Best practices for SAM templates, application monitors, and script monitors
- Use the Credentials Library for SAM component monitor credentials
- Assign templates to nodes manually to create application monitors
- Use group assignments for SAM application monitor templates and application monitors
- Import and export SAM application monitor templates
- Create custom application monitor templates in SAM
- Remove a SAM application monitor from multiple nodes
See also:
- Manage application monitor thresholds in SAM
- SAM Custom Application Monitor Template Guide
- SAM Application Monitor Template Reference
Create a template
SAM includes two options for creating templates:
- (Recommended) Use the Component Monitor Template Wizard to create component monitors and add them to a new template. This option adds instances of a component monitor type with fewer steps to create a template.
- Create a new template and add component monitors manually.
The fastest way to build a template is to use the Component Monitor Wizard, which provides the most common and popular component monitors per platform. You can use it to add multiple instances of a selected component monitor to a new or existing template, and then edit the template to add more component monitors as needed.
For example, you may need to monitor 20 services on servers and run custom PowerShell scripts. Use the wizard to generate a template with 20 process or service monitors (depending on your use case), and then add PowerShell script monitors as needed.
When you enter credentials for component monitors, a connection test runs. Depending on the components, you may need to enter additional server and credentials data.
To create a template in the Component Monitor wizard, follow these steps.
-
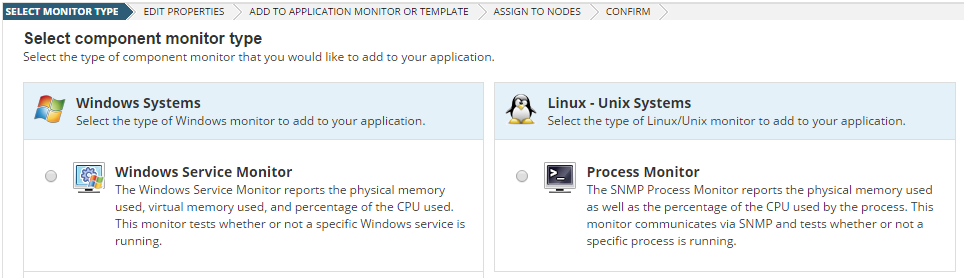
Select the type of component monitor you're adding.
- Select a target server in your environment and complete required fields.
- Select from a list of available processes, services, and performance counters for the server.
-
Edit the properties of component monitors, as necessary.
See Use script component monitors in SAM to learn about PowerShell, Nagios, Linux/Unix, or Windows scripting in custom templates.
-
Provide an Application Monitor Template Name.
Avoid spaces at the beginning or end of the name. Otherwise, application monitors based on the template may not appear in widgets.
-
Assign the template to nodes in your environment according to server type.
-
Review the configuration of the new template and confirm that you want to create it.
SAM creates the template and assigns it to the selected nodes.
If you do not want to use the wizard, you can also create a new, empty template and add component monitors as needed. For example, you may only want to create a template with PowerShell script monitors to gather data on your systems and applications.
- Click Settings > All Settings > SAM Settings and select Manage Templates.
- Click New Template.
-
Add general information and settings for the template including name, description, and tags.
Avoid spaces at the beginning or end of the name. Otherwise, application monitors based on the template may not appear in widgets.
- Based on the number of component monitors, set the polling frequency and timeout.
Continue by adding component monitors.
Create a custom template (Example)
For customized monitoring, you can create new templates based on existing templates or build templates from scratch. For example, you can build a template to monitor a local SQL Server instance that includes Windows Service component monitors, a TCP port monitor for your SQL server, and an HTTP monitor for the SolarWinds Platform Web Console.
This template could include the following monitors:
- TCP port component monitor to monitor port 1433, the port through which SolarWinds communicates with the SQL Server.
- Service component monitors for the following Windows services:
- SolarWinds Alerting Engine
- SolarWinds Network Performance Monitor
- SolarWinds Job Engine
- SolarWinds Job Scheduler
- SolarWinds Module Engine
- SolarWinds Syslog Service
- SolarWinds Trap Service
- HTTP component monitor to monitor port 80, the default port for the SolarWinds Platform Web Console.
To learn more, see the SAM Custom Application Monitor Template Guide.
Create a SAM template to monitor a service
You can create templates specifically for the following Windows services that support the SolarWinds Platform:
- SolarWinds Network Performance Monitor
- SolarWinds Job Engine v2
- SolarWinds Job Scheduler
- SolarWinds Module Engine
- SolarWinds Syslog Service
- SolarWinds Trap Service
When creating templates, modify these instructions based on the services you are monitoring:
- Click Settings > All Settings > SAM Settings > Create New Template.
- Add general information to the template including a name, description, and tags. Tags are used for searching or opening lists of templates.
- Click Add Component Monitor, expand the Network Protocol Component Monitors list, and select TCP Port Monitor. Click Submit to add.
- Click Rename and name the TCP port monitor, and click OK.
- Ensure the Port Number field corresponds to the port used to communicate with the SolarWinds SQL Server instance. By default, this is port 1433.
- Click Add Component Monitor, expand the Process and Service Component Monitors, and check Windows Service Monitor and click Submit.
- Click Rename, name the SolarWinds Alerting Engine monitor, and click OK.
- Enter or select the credential set to use when accessing the Windows service information.
- Enter the name of the SolarWinds Alerting Engine service in the Net Service Name field.
- Click Add Component Monitor then expand the User Experience Component Monitors list, and then check HTTP Monitor.
- Click Rename, name the HTTP port monitor, then click OK.
- Ensure the Port Number corresponds to the port used for the SolarWinds Platform Web Console, then click Submit.
Assign a template to a node
To begin monitoring with a template, you need to assign it to a node. At that point, the template is considered to be an "application monitor" (sometimes called an "application") that collects and reports on polling data to the node according to the application monitor's configuration.
Use the Discovery Wizard to add nodes, if necessary.
To assign templates to nodes:
- Click Settings > All Settings > SAM Settings > Manage Templates.
- Check the template(s) to assign, and click Assign to Node.
- Specify the node(s) to monitor and click Next.
- Enter or select the appropriate credentials.
- Click Assign Application Monitors.
Want to learn how to use SolarWinds Platform groups to automatically assign or remove SAM templates? Check out the Using Automation to Apply SAM Templates video. See also Group monitored objects, in the SolarWinds Platform Administrator Guide.
Edit a template
Every template, including default SAM templates, can be modified. You can change the name, description, general settings, and application monitors. You can also create a copy of a template and modify the copy.
- Click Settings > All Settings > Settings > Manage Templates.
- Select a template and click Edit.
-
Specify the values for the Polling Frequency and Polling Timeout fields.
Setting a polling frequency below 30 seconds can result in erratic monitor behavior.
- To add a monitor, click Add Component Monitor. Expand and filter through the options to add one or more monitors to the template.
- You can edit one or more monitors, update settings per monitor, and more. See Edit component monitors in templates and application monitors for details. To review help information per monitor, use the help option in the SolarWinds Platform Web Console.
- When done, click Submit to save the changes.
Add component monitors
When editing a template, you can add one or more SAM component monitors. This scenario uses the Manually Add Component Monitor option where you select component monitors from a list to add to the template. Alternatively, you can use Browse for Component Monitors to select items in the Component Monitor wizard.
-
Next to Add Component Monitors, click the option button and select Manually add Component Monitors.

-
In the list of component monitors that appears, select the check box for the monitor you're adding to the template.

- (Optional) Click inside the Quantity field and enter a digit to add multiple versions of the same monitor.
- Click Add.
- Modify the configurations and custom settings per monitor, as necessary.
- When you return to the Edit Template page, expand each component monitor to configure settings, add scripts, and more.
- When finished, click Submit.
Click Save and Continue Working as you add and complete component monitors.
Copy a template
You can modify current templates, or create a copy. With copies, you can use a base template from the default templates, imported templates, or templates you created. Using a copy for a new template can make the process much faster than starting a new template without pre-filled monitors and configurations.
The copied templates use the same name of the original name with "- Copy" appended.
If you want to completely modify a current template, use a copy to keep the original.
- Click Settings > All Settings > SAM Settings > Manage Templates.
- Select the template you want to copy, and click Copy. A new template is added with the same component monitors and configured settings, which you can modify, as necessary.
Delete a template
Deleting a template also deletes all of related application monitors assigned to nodes, both modified and unmodified.
Template-related data is not immediately removed from the SolarWinds Platform database, but systematically updated every few minutes in the background.
Instead of deleting a template, consider exporting it to a file so you can restore it later, if necessary.
- Click Settings > All Settings > SAM Settings > Manage Templates.
- Check the template(s) to delete and then click Delete.
- Confirm deletion by clicking Yes.
See also Remove a SAM application monitor from multiple nodes.
Tag a template
Tags are descriptive labels that help you classify and sort templates on the Manage Application Monitor Templates page. Most SAM templates are already tagged with descriptive labels that you can modify.
- Click Settings > All Settings > SAM Settings > Manage Templates.
- Select the templates you want to tag, then click Tags.
- Click Add existing tag(s) or select the tags from the list.
- Type the tags, separating multiple tag entries with commas, then click Submit.
To remove tags:
- Click Settings > All Settings > SAM Settings > Manage Templates.
- Select the templates you want to tag, then click Tags > Remove Tags.
- Select the tags from the list, then click Submit.
Change between 32-bit and 64-bit polling
You should use 64-bit polling on 64-bit OS systems. Using AppInsight applications with 32-bit polling on 64-bit computers via an agent prevents certain performance counters from collecting information.
To change to 64-bit polling at the application resource level:
- Click My Dashboards > Applications > SAM Summary.
- Select an AppInsight Application (Exchange, SQL, IIS) and then click Edit Application Monitor.
- Expand Advanced, and then click Override Template.
- In the Platform to run polling job field, change the value to
x64. - Click Submit.
To change to 64-bit polling at the template level:
- Click Settings > All Settings > SAM Settings > Manage Templates.
- Select an AppInsight application and click Edit.
-
Expand Advanced and change the Platform setting to
x64.