Add an action to forward messages to another host in KSS NG
You can add an action to forward the received message to another syslog host using the specified syslog protocol. This is beneficial if you need to pass log messages to team members that reside in a different location than your host machine. For example, your company has teams in both the United States and Japan who monitor log messages.
- From the Kiwi Syslog NG navigation bar, choose Setup > Rules.
- Locate an existing rule. If the rule does not exist, add a rule and start the New Rule wizard.
- If you are adding an action to an existing rule, select the rule and click Edit. If you are creating a new rule, navigate to the Actions step of the New Rule wizard.
- Click Add Action. Define the action name in the provided field.
- In the Action drop down, select Forward to another host.
-
Specify the remote host IP address or host name. To send messages to multiple hosts, separate each host name or IP address with a comma. For example:
Myhost.com, SecondHost.net, 203.75.21.3, ABC:567:0:0:8888:9999:1111:0 -
Specify the protocol.
-
Specify the port number. Recommended values are:
- UDP: Port 514
- TCP: Port 1468 or port 601
- Configure any of the following optional values.
New Facility Forces outgoing messages to use a specified facility. In most cases, accept the default value of No change.New Level Forces outgoing messages to use a specified level. In most cases, accept the default value of No change.Send with RFC3164 header information Adds the standard RFC3164 header information to the outgoing message. The format is:
<Priority>Date Hostname PID Message textThe Priority is a value between 0 and 191.
The Date is in the format of
Mmm DD HH:NN:SS(July 4 12:44:39). Note there is no year specified. The PID is a program identifier up to 32 characters in length.Retain the original source address of the message Normally, the syslog protocol is unable to maintain the original sender's address when forwarding syslog messages. This is because the sender's address is taken from the received UDP or TCP packet.
Kiwi Syslog solves this problem by placing a tag in the message text that contains the original sender's address. By default, the tag looks like
Original Address=192.168.1.1. That is, theOriginal Address=tag, followed by the IP address, followed by a " " (space) delimiter or tag.These tags are inserted only if the "Retain the original source address of the message" option is selected.
If the "Spoof Network Packet" option is used, then the
Original Address=tag is not used. The Syslog packet is forwarded to the destination address as though it has been sent from the originating IP address.Use a fixed source IP address Uses a fixed IP address in the
Original Address=tag. This can be useful when you want to identify outgoing messages as coming from a particular host. For example, if you have more than one remote syslog servers sending messages to one central location. If each of the remote syslogs use the 10.0.0.x address range, the received messages appear from the same host. Specifying a different source IP address for each remote syslog could help in identifying the incoming messages better.If the "Spoof Network Packet" option is used, then the
Original Address=tag is not used. The Syslog packet is forwarded to the destination address as though it has been sent from the specified fixed IP address.Spoof Network Packet This option only applies to syslog messages forwarded via UDP protocol with IPv4 address only.
The network packet is spoofed to appear as though the forwarded message has come directly from the originating devices' IP address, and not the address of the Syslog Server. Kiwi Syslog Server uses the Selected Network Adapter to send the spoofed UDP/IP packet.
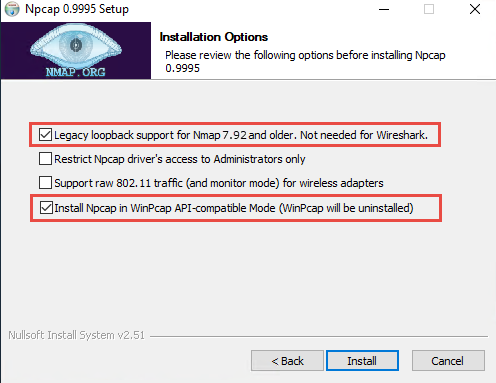
This feature is only available in a licensed edition of Kiwi Syslog Server. It requires NpCap (with NpCap Loopback Adapter) installation.
- If you are adding an action to an existing rule, click Apply. If you are creating an action in the New Rule wizard, click Add.