Migrate WPM recordings using the Recordings Migration Tool
What to do if you are using the Deprecated WPM Recorder
If you are currently using the Deprecated WPM Recorder, it's important to understand that SolarWinds has now aligned with Microsoft Support and will no longer support Internet Explorer-based transactions in a near-term future release. As a result, upcoming releases of WPM will not support editing or playing transactions that originate in the Deprecated WPM Recorder. Now is the time to migrate your WPM recordings and discontinue using the Deprecated WPM Recorder.
What is the Recordings Migration Tool?
The Recordings Migration Tool (RMT) is a component of SolarWinds WPM that enables you to migrate WPM recordings created with the Deprecated Recorder (based on the Internet Explorer engine) to recordings in WPM3.0+ format that are compatible with the Chromium-based WPM Recorder. It is a command line tool that aims to make the transition from Internet Explorer recordings and transactions to Chromium recordings and transactions as streamlined as possible.
- The standard installation location of the RMT is as follows: C:\ProgramFiles\SolarWinds\Orion\SEUM\RecordingsMigrationTool\SolarWinds.SEUM.RecordingsMigrationTool.exe
This may differ when the SolarWinds Platform is installed in a nonstandard directory. - The RMT requires elevated privileges, so it must be run with an administrative OS account.
- The RMT is a command line interface (CLI) application, so it is best to open command prompt (as admin) or another terminal such as Windows terminal and run it from the command line. Doing so allows you to specify arguments and options the tool should use.
Get started with the RMT
-
Open the command prompt as an administrator.
-
In the command prompt, navigate to the installation directory of the RMT.
-
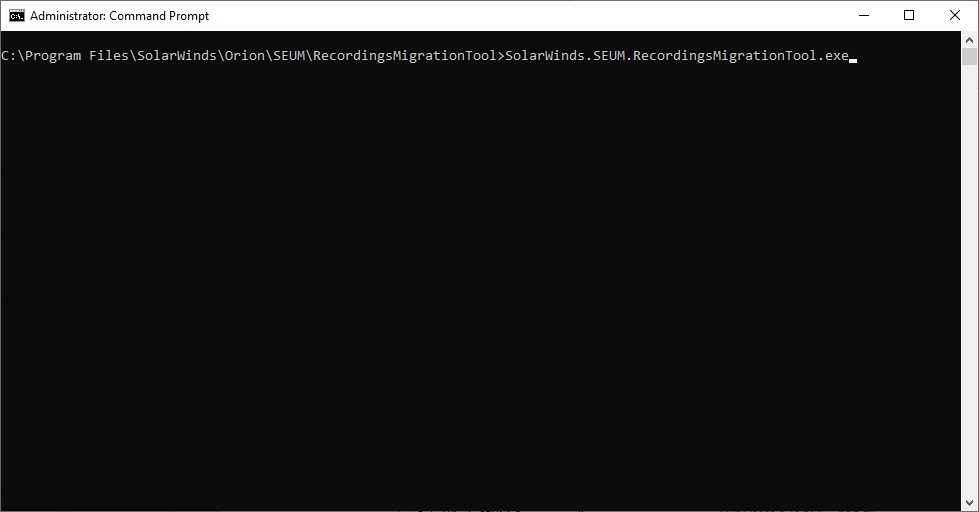
Run the RMT from the command prompt.
-
When prompted, enter the credentials of the SolarWinds Platform account that has WPM administrative privileges.
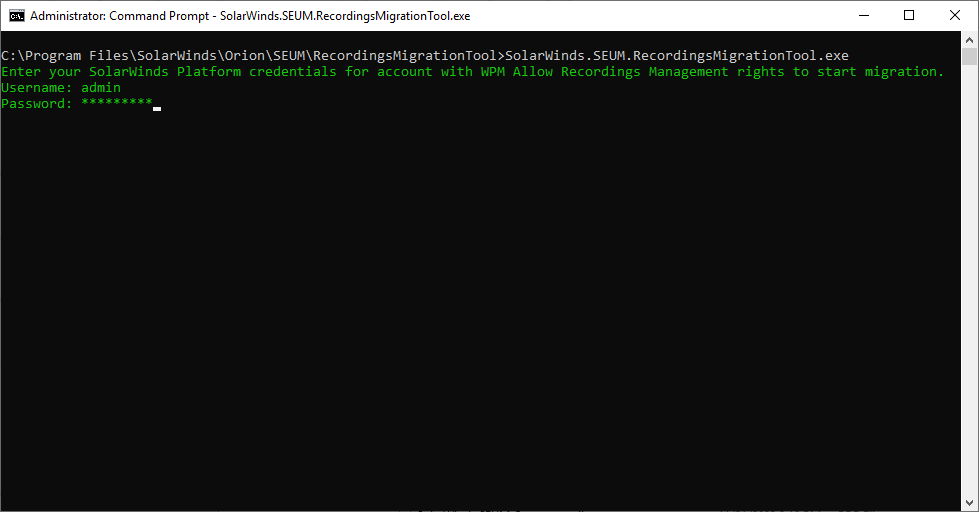
The RMT connects to the SolarWinds Platform SWIS service to proceed with migration. It retrieves information about all deprecated recordings (Internet Explorer-based) and starts the migration process for each deprecated recording one by one. Each successfully migrated recording is saved in the WPM3.0+ format (Chromium-based) on the SolarWinds Platform server (this is customizable).
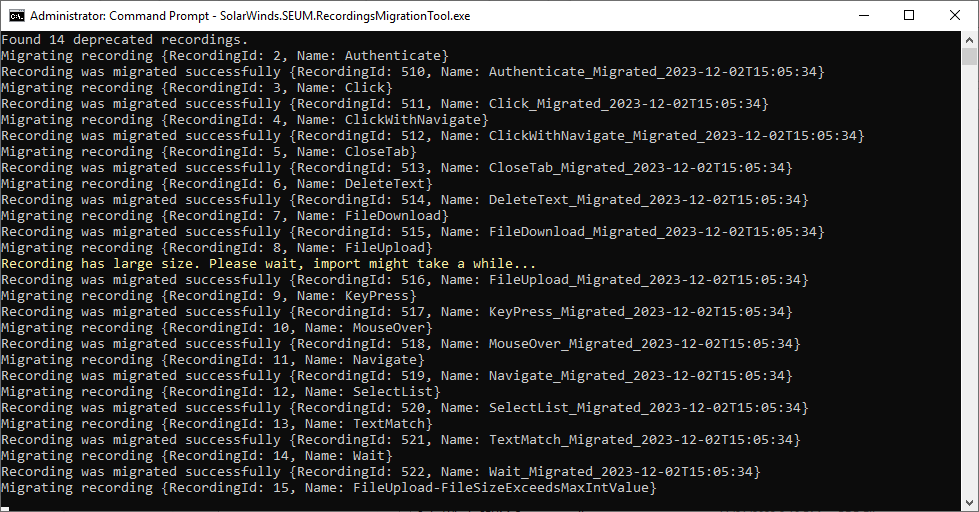
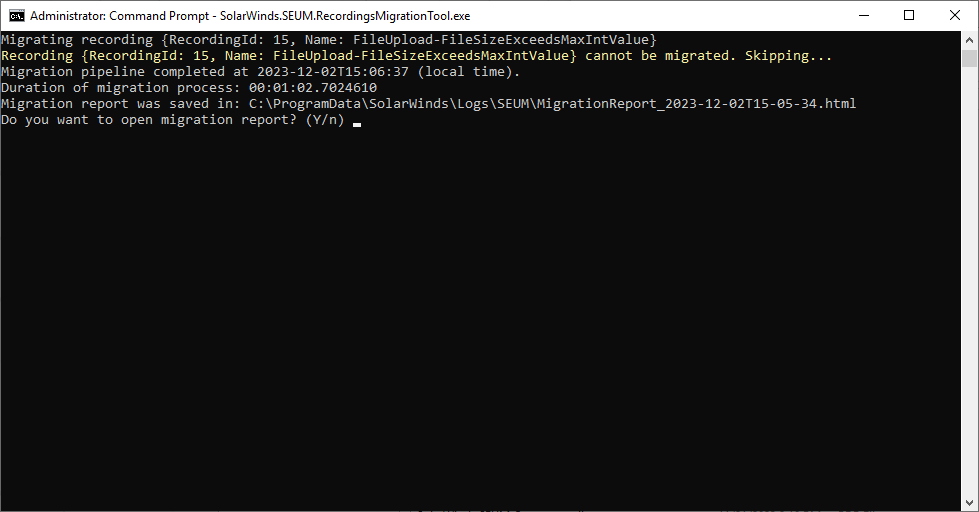
When the migration is complete, the RMT generates a migration report file that includes the details of the migration process and asks whether you want to open the report in the browser.
-
Type Y to confirm, and the final migration report is displayed.

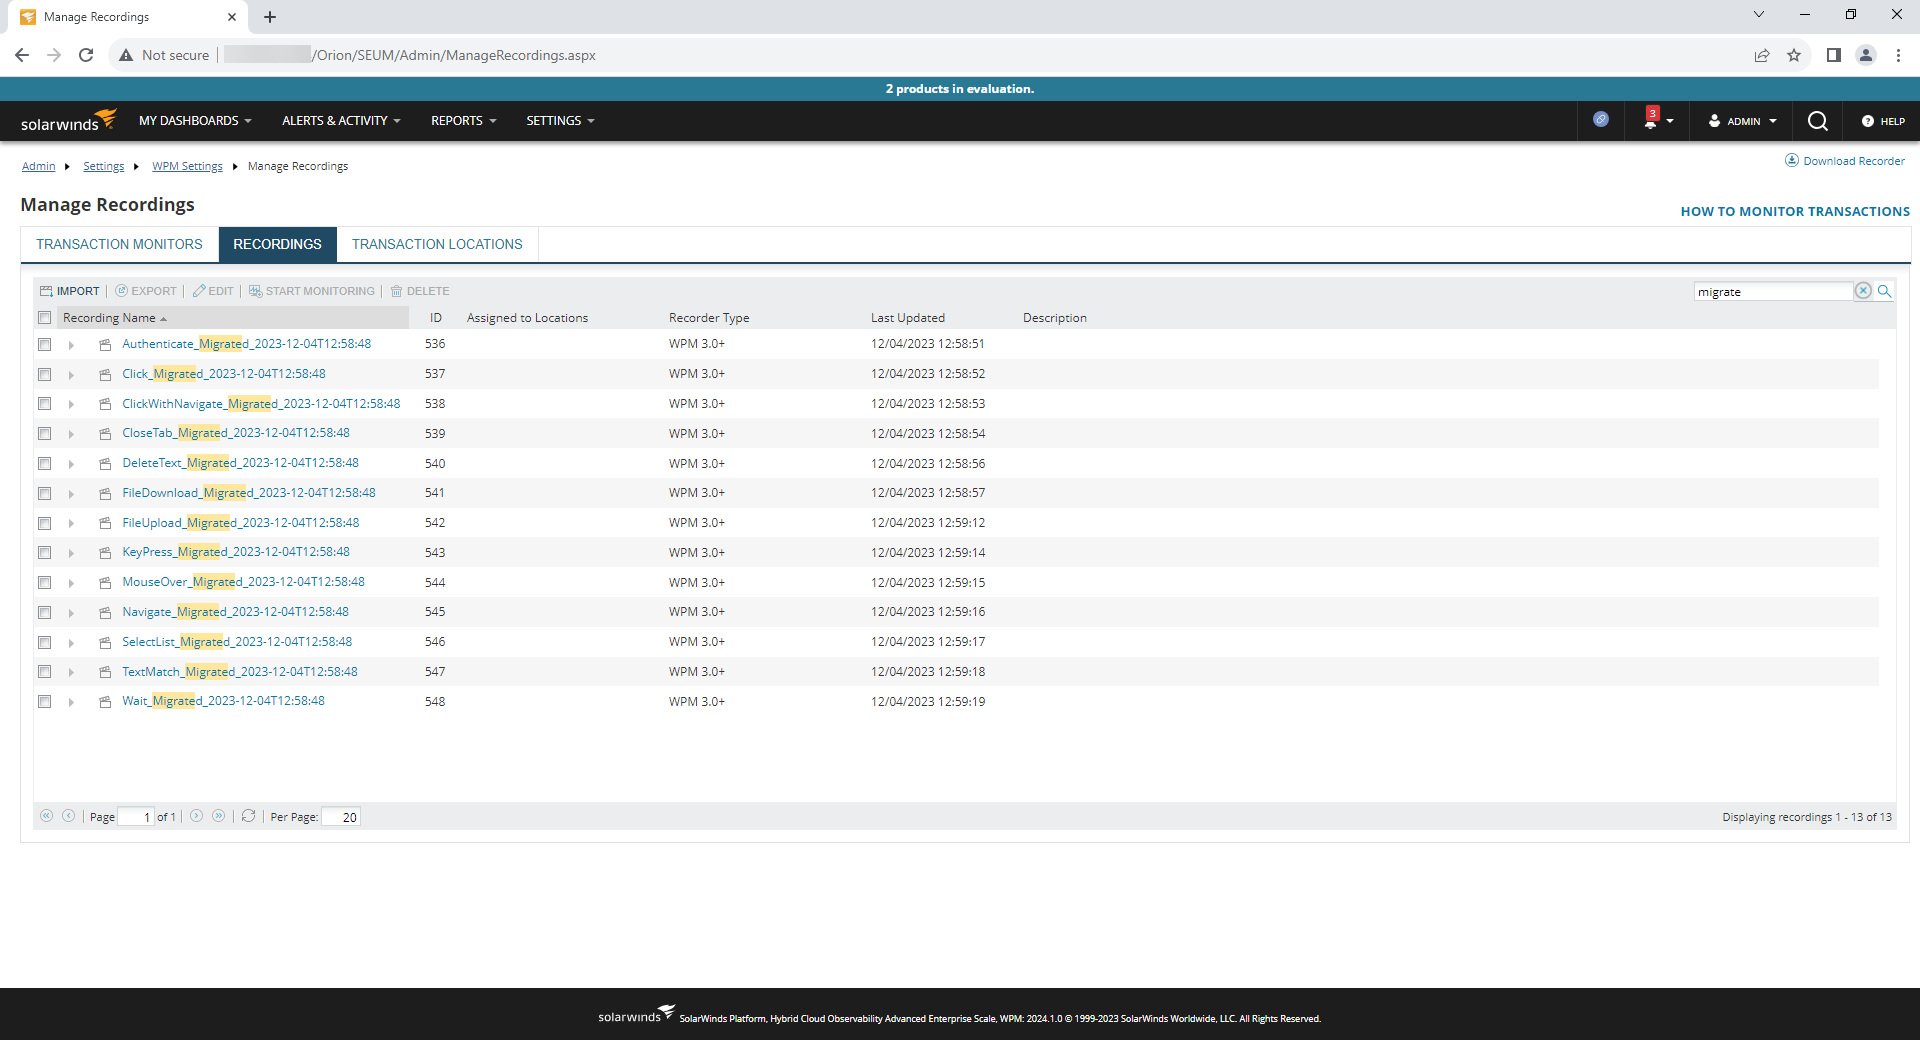
The newly created recordings resulting from the migration are shown in the SolarWinds Platform Web Console.
Options
When you run the RMT in an administrative command prompt with the -h option, the application presents available help that describes supported options.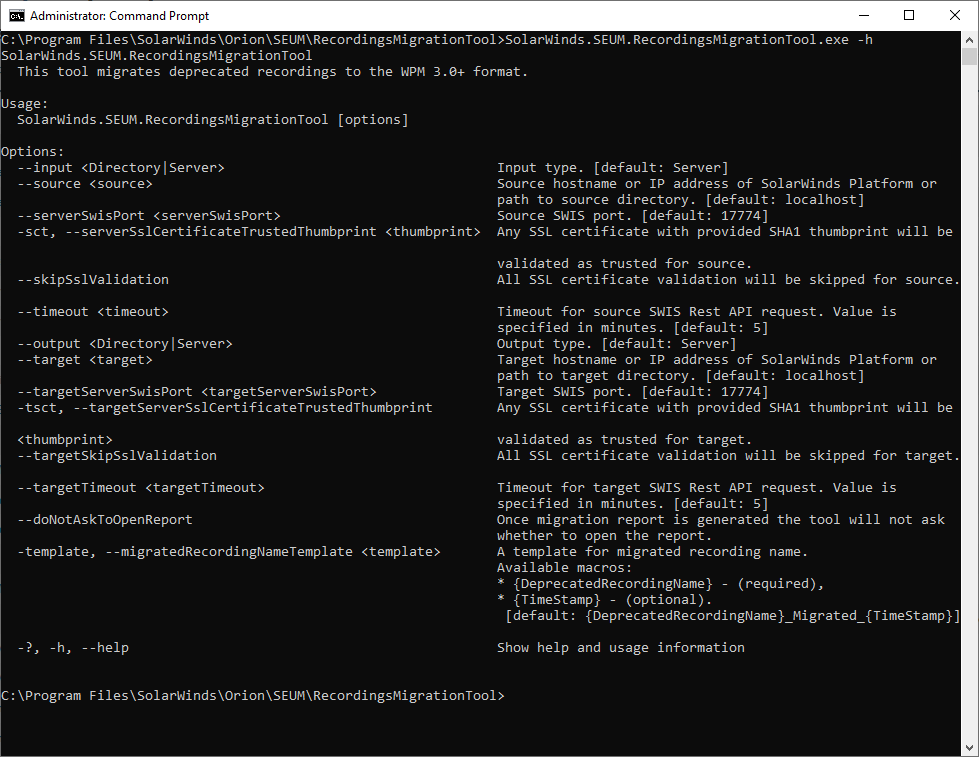
-
--input is an optional parameter that allows you to specify the input type, which can be either Server or Directory. The Server input type indicates that you choose to connect to the SolarWinds Platform server, specified with a --source parameter. If you specify this option, you are prompted for a username and password for SolarWinds Platform server. The Directory input type indicates that you choose to load deprecated recordings for migration from a directory specified with the --source parameter. If you specify this option, you are prompted for a password that is used to decrypt all deprecated recording files located in the source directory. The default value is Server.
Example usages:
SolarWinds.SEUM.RecordingsMigrationTool.exe --input Server --source <ip address>
SolarWinds.SEUM.RecordingsMigrationTool.exe --input Directory --source C:\TEMP\RMT_Input -
--source is an optional parameter that, depending on the --input parameter value, allows you to specify either:
-
The network name or IP address of the SolarWinds Platform server to which the tool should connect
— OR —
-
The directory from which deprecated recordings are to be imported for migration.
If the option is omitted, then the default value used is the localhost for --input Server and the current working directory of the RMT tool for the --input Directory.
Example usages:
SolarWinds.SEUM.RecordingsMigrationTool.exe --source <ip address>
SolarWinds.SEUM.RecordingsMigrationTool.exe --input Directory-
--serverSwisPort allows you to specify custom ports for source connection to use when connecting to the SWIS service. If it is omitted, then the default value of 17778 is used. The RMT connects to SWIS REST API to retrieve and store data (such as WPM recordings) on the SolarWinds Platform server.
Example usage:
SolarWinds.SEUM.RecordingsMigrationTool.exe --serverSwisPort 1234 -
-sct, --serverSslCertificateTrustedThumbprint allows you to specify the thumbprint of a server SSL certificate that should be trusted when communicating with the source SolarWinds Platform server. If it is omitted, then the RMT looks for a SolarWinds-Orion certificate in the OS certificate store. This option is useful when connecting to the source remote SolarWinds Platform server where the certificate is not available locally to the RMT. In such cases, you can provide a thumbprint of the remote SolarWinds Platform server to connect remotely and securely.
Example usage:
SolarWinds.SEUM.RecordingsMigrationTool.exe --source <ip address> -sct <thumbprint> -
--skipSslValidation allows you to skip SSL certificate validation for the source connection. If you have trouble passing the certificate validation by other means, you can skip the validation completely. Keep in mind that the identity of the source SolarWinds Platform server is not verified, so it could be subject to the Man in the Middle vulnerability.
Example usage:
SolarWinds.SEUM.RecordingsMigrationTool.exe --skipSslValidation -
--timeout allows you to specify the timeout for a SWIS Rest API request sent to the source SolarWinds Platform server. The value is specified in minutes. If it is omitted, then the RMT uses a default timeout of five minutes. This option is useful when your network is slow or when you have very large recordings to migrate and exporting or importing through SWIS might take a longer time.
Example usage:
SolarWinds.SEUM.RecordingsMigrationTool.exe --timeout 10
-
-
--output is an optional parameter that allows you to specify the output type, which can be either Server or Directory. The Server output type indicates that you choose to connect to the SolarWinds Platform server, specified with a --target parameter. If you specify this option, you are prompted for a username and password for SolarWinds Platform server. The Directory output type indicates that you choose to save migrated recordings into a directory specified with the --target parameter. If you specify this option, you are prompted for a password that is used to encrypt all migrated recording files to WPM3.0+ format in the target directory. The default value is Server.
Example usages:
SolarWinds.SEUM.RecordingsMigrationTool.exe --output Server --target <ip address>
SolarWinds.SEUM.RecordingsMigrationTool.exe --output Directory --target C:\TEMP\RMT_Output\ -
--target is an optional parameter that, depending on the --output parameter value, allows you to specify either:
-
The network name or IP address of the SolarWinds Platform server to which the tool should connect
— OR —
-
The directory to which migrated recordings are to be exported.
If the option is omitted, then the default value used is the localhost for --output Server and the current working directory of the RMT tool for the --output Directory. This option is useful when you:
-
Load deprecated recordings from one SolarWinds Platform instance and save migrated recordings to another SolarWinds Platform instance
— OR —
-
Perform a dry run to test the migration before you commit to save migrated recordings in the SolarWinds Platform server and therefore migrate into a directory.
Example usages:
SolarWinds.SEUM.RecordingsMigrationTool.exe --target <ip address>
SolarWinds.SEUM.RecordingsMigrationTool.exe --output Directory --target C:\TEMP\RMT_Output\-
--targetSwisPort allows you to specify custom ports for target connection to use when connecting to the SWIS service. If it is omitted, then the default value of 17778 is used.
Example usage:
SolarWinds.SEUM.RecordingsMigrationTool.exe --targetSwisPort 1234 -
-tsct, --targetSslCertificateTrustedThumbprint allows you to specify the thumbprint of a server SSL certificate that should be trusted when communicating with the target SolarWinds Platform server. If it is omitted, then the RMT looks for a SolarWinds-Orion certificate in the OS certificate store. This option is useful when connecting to the target remote SolarWinds Platform server where the certificate is not available locally to the RMT. In such cases, you can provide a thumbprint of the remote SolarWinds Platform server to connect remotely and securely.
Example usage:
SolarWinds.SEUM.RecordingsMigrationTool.exe --target <ip address> -tsct <thumbprint> -
--targetSkipSslValidation allows you to skip SSL certificate validation for the target connection. If you have trouble passing the certificate validation by other means, you can skip the validation completely. Keep in mind that the identity of the target SolarWinds Platform server is not verified, so it could be subject to the Man in the Middle vulnerability.
Example usage:
SolarWinds.SEUM.RecordingsMigrationTool.exe --target <ip address> --targetSkipSslValidation -
--targetTimeout allows you to specify the timeout for a SWIS Rest API request sent to the target SolarWinds Platform server. The value is specified in minutes. If it is omitted, then the RMT uses a default timeout of five minutes. This option is useful when your network is slow or when you have very large recordings to migrate and exporting or importing through SWIS might take a longer time.
Example usage:
SolarWinds.SEUM.RecordingsMigrationTool.exe --target <ipaddress> --targetTimeout 10
-
-
-template, --migratedRecordingNameTemplate allows you to specify the name template for the migrated recording. This enables you to control how the names of migrated recordings are constructed based on the name of the recording that is subject for migration. If it is omitted, then the RMT uses the default template: {DeprecatedRecordingName}_Migrated_{TimeStamp}
Example usage:
SolarWinds.SEUM.RecordingsMigrationTool.exe --migratedRecordingNameTemplate
MyCustomPrefix_{DeprecatedRecordingName}
The template supports the following macros:-
{DeprecatedRecordingName} expands to the name of the original recording that is subject for migration. This macro must be present in the template.
-
{TimeStamp} expands to the time stamp of the migration process. It allows you to easily guarantee the uniqueness of recordings names.
-
-
--doNotAskToOpenReport can be used to avoid having the RMT prompt you to open the report when the migration report is generated.
Example usage:
SolarWinds.SEUM.RecordingsMigrationTool.exe --doNotAskToOpenReport
Use the RMT Migration Report
When the migration is complete, the RMT generates the migration report file as an HTML document in the standard WPM logs location, C:\ProgramData\SolarWinds\Logs\SEUM. The application opens the report in the default browser (unless the user specifies otherwise). The exact path to the generated report file is presented in the command line output of the program.
The report consists of a basic summary that details how many recordings were subject to migration, how many recordings were migrated successfully, and how many recordings failed to migrate.
Below the summary of the report there is detailed information about migrated recordings grouped by migration status. The first group consists of failed recordings, and the second group consists of successful recordings.
If errors occurred or other potential issues were identified during the migration of a recording, this information is included in the details section as an error or warning, along with any relevant messages and information on where in recording steps and actions they occurred.
The recording failed due to an error related to the third action in the third step, which is File Upload.

The recording was migrated successfully; however, a warning was reported, so it may require further manual actions.

The recording was migrated successfully with no warnings.
Investigate RMT Diagnostics
The RMT creates a log file (RecordingsMigrationTool.log) for each run in the standard WPM logs location, C:\ProgramData\SolarWinds\Logs\SEUM. If any errors reported by the RMT in the command line are unclear, you can refer to the log file, as it may include additional details that can help identify and resolve the issue.
You can adjust the log level using Log Adjuster.
SolarWinds Diagnostics tool supports capturing RMT log files.
Learn more about using the RMT through examples
The following are a few example scenarios to illustrate how the RMT can be used:
To connect the RMT to a remote SolarWinds Platform server:
-
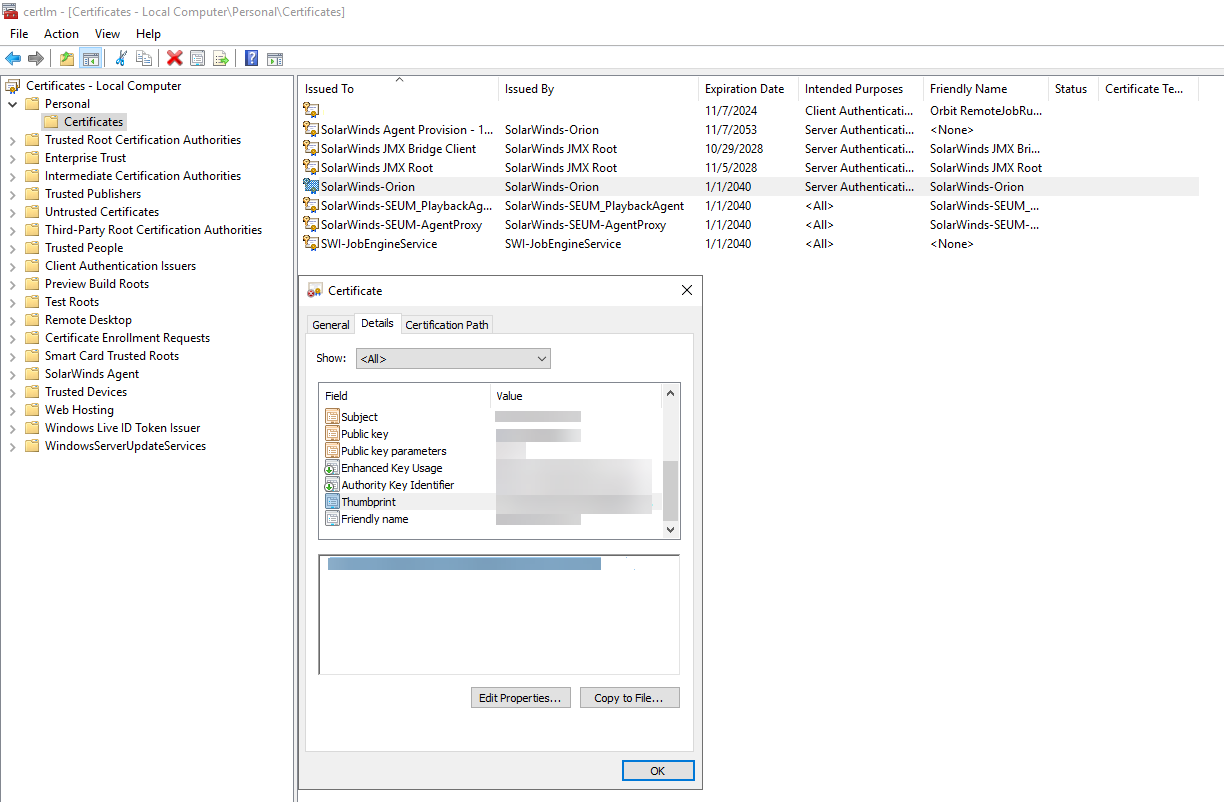
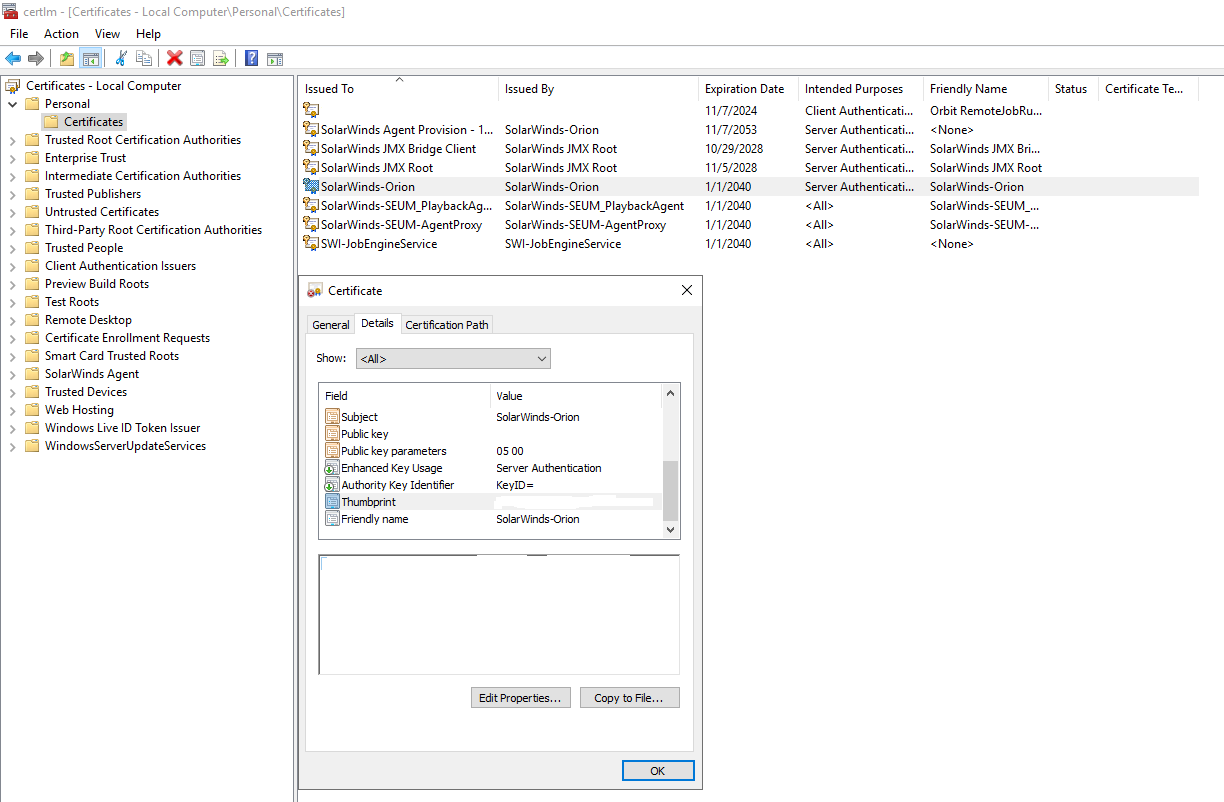
Retrieve the thumbprint of the SSL/TLS certificate configured on the remote SolarWinds Platform server. You may use Microsoft Management Console to do so, as shown below:
-
Open the command prompt as an administrator.
-
In the command prompt, navigate to the installation directory of the RMT.
-
Run the RMT from the command prompt with the IP or hostname of the remote server as an option for the source and target, and the -sct option with the specified thumbprint. In this example, the remote server's IP is <ip address>, and the trusted certificate thumbprint is <thumbprint>, so the RMT is run as follows:
SolarWinds.SEUM.RecordingsMigrationTool.exe --source <ip address> -sct <thumbprint> --target <ip address>
Note: The source and target options are the same, so there is no need to provide a-tsct option; it is inherited from the source.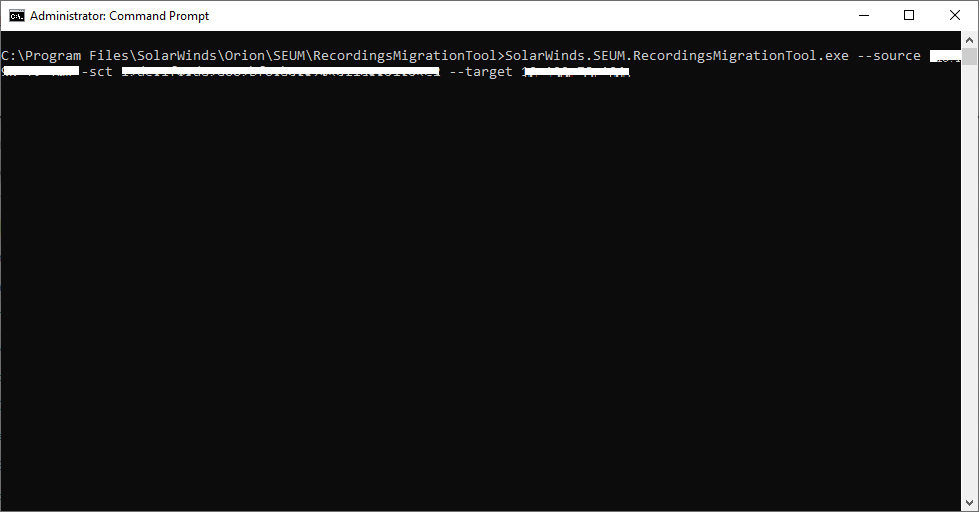
-
Enter the credentials for the SolarWinds Platform account that has WPM administrative privileges.
Note: The source and target options are the same, so there is no need to provide credentials to the target server. -
When the migration starts, you can see that the server to which RMT is connected presented a valid certificate that matched the thumbprint and was therefore accepted.

-
When the migration is complete, you can view the migrated recordings in the Web Console of the remote SolarWinds Platform server.
To connect the RMT to the remote SolarWinds Platform server and save migrated recordings to a local SolarWinds Platform server:
-
Retrieve the thumbprint of the SSL/TLS certificate that was configured on the remote SolarWinds Platform server. You may use Microsoft Manager Console to do so.
-
Open the Command Prompt as an Administrator.
-
In the Command Prompt, navigate to the installation directory of the RMT.
-
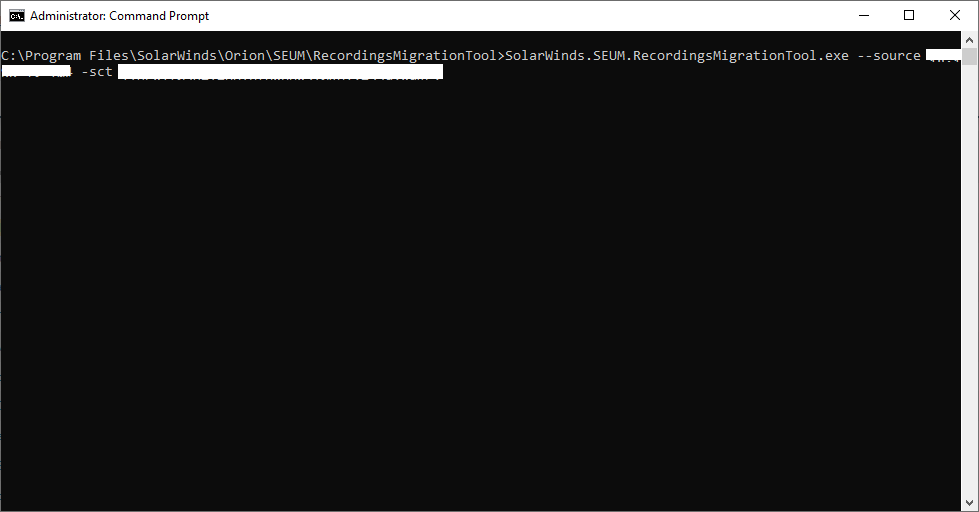
Run the RMT from the Command Prompt with the --source option with the IP or hostname of the remote server specified and the -sct option with the thumbprint specified. In this example, the remote server IP address is <ip address>, and the trusted certificate thumbprint is <thumbprint>, so the RMT is run as follows:
SolarWinds.SEUM.RecordingsMigrationTool.exe --source <ip address> -sct <thumbprint>
Note: The --target is not specified. Therefore, the target remains localhost.
-
Enter credentials for a remote SolarWinds Platform account that has WPM administrative privileges.
-
Enter credentials for a local SolarWinds Platform account that has WPM administrative privileges.
-
After migration starts, you can see that the server to which the RMT connected presented a valid certificate that matched the thumbprint and was therefore accepted.

-
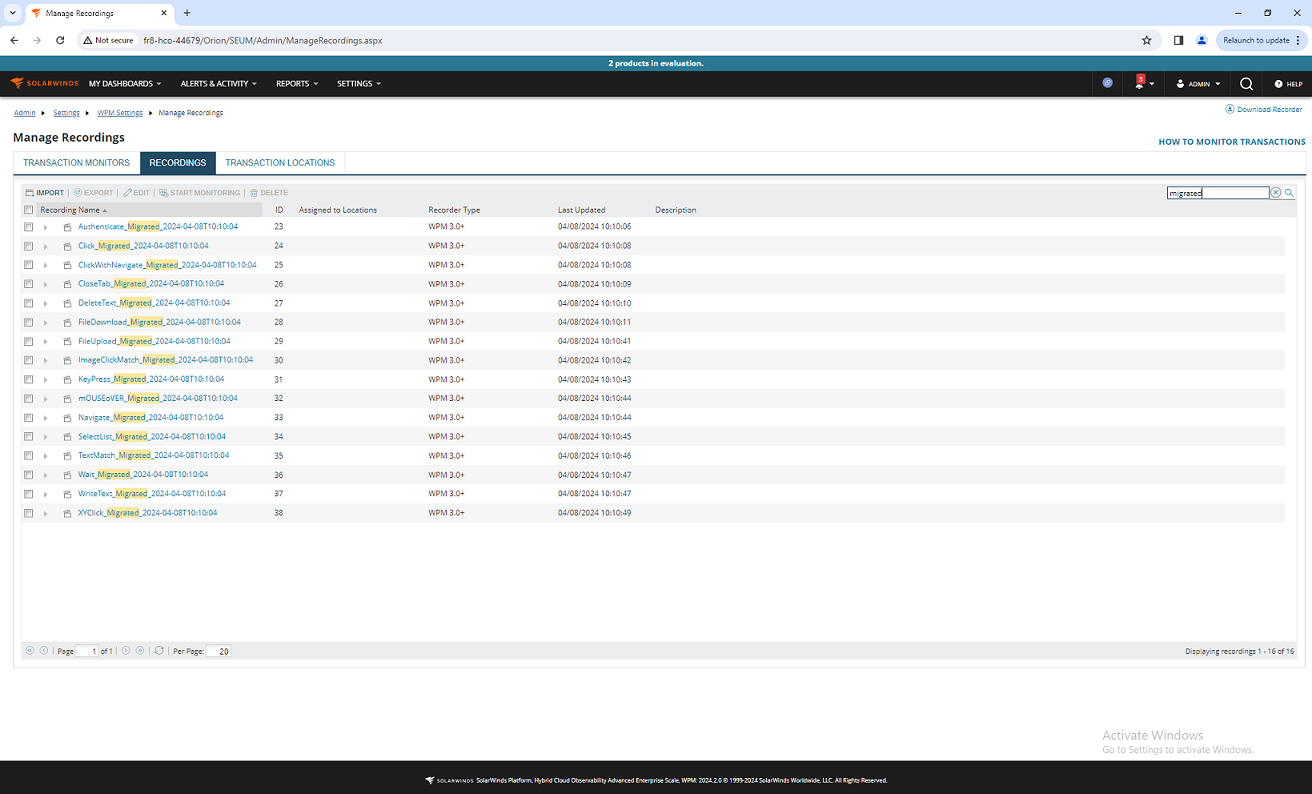
After the migration is completed, you can see migrated recordings present in the Web Console of the local SolarWinds Platform server.
To configure the RMT to migrate recordings into a directory (dry run scenario):
-
Open the command prompt as an administrator.
-
In the command prompt, navigate to the installation directory of the RMT.
-
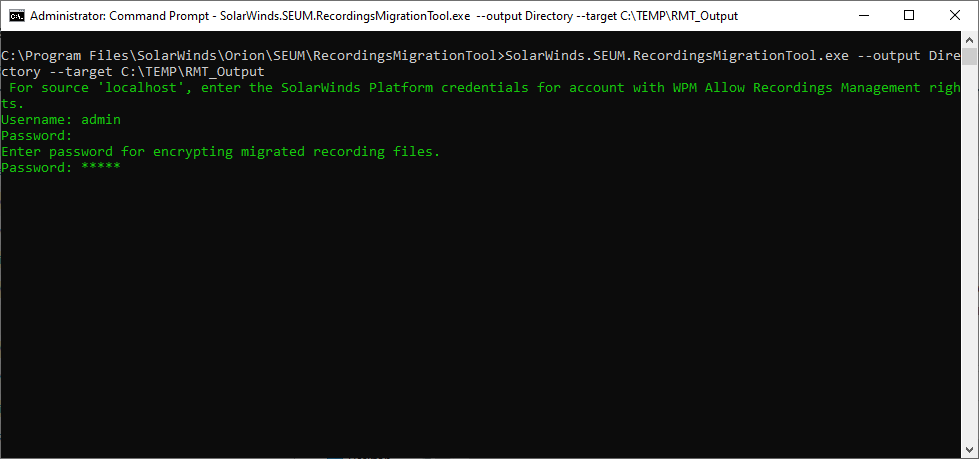
Run the RMT from the command prompt with the --output Directory option and the target directory specified. In this example, the target directory is C:\TEMP\RMT_Output, so the RMT is run as follows:
SolarWinds.SEUM.RecordingsMigrationTool.exe --output Directory --target C:\TEMP\RMT_Output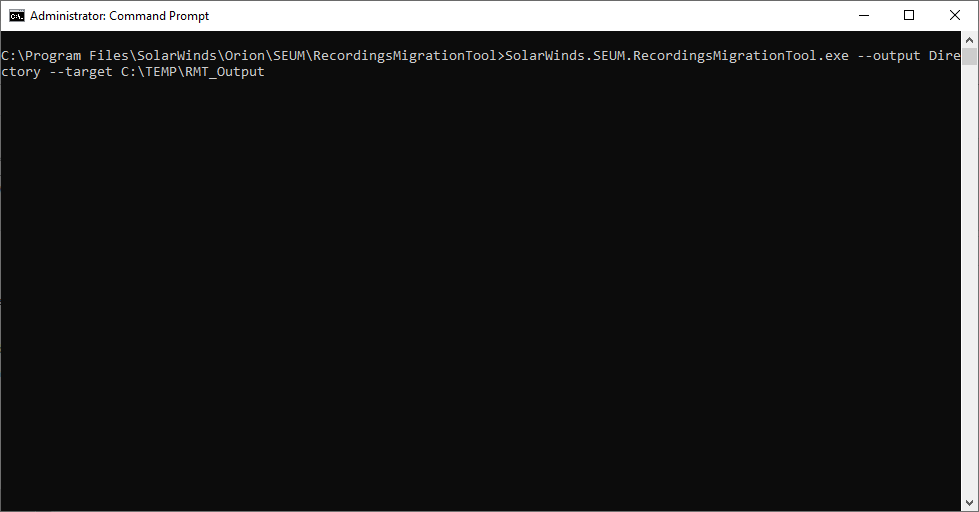
-
Enter the credentials for the source SolarWinds Platform account that has WPM administrative privileges.
-
When prompted, enter a password to encrypt the recording files saved in the target directory.
-
When the migration is complete, view the migrated recordings saved in the target directory. File names are derived from names of recordings.


