Add transaction locations in WPM
Use the Manage Transaction Locations page to add transaction locations on remote systems where you want a recorded transaction to play back repeatedly, at scheduled intervals. You can also use the SolarWinds Platform server and Additional Polling Engines as transaction locations.
After adding a location, you can assign a WPM recording to it to create a transaction monitor.
![]()
As you add a transaction location, you are prompted to select one of the following options:
- Install location on my network. Use this option if the remote system does not yet host any WPM transactions and you want to deploy the WPM Player service to the remote system.
- Add an existing location. Select this option if a remote system already hosts the WPM Player service (for example, if it already hosts a WPM transaction location).
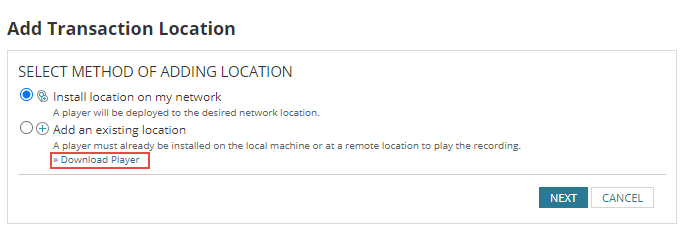
To update a WPM Player that's already installed on a remote system, click Download Player.
To add a transaction location to a remote system that does not yet host any transaction locations:
- Click Settings >All Settings > WPM Settings > Manage Player Locations.
- On the Manage Transaction Locations page, switch to the Transaction Locations tab and click Add Location.
- Select "Install location on my network" and click Next.
- Perform one of the following actions, and then click Next:
- Enter the IP Address or Hostname of the location, and then click Add to List; or
- Select one or more locations from the list of existing nodes.
- To configure Player Settings, you can either:
- Select "Use default settings" and enter a Player Name if you do not want it to be the same as the Location Name or,
- Select "Use advanced settings" and enter a Player Name, Player Port number, and Player Password, as required.
- Click Next.
- On the Location Credentials tab:
- Select the location you're adding, and then click Assign Credentials.
- Provide credentials, and then click Test to verify them.
- Click Submit to save your changes.
- Click Deploy Player.
The location is added to the list of locations. - Select the location and click Next to assign an existing recording to the location. For details, see Create WPM transaction monitors based on recordings.
To add a transaction location to a remote system that already hosts the WPM Player service:
- Click Add Location on the Manage Transaction Locations page.
- Select Add an existing location and click Next.
- Enter a name for the player.
- To use server-initiated communication, where the WPM Player service is passive and waits for requests from the SolarWinds Platform server on a specified port:
- Select "Server initiated communication" and enter an IP Address or hostname.
- (Optional) Click Advanced to add a Player Password, change the Player port (the default is 17781), and/or use a proxy.
- To use player-initiated communication, where the WPM actively initiates communication with the SolarWinds Platform server on port 17782:
- Select "Player initiated communication," and select the Player from the drop-down menu.
- Click Advanced to assign the player to a polling engine.
Firewall/NAT configuration is simplified because the player actively connects to the polling server using a HTTP(S) protocol. MSPs and larger distributed deployments may prefer this option.
- Click Submit.
The location is added to the list of locations, where you can select it and click Next to access the After you assign a recording to a location, define the properties for the transaction monitor. tab on the Add Transaction page.