- Release Notes
- Install or Upgrade
- Dameware Install or Upgrade Guides
- Upgrade Dameware
- Dameware Remote Support Centralized and Mini Remote Control Centralized overview
- Dameware 12.3 centralized installation system requirements
- Dameware centralized installation port requirements
- Install Dameware Remote Support centralized
- Install Dameware Mini Remote Control centralized
- Install Dameware Remote Support or Mini Remote Control from the command line
- Install the Dameware client agent service on Windows computers
- Dameware centralized licensing and activation
- Troubleshoot a centralized Dameware installation
- Configure the Internet Proxy for Dameware
- Dameware Stand-alone Installation Guide overview
- Dameware 12.3 stand-alone installation system requirements
- Dameware stand-alone installation port requirements
- Install Dameware Remote Support or Mini Remote Control in stand-alone mode
- Install Dameware Remote Support or Mini Remote Control in evaluation mode
- Install the Dameware client agent service on Windows computers
- Dameware stand-alone licensing and activation
- Common Dameware installation error messages
- Get Started
- Dameware Getting Started Guides
- Dameware Centralized Getting Started Guide
- Dameware Stand-alone Getting Started Guide
- Dameware Getting Started - Additional Resources
- Administer
- Dameware Administrator Guide
- Dameware Administrator Guide overview
- Dameware architecture overview
- Log into the Dameware Administration Console
- Change language in the Dameware interface
- Administer Dameware users, security, and components
- Manage Dameware user accounts
- Manage Dameware security
- About security and encryption in Dameware Mini Remote Control
- Configure encryption levels on the Dameware client agent
- Modify Dameware client agent permissions to enable or prevent non-administrator access
- Enable remote logging in Dameware
- Bind a self-signed certificate to prevent warnings during installation of the Dameware client agent
- About Smart Card requirements for Dameware
- Manage Dameware components
- Create and maintain a list of internal hosts in the Dameware console
- About Dameware Global Host Lists
- Create a Global Host List in Dameware
- Import hosts to the Global Host List in Dameware
- Back up Dameware Remote Support settings and hosts on first launch after upgrade to version 12.2.4 or later
- Back up Dameware Mini Remote Control settings and hosts during upgrade to version 12.2.2 or later
- Manage the Saved Host List and Personal Host List in Dameware
- Connect to remote hosts in Dameware
- Manage Internet Sessions in the Dameware Console
- Use command line to run Dameware Mini Remote Control
- Integrate Dameware Mini Remote Control with Solarwinds Web Help Desk
- Collect diagnostics from Dameware
Connect to a computer using Dameware Remote Support
This topic applies to Remote Support.
Before you connect to a computer internal to your network, ensure that you know the location of the computer within your network.
- Launch the Dameware Remote Support application.
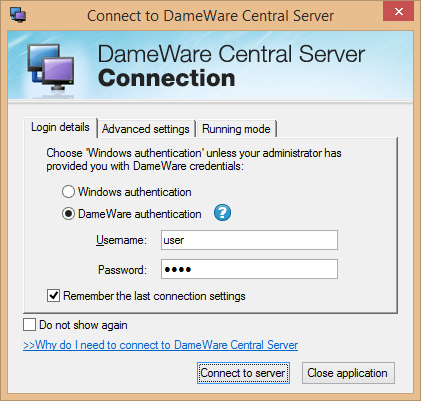
- Click Connect to Server.
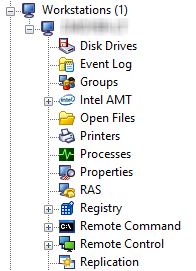
- Browse the subnets until you locate the computer you want to support.
- Click the plus sign (+) next to the computer you want to support.
You are now ready to Modify end user machines using Dameware Remote Support.