- Release Notes
- Install or Upgrade
- Dameware Install or Upgrade Guides
- Upgrade Dameware
- Dameware Remote Support Centralized and Mini Remote Control Centralized overview
- Dameware 12.3 centralized installation system requirements
- Dameware centralized installation port requirements
- Install Dameware Remote Support centralized
- Install Dameware Mini Remote Control centralized
- Install Dameware Remote Support or Mini Remote Control from the command line
- Install the Dameware client agent service on Windows computers
- Dameware centralized licensing and activation
- Troubleshoot a centralized Dameware installation
- Configure the Internet Proxy for Dameware
- Dameware Stand-alone Installation Guide overview
- Dameware 12.3 stand-alone installation system requirements
- Dameware stand-alone installation port requirements
- Install Dameware Remote Support or Mini Remote Control in stand-alone mode
- Install Dameware Remote Support or Mini Remote Control in evaluation mode
- Install the Dameware client agent service on Windows computers
- Dameware stand-alone licensing and activation
- Common Dameware installation error messages
- Get Started
- Dameware Getting Started Guides
- Dameware Centralized Getting Started Guide
- Dameware Stand-alone Getting Started Guide
- Dameware Getting Started - Additional Resources
- Administer
- Dameware Administrator Guide
- Dameware Administrator Guide overview
- Dameware architecture overview
- Log into the Dameware Administration Console
- Change language in the Dameware interface
- Administer Dameware users, security, and components
- Manage Dameware user accounts
- Manage Dameware security
- About security and encryption in Dameware Mini Remote Control
- Configure encryption levels on the Dameware client agent
- Modify Dameware client agent permissions to enable or prevent non-administrator access
- Enable remote logging in Dameware
- Bind a self-signed certificate to prevent warnings during installation of the Dameware client agent
- About Smart Card requirements for Dameware
- Manage Dameware components
- Create and maintain a list of internal hosts in the Dameware console
- About Dameware Global Host Lists
- Create a Global Host List in Dameware
- Import hosts to the Global Host List in Dameware
- Back up Dameware Remote Support settings and hosts on first launch after upgrade to version 12.2.4 or later
- Back up Dameware Mini Remote Control settings and hosts during upgrade to version 12.2.2 or later
- Manage the Saved Host List and Personal Host List in Dameware
- Connect to remote hosts in Dameware
- Manage Internet Sessions in the Dameware Console
- Use command line to run Dameware Mini Remote Control
- Integrate Dameware Mini Remote Control with Solarwinds Web Help Desk
- Collect diagnostics from Dameware
Manually add a user to Dameware
This topic applies to both Remote Support and Mini Remote Control.
Technicians who use either Dameware Remote Support or Dameware Mini Remote Control to support end users must be created as users in the Dameware Administration Console. Manually add users if you have a small number of Dameware users. If you have a large number of Dameware users, then you can import them from Active Directory, or import them from a file. If you have a large number of Dameware users, then you can import them from Active Directory or a CSV file.
- Log in to the Administration Console as an administrator.
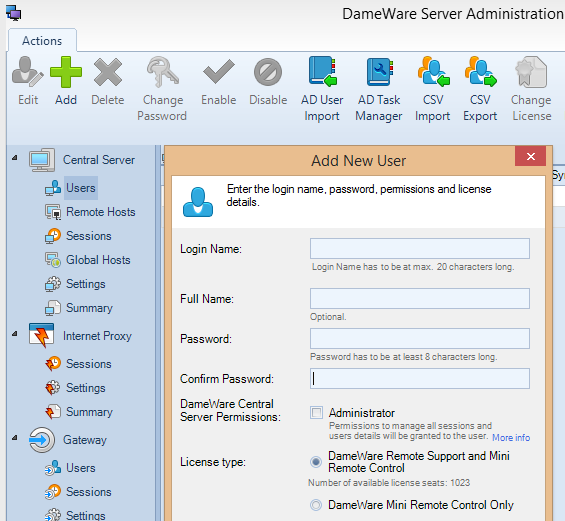
- Under Central Server, click Users.
- On the Actions toolbar, click Add.
- Complete the fields in the Add New User dialog box, and click Add New User.
The user is displayed in the list of users.