Integrate IPAM with VMware vRealize Automation
See Integrate SolarWinds IPAM with VMware vRealize Orchestrator for information on importing the IPAM package into Orchestrator.
vRealize Automation integration
IPAM Endpoint type
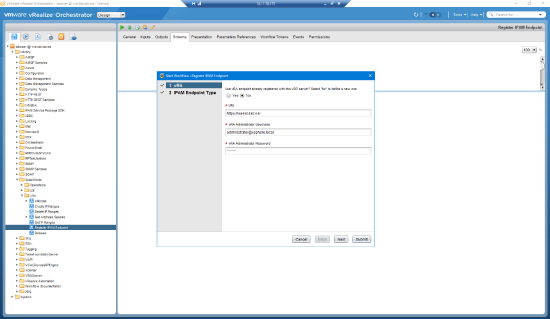
- Open Design > Workflows > Library > SolarWinds > vRAM, and run Register IPAM Endpoint.
- Enter the vRA URL, and administrator credentials, and then click Next and Submit.
The Endpoint type is registered as shown below.
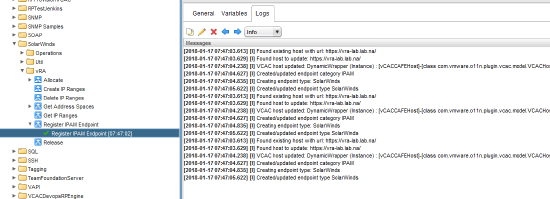
Register IPAM endpoint
- Log in into vRA.
- Go to Infrastructure > Endpoints > Endpoints.
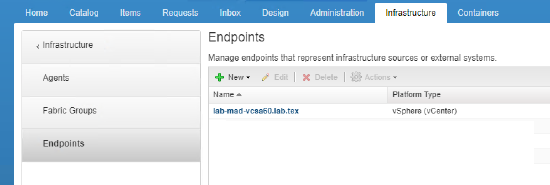
- Click New > IPAM > SolarWinds.
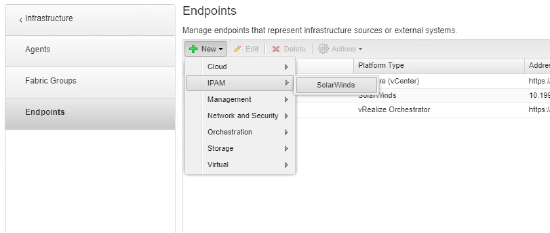
- Enter name, IP address (or hostname of installed IPAM), and SolarWinds credentials.

- The following properties can be defined for endpoint connection on the Properties tab.
Property
Default value
connectionTimeout 30 operationTimeout 60 proxyHost proxyPort 0
- Click OK.
Network profiles and reservations
- Go to Infrastructure > Reservations > Network Profiles, and then New > External to create anew network profile.

- Define Name, and select SolarWinds in the IPAM endpoint combo box.
- Open Network Ranges tab, and select Address Space,

- Click Add, and click the search button to display available the subnets in IPAM group.
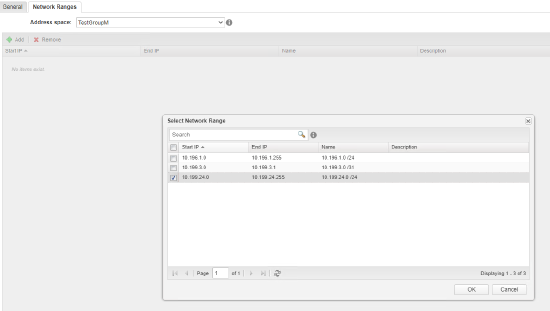
- Select the subnets,click OK, and click OK again to save the profile.
- Go to Reservations, edit existing one and assign just created Network Profile for Network Adapter on Network tab.
Blueprint
- Open Design > Blueprints and New.
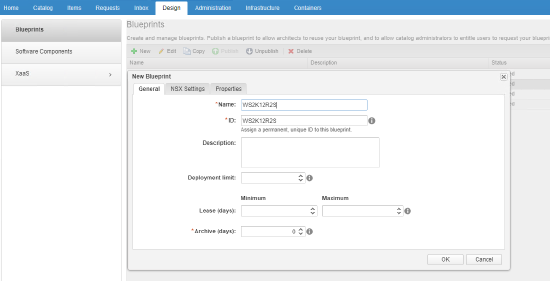
- Define Nameand the other.parameters, and click OK.
- Add vSphere (vCenter) Machine and Existing Network components to Canvas.
- Click Network component, and select Network Profile

- Click on the added machine component and:
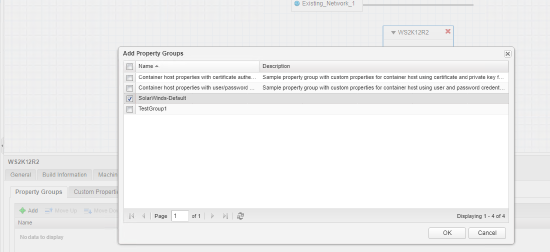
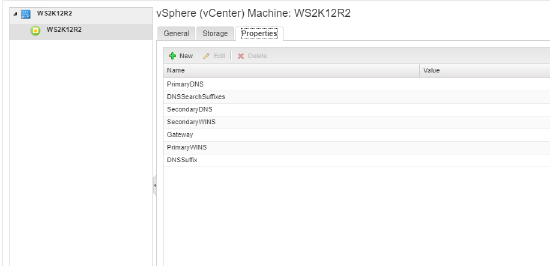
- On the Properties tab, add SolarWinds-Default properties.
- On the Network tab, add network and select used profile,

- On the Properties tab, add SolarWinds-Default properties.
- Click Save.
Publish the blueprint
- Open Administration - Catalog Management - Services and click New.

- Enter details and click OK.
- Open Administration - Catalog Management - Entitlements and click New.
- Define name.
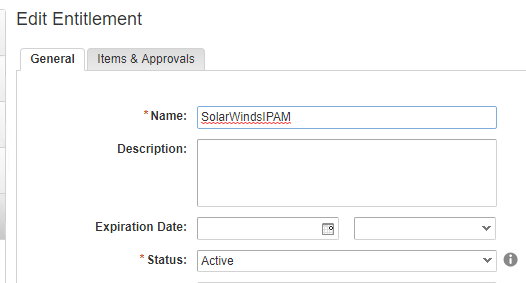
- On the next tab add Services, and the blueprintyou created.
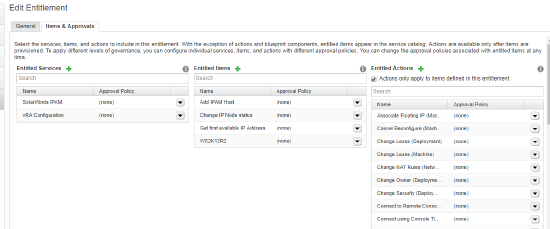
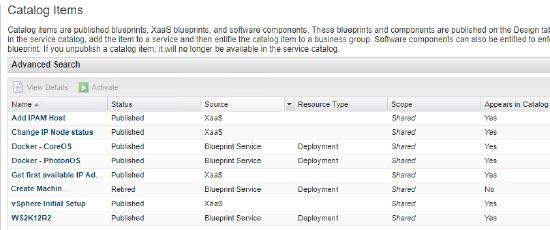
- In the Catalog Items grid, select the blueprint you created, and activate it.
New machine
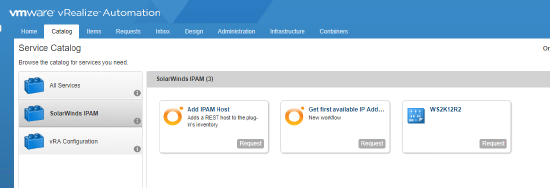
- Click Catalog > SolarWinds IPAM, and then click Request on WS2K12R2 (the blueprint just created).
- Select the machine to create.

- Define DNS properties if needed.
- Click Submit. The VM will appear in the Items grid.
