Import IP addresses from a spreadsheet
Manually import IP4 and IP6 groups, supernets, and IPv6 global prefixes, including subnet tree hierarchy, from a spreadsheet to an existing subnet.
- Imported data maintains user delegation permissions.
- The import may overwrite existing subnets of the same address spaces.
- Only .csv, .xls, and .xlsx file can be imported.
- If your .xls or .xlsx file has multiple worksheets, the header rows must be identical in each worksheet.
The following example imports an .xls file to the EAST0100: NOC node.
- Click My Dashboards > IP Addresses > Manage Subnets & IP Addresses.
- Select the subnet into which you want to import the addresses.
- Click Import > Import from file.

- On the Preparing to import a spreadsheet page, click Next.
To prevent import errors, SolarWinds strongly recommends you first download the example spreadsheet for adding IP Addresses and ensure your file columns match the example columns.
- Click Browse to select a file, ensure IP Addresses is selected, and click Next.

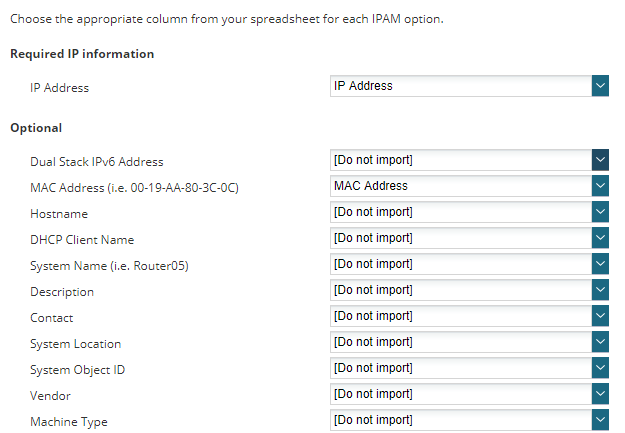
- The IP Address column matching page is displayed.
IPAM detects the columns in your spreadsheet and tries to match the spreadsheet columns to the IPAM fields. This example only imports IP addresses and MAC addresses.

- Click Next.
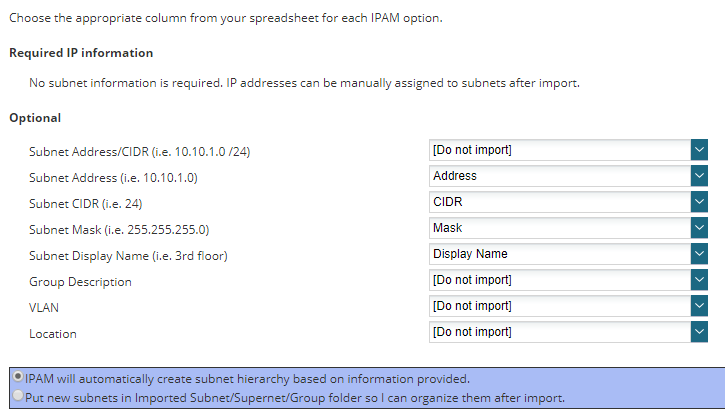
- On the Subnet Column matching page, select optional Subnet columns to import, and select an option to tell IPAM how to handle the imported content.
In this example, IPAM will import the Address, CIDR, Mask and Display names, and create subnet hierarchy based on the information provided.

- The information is now validated and any problems displayed.
If there are problems, the columns or portions are displayed in red. If you need help in determining the problem, export the results to spreadsheet to check. Adjust as needed and re-import.
If errors involve IP addresses and CIDRs, you can use a subnet calculator such as that provided by MXToolBox (© 2018 MXToolBox, Inc, available at mxtoolbox.com, obtained on 7/24/18) to verify addresses and CIDRs.
- If your spreadsheet has additional columns that you want to add to IPAM, you can add these as custom properties. Click Add Custom Property to add a property.
Select the field type and click Save.
In IPAM 4.7 and earlier, custom properties were referred to as custom fields. For more information, see Creating and configuring custom fields.
- Click Next.

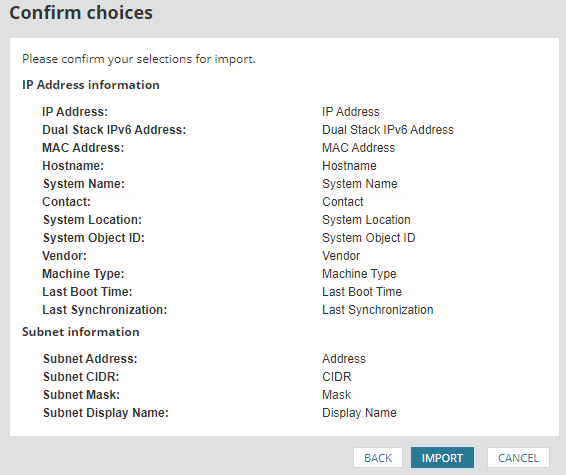
- Confirm the fields to import, and click Import.
- Go to the Manage Subnets and IP Addresses page to see the result of this import.
- Review the Import Summary and click Done.
