Monitor traffic to and from a port mirror, SPAN, or network tap
This topic applies only to the following products:
SolarWinds Observability Self-Hosted
NAM — NPM
Network sensors monitor all packets that flow through the switch and categorize the packets by application.
After you deploy a network sensor to the port mirror, SPAN, or network tap, the sensor monitors packets to and from the node, identifies the application or the URL, and analyzes the packets for QoE metrics, such as response time or traffic volume.
Before you begin
- Data from sensors is directed to the polling engine assigned to the node when the sensor was deployed.
- A high number of applications or nodes can cause performance issues with the sensors.
The network sensor must be installed on a Windows computer that is monitoring the switch's SPAN or mirror port.
Install the network sensor
- Click Settings > All Settings in the menu bar.
- Click QoE Settings > Manage QoE Packet Analysis Sensors > Add Packet Analysis Sensor.

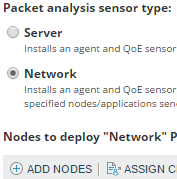
- Select Network, and click Add Nodes.

- Move the node that monitors your switch to the Selected Nodes panel, and click Add Selected Nodes.
Make sure you select the Windows machine that is monitoring the SPAN or mirror port of the switch.
- Assign and test the credentials for the node, and click Submit.
- Click Add Nodes and Deploy Agents.
When the sensors are successfully deployed, a message is displayed in Notifications.
Deploying the sensor and receiving the first set of data can take several minutes. When the deployment is finished, select the sensor on the Manage Quality of Experience (QoE) Packet Analysis Sensors page, click Edit Sensor, and verify the selected NIC.
Monitor website traffic based on domains
After you deploy a network sensor, you can filter application traffic based on domain names instead of all http traffic.
- Click Settings > All Settings in the menu bar.
- Click QoE Settings > Manage Global QoE Settings.
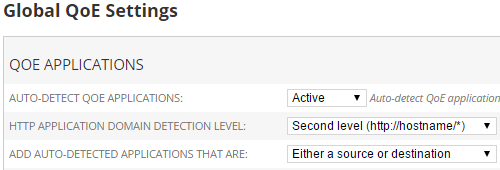
- Set the HTTP application domain detection level.

- Set the Auto-detect QoE applications option to Active, and click Submit.
QoE can automatically detect the first 50 applications, or you can add specific applications.
Discovered applications have the "No Risk" Risk Level and the "Both Business and Social" Productivity Rating associated with them. To modify the Risk Level and Productivity Rating, click QoE Settings > Manage (QoE) Applications, and edit the application.
Use the Global QoE Settings page to disable monitoring or discovery of multiple applications. Select the applications, and click Disable Monitoring or Disable Discovery.
Nodes are automatically detected and added by default. To specify which nodes and applications to monitor manually, see Monitor QoE applications and nodes.
