Form logic
On this page
Introduction
In Service Desk, form logic enables you to control when fields are displayed, hidden, required, or optional according to conditions based on other fields located on the same form. The form logic feature provides an efficient way to collect and validate context dependent inputs when users enter data into forms.
For example, as an incident goes through the incident lifecycle, different fields are required at different steps in the process. With form logic, you can have certain fields display when the incident goes into certain states. You can also lock previously displayed fields to retain information. This lets you make sure you are collecting and storing the information so it's available when you need it.
Form logic is available for:
Form logic is not currently supported for:
- Computers
- Other Assets
- Mobile Devices
- Contracts
- Users
- Purchase Orders
- Groups
Examples for using form logic include:
-
Require entry of the phone model during incident submission. For example, if an issue were found in one of your company's phone models, you might want to require users to submit the phone model in order to handle issues more effectively.
-
Require an agent to provide an email address, based on a specific type of service request, so you can verify the address is valid.
-
Require a reason when an incident status is updated to Awaiting customer input.
-
Display a specific form, for example one named Incident Form - Network, when the incident category is Network, otherwise show Incident Form - Generic.
Navigation
You can access form logic when you are editing a custom form or a service catalog item that has a field added in a custom form. If no field exists in the form, you must add one first.
- Custom forms navigation: Setup > Service Desk > Custom Forms.
- Service catalog items navigation: Service Desk > Service Catalog.
Set up form logic
You can access form logic when you are editing a custom form or a service catalog item.
-
From either the custom form or the service catalog, navigate to the custom form field. (See Navigation.)
If no field exists, you must add one before proceeding. -
From the custom form field, click Add Logic.
If logic has already been established, the icon displays as View Logic.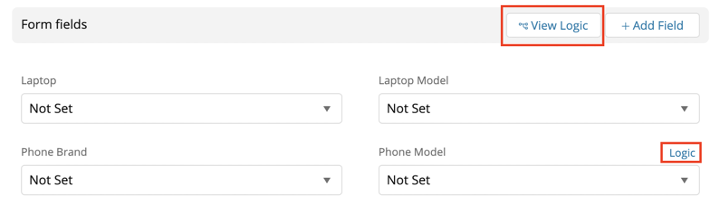
-
Define the relevant conditions. You can use conditions to dictate when certain actions need to take place. To add a condition:
-
In the Form Logic window, click Add
 .
. -
Select Condition Set.

-
In the New Condition Set dialog, provide a name. This name is only visible in form logic for administration purposes. You can see all fields available in the system because the condition can look at fields outside of the current form.
-
From the Field dropdown menu, select the field that you want the condition set to look at. All available fields display in the dropdown because the condition can look at fields outside of your form.
-
From the Operator dropdown menu, select the appropriate operator for your form logic:
- equals
- not equals
- contains
- starts with
- ends with
- is empty
- is not empty
-
In the Value field, enter the value you want the condition set to look for.
-
Click Add Condition Set.

-
-
Define the relevant Actions. With or without condition sets you can set actions to run on fields in the form. To add a new action:
-
In the Form Logic window, click Add
. -
Click Action.

-
In the New Action dialog, provide a name for the action. This name is only visible in the form logic for administration purposes.
-
From the Action dropdown menu, select the action you want Service Desk to perform. The following options are available:
-
Show Field. Shows a previously hidden field.
-
Hide Field. Hides a field that is currently visible.
All fields are visible by default. -
Enable Field. Makes a previously disabled field editable again.
-
Disable Field. Makes an enabled field non-editable. This is best used when you want to lock an input at a certain stage of the process.
-
Required Field. Makes a field required.
-
Not required field. Makes a previously required field not required.
-
-
In Field, select the field one or more fields you want the action to be performed on.
Service Desk displays only fields that are on the current form. -
Click Add Action
 .
.

-