Configure the business zones and calendar settings
The Time & Place settings allow you to set up business zones for your primary and remote call center locations. You can also configure the calendar settings to format the ticket due dates and work time events that display in the calendar for each client ticket.
About business zones
Business zones describe the time zone, country, business hours, and other related information for your primary and remote call center locations. You can set up business zones that apply to cities or countries where your techs assist clients.
The Business Zone tab defines the default location and time zone for your primary help desk location. This ensures that all dates stored in the database and downloaded in your calendar subscriptions include times and dates based on your selected time zone.
When you set up Web Help Desk for the first time, the Business Zone tab includes a default business zone. Set the default business zone so it applies to your primary business location and time zone. If you have techs in help desk operation centers located in multiple cities or countries, you can add additional business zones for these locations.
The following example displays multiple business zones with locations that span several countries. Each zone includes an identifying name and time zone. In this example, America/Atlanta is set as the default zone.

Set the default business zone
- Click Setup > General > Time and Place.
-
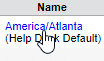
In the Name column, click the Help Desk Default business zone.
-
In the Business Zones tab, delete the existing name and enter a name for your primary business zone.

-
Select the time zone where your Web Help Desk server is installed.

This setting ensures that all dates stored in the database and downloaded in your calendar subscriptions include times and dates based on your selected time zone.
To use the host server time zone, accept the system default time zone. To assign another time zone, click the drop-down menu and select a time zone. See the Greenwich Mean Time (GMT) website for assistance with selecting a time zone format.
-
Select the country where your Web Help Desk server is installed.

This setting formats the currency, numbers, percentages, dates, and times that display in Web Help Desk for your default location. The number formats provide an example based on your selected country.
 You can configure a custom date and time formats in the upcoming steps.
 -
Select the number of digits to use in the fraction part of currency or accept the default selection.

-
Select a date format or accept the default chosen automatically based on your Country selection.

The following table lists the supported date format characters.
Character Description MThe month in a calendar year. dThe target day of the month.
To include a leading zero, use two characters. For example, if the date is the first day of the month, you can use d to display 1 or dd to display 01.
yyThe current year in two-digit format. yyyyThe current year in four-digit format. -
Select a time format or accept the default selection chosen automatically based on your Country selection.

The following table describes the supported time format characters.
Character Description hThe hour in 12-hour notation.
Enter a value between 1 and 12.
HThe hour in 24-hour notation (military time).
Enter a value between 1 and 24.
mThe minutes in an hour.
To include a leading zero, use two characters. For example, if the time is five minutes past the hour, you can use
mto display 5 andmmto display 05.sThe seconds in a minute. zThe time zone abbreviation. ZThe time zone offset from GMT or RFC 822 time zone.
For example, Central Time is GMT-05:00 (GMT minus five hours).
-
Select the business hours and work days to include when calculating the ticket open time.
 Open time computes the difference between the time the ticket was open and the time it was closed.
When you select your business hours, select the hours when your help desk team is available to provide support for your clients. The default selection indicates a 24-hour business day, with the Start and End time set to identical values.
- Click Save.
Create a new business zone
- Click Setup > General > Time and Place.
- Click New.
- In the Business Zones tab, enter a name for the new business zone.
- Follow step 4 through step 10 in Set the default business zone, entering the details about the new location.
Configure the calendar settings
The calendar displays scheduled and due client tickets in a calendar format. Techs can use the calendar to track pending tickets and plan their weekly schedule. Click Calendar in the toolbar to access the calendar.
The Calendars tab contains the ticket due dates and work time events that display in the calendar for each client ticket. By default, each calendar entry displays the ticket number, due status, and abbreviated client name. If the ticket includes a scheduled date and due date, Web Help Desk adds separate event entries for each date.
The following example shows the Calendars tab and the default settings.

Select the ticket details that display in the calendar. Calendar events for due tickets display the date when the ticket request is scheduled to be completed. This date is based on the ticket due date selections.
For example, ticket number 114 is due on the 14th day of the month. If you select the Due Tickets check box, the ticket number and client name display in the calendar on the 14th day based on the formatting options you select in the Calendars tab for due date calendar events.

If you select the Scheduled Tickets and Due Dates check boxes, the scheduled ticket events display as well, based on the formatting options you select in the Calendars tab for the work time calendar events.

Integrate the calendar with Outlook or Gmail
You can integrate your calendar with a Microsoft Outlook (through Microsoft Exchange) or Google Gmail account. This integration allows you to view the notification count for scheduled ticket status events on the Calendar tab. The notification count reflects all events due on the current day.

When you configure status and schedule dates in a Web Help Desk ticket and then click Save & email, a calendar event is emailed to the Gmail or Outlook account owned by the tech assigned to the ticket. The tech also receives a reminder from Web Help Desk.
When the integration is completed, administrators can click the Tech drop-down menu, select a tech, and view events for the selected tech in the calendar, as shown below.

Administrators can use the integrated calendar to keep track of ticket issues and reassign a ticket when the assigned tech is unavailable. They can also review pending tickets, plan their weekly schedule, and ensure that all customer issues are resolved in a timely manner.
-
Log in to Web Help Desk as an administrator.
-
Configure an outgoing email account. Ensure that:
-
SMTP Authentication for the outgoing account is set to Simple with a corresponding username and password.
-
The Web Help Desk email Address field includes a valid WHD email address.
-
-
In the toolbar, click Tickets.

-
Locate and open a ticket that you want to track in the calendar.
-
Click the Ticket Details tab.

-
Scroll down to Status & Schedule.
-
In the Scheduled Date fields, configure an event time span that
For example:

-
Click Save & email.
The event is added to the scheduled calendar date (for example, 04/04/23) based on the From time setting and an event email is sent to the assigned tech.
If the event schedule date time matches the current date time, the event count is incremented in the Calendar icon.
Select the calendar display options
- Click Setup > General > Time & Place.
- Click the Calendars tab.
-
Select the tickets to include in your calendar.

Select Scheduled Tickets to include calendar events for the ticket work schedules.
Select Due Tickets to include calendar events for the ticket due dates.
-
Select a window of time for your calendar events.
 Ticket work time and due dates outside the selected value are not included in the calendar.
 -
Select a calendar display format.

Select this option to subscribe to the calendar events in your Outlook or iCalendar.
Deselect this option to only view all calendar events in the Web Help Desk calendar.
-
Enter a display format for due dates that display in the calendar or accept the default format.
See Calendar event text formats for additional formatting options.

-
Select a display format for scheduled work time events that display in the calendar, or accept the default format.
See Calendar event text formats for additional formatting options.

- Click Save.
Calendar event text formats
The following table lists the ticket attributes you can use to format the calendar event text that displays in the calendar.
| Attribute | Format |
|---|---|
| Ticket number | <ticket_id>
|
| Request type | <request_type>
|
| Status type | <status_type>
|
| Priority type | <priority_type>
|
| Client's full name | <client>
|
| Client's first initial and last name | <client_short>
|
| Client's primary phone | <client_phone>
|
| Client's primary email | <client_email>
|
|
Party responsible for the ticket (first name + last name) The responsible party can be a tech, tech group, or manager. |
<assigned_to>
|
|
Party responsible for the ticket (first initial + last name) The responsible party can be a tech, tech group, or manager. |
<assigned_to_short>
|
| Tech's full name | <tech>
|
| Tech's first initial and last name | <tech_short>
|
| Tech's primary phone | <tech_phone>
|
| Tech's primary email | <tech_email>
|
| Room | <room>
|
| Location | <location>
|
| Model number | <model>
|
| Subject | <subject>
|
| Report | <report>
|
| Date & time Ticket is due | <due_datetime>
|
| Scheduled Date and time when the tech works on the ticket request | <scheduled_datetime>
|
|
Scheduled Date and time when the tech works on the ticket request (compatible with previous WHD versions) |
<work_datetime>
|
| Work time recorded in the ticket tech notes | <work_time>
|
| First custom field | <custom_1>
|
| Second custom field | <custom_2>
|
| nth custom field | <custom_n>
|