Create the tech accounts
 Check out this video (8:58) on setting up a Web Help Desk account.
Each tech who logs in to Web Help Desk must have an account. You can use the Techs page to define the techs who will log in to Web Help Desk. For each tech, you can define their work schedule, location, associated tech group, and business zone.
Techs using LDAP authentication
Beginning in Web Help Desk 12.5.2, all techs who use LDAP authentication must have a client account to access their tech account. This process prevents unauthorized access to an LDAP account.
Non-admin tech accounts
When you create a non-admin tech account, you must specify the tech's supervisor. As a result, SolarWinds recommends creating the supervisors' accounts first.

Tech status indicators
The Tech Name column includes a list of a techs in your tech group. Some tech names may include an indicator that describes their availability status.
| Indicator | Status | Description |
|---|---|---|
| [ C ] | Concurrent | The tech is assigned to a concurrent license. |
| [ D ] | Deleted | The tech account was deleted. |
| [ I ] | Inactive | The tech account is inactive. |
| [ S ] | Not on schedule | The tech has a specific work schedule outside the assigned business zone. |
| [ V ] | Vacation | The tech is on vacation. |
You can configure all statuses except Concurrent in the Scheduling Setup section of each tech account. If the tech is assigned to a Concurrent license, the tech must wait for an available license to use Web Help Desk.
SolarWinds recommends creating the supervisor before creating the techs who report to that supervisor. Using this method, you can assign a supervisor to each tech as you create the tech.
Create a new account
Beginning in Web Help Desk 12.7.4, all tech and administrator accounts require your password in the Current Password field to edit and save the account information. The password must comply with password policy.

If you enter an incorrect password after five attempts, Web Help Desk times out for 30 seconds before you can re-enter your password. This feature prevents unauthorized access to these accounts.
- In the toolbar, click Setup > Techs > Techs.
- Click New.
- Enter the tech's first and last name.
-
Enter a user name and password the tech will use to log in to Web Help Desk.
 Techs always log in with their user name, regardless of whether clients are set to log in with their user name or email address. If a tech also has a client account under the same user name or password, the tech account takes priority.
 -
Enter a primary email address for this tech.

-
(Optional) Enter a secondary email addresses for this tech. For multiple email addresses, separate each address with a comma.
Secondary addresses enable tickets from multiple email accounts to be identified with the same Web Help Desk account. Except for confirmation email sent in reply to a secondary address, Web Help Desk always uses the primary email address.
-
(Optional) Enter the primary phone number, mobile number, and pager number for this tech.

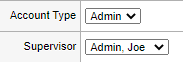
- Click the Account Type drop-down menu and select an account type. For tech accounts, click the Supervisor drop-down menu and select the tech's supervisor.
A supervisor is required for tech accounts, but optional for admin accounts.
-
Select a color to use for the label background. If a label color is not required, select white.

-
To enable the tech to access the Web Help Desk client interface, link the tech to a client account. Only admin users and techs with Edit Clients permission can edit this option.

When a tech account is linked to a client account, the Switch to Client Account icon displays next to the Logout button in the menu bar.

This enables the tech to switch to the client user interface as the given client, and then switch back when needed.
Tech accounts can be linked to actual client accounts or a demo client account. If you link to a demo client account with the same user name as the tech, a message warns you that the client won't be able to log in except as a tech linked to the client account. Because that is the intent, you can ignore the message.
When you are linked to a client account, the My Approvals tab displays in the Ticket Details tab. This allows you to approve one or more processes in the Tech interface without switching to the Client interface.
Any changes not saved will be lost when the tech switches between the Tech and Client accounts. -
Enable user interface enhancements to support the latest web browser.

When selected, some user interface enhancements required by the latest web browsers is enabled. This includes speed and standards requirements.
-
Specify the number of most recent notes and history entries to display in the Ticket Details page before collapsing additional entries. The tech can view the collapsed notes by clicking More under the note list.

-
Select this checkbox to physically delete a ticket from the Web Help Desk when a tech deletes a ticket. When selected, all attachments, client notes, tech notes, ticket history entries, and email history entries are deleted as well. Otherwise, leave this checkbox unchecked.

-
Select the checkbox to enable Web Help Desk to send all email to this tech in HTML format. Otherwise, leave this checkbox unchecked to send email in plain text format.

-
If you selected Use HTML email, select Yes to include images. Select No to use plain HTML, which is more compatible with Google GMail.

-
Enter the signature text that is included with single-note emails. These emails are sent to clients using the email Client button in the Tech Note editor.

-
Select the events that will trigger an email notification to the tech.
For example, to enable the tech to receive notifications about certain events, select the appropriate notification checkboxes.

An administrator can force some of these notifications for all techs in a particular Tech Group by configuring the email notifications at Setup > Techs > Tech Groups [Tech Group] > Tech Group Levels > [Tech Group Level].
-
Select the checkbox to send notifications to a tech's mobile device.

If you do not select this checkbox, go to the next step.
If you select this checkbox, complete the additional options.
-
Enter the email address of the SMS-enabled mobile device.
 Click the tooltip to locate address formats of major telephone carriers
 -
Click the drop-down menu and select the minimum priority a ticket must have for Web Help Desk to send an SMS email when a client creates or updates a ticket.

-
Click the drop-down menu and select the minimum alert level that triggers Web Help Desk to send alert notifications to the mobile device.

-
Select the Repeating checkbox to repeat the notifications at regular intervals for as long as the alert is valid. Otherwise, leave this checkbox unchecked.
-
-
To prevent Web Help Desk from escalating a ticket to this tech when the tech is not scheduled to work, configure the scheduling setup settings.
-
Select the business zone used when formatting dates and times. A business zone consists of a time zone and a schedule of business hours.

See Configure the business zones and calendar settings for details about how to set up business zones for your primary and remote call center locations.
-
If the tech's work schedule is limited to certain hours and days of the week, select the Specify Work Schedule checkbox and select the work schedule options. If the tech works during the business days and hours configured at Setup > General > Time & Place, leave this box unchecked.

-
Select this checkbox when the tech is on vacation and is not available when auto-assigning new tickets.

-
Click the drop-down menu and select a backup tech to receive escalated tickets when the tech is on vacation.

-
Select the checkbox if this an active account.
 Inactive techs cannot log in and do not count against your licensed seat count.
-
-
In the Identity section, enter your user password in the Current Password field. This password is required when you edit a tech account.
-
Click Save.
If your user password is correct, the account settings are saved.
If your user password is incorrect, an error message displays. Re-enter your password, and then click Save.
Web Help Desk times out for 30 seconds after five failed attempts. After 30 seconds, re-enter your password.
Assign a backup tech
You can assign a backup tech to any tech account. When you change the tech status to indicate that the tech is not available, the backup tech is assigned to cover in their absence.
- Log in to Web Help Desk as an administrator.
- Click Setup > Techs and select Techs.
- Select a technician or agent in the Tech Name column.
- Click
 to enter Edit mode.
-
Click the Backup Tech drop-down menu and select a backup tech.

-
In the Identity section, enter your user password in the Current Password field. This password is required when you edit a tech account. The password must comply with password policy.
-
Click Save.
If your user password is correct, the backup tech is saved in Web Help Desk.
If your user password is incorrect, an error message displays. Re-enter your password, and then click Save.
Web Help Desk times out for 30 seconds after five failed attempts. After 30 seconds, re-enter your password.