OpsGenie Integration
Navigation Notice: When the APM Integrated Experience is enabled, Loggly shares a common navigation and enhanced feature set with other integrated experience products. How you navigate Loggly and access its features may vary from these instructions.
By forwarding Loggly alerts to OpsGenie, you can notify users via iPhone and Android push notifications, email, SMS, and phone calls. You can also track the alert life cycle, escalate alerts, and more. Loggly can send alerts via email or using webhook.
Integration via email
OpsGenie can integrate with any software or service that is able to send an email. It can process incoming emails and create, acknowledge, and close alerts from incoming emails by applying user-defined rules. OpsGenie also provides product specific Integration Plugins for many popular monitoring tools, a Web API, and a lamp command line utility for integration. For more information, see Integrate Opsgenie with Loggly.
Email-based integrations configuration can be done on the Opsgenie Integrations page.
Creating alerts using Basic configuration
- Create an OpsGenie account if you haven’t done so already.
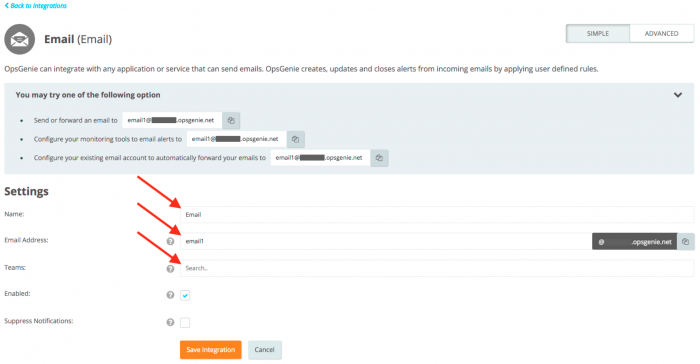
- Go to the OpsGenie Email Integration page. Each email integration is assigned an email address you can customize.
- Use the Recipients and Teams fields to specify who should be notified by email for the alert. Recipients can be users, groups, schedules or escalations. These fields have auto-complete support. Available options are displayed as you type. Set the recipient to all to notify all the users.
- If desired, change the name of the integration.
- Click Save Integration.

OpsGenie creates an alert for each email sent to the specified email address. By default, email integration uses the email subject as the alert message, and the email body becomes the alert description field. If the incoming email is in HTML format, OpsGenie also attaches the original email to the alert.
Email attachment size is limited to a maximum of 10MB. If the size is exceeded, the email will be discarded.
- If an email integration is disabled, emails sent to that email address are ignored by OpsGenie.
- If Suppress Notifications is checked, OpsGenie creates alerts, but users do not receive notifications for the alerts.
Creating alerts using Advanced Configuration
Basic configuration allows creating alerts with minimal configuration. For advanced settings please click here to learn more.
Integration via webhook
OpsGenie provides a web API for Loggly to create alerts directly in OpsGenie servers. The advantage of using the web API is that it is easy to set up. However, to get more details about your alerts use the Integration via email option.
- Create an OpsGenie account if you haven’t done so already.
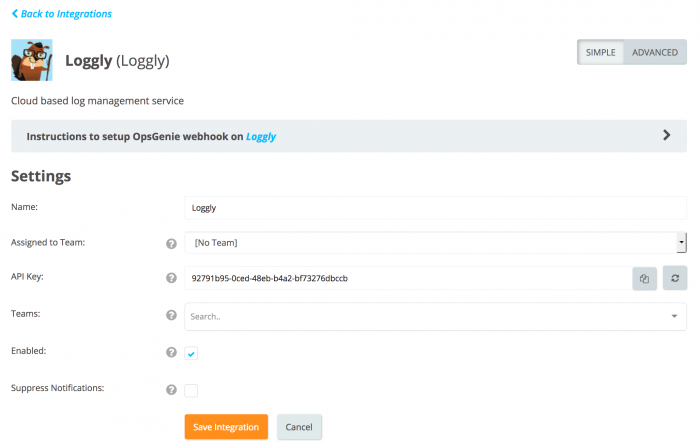
- Go to the OpsGenie Loggly Integration page.
- Use the Recipients field to specify who should receive the Loggly alerts. User(s), group(s), escalations policies, and on-call schedules can be specified as alert recipients. Auto-complete suggestions are provided as you type.
- Click Save Integration.

An API Key is generated for the integration.
- Copy the integration URL provided on the integration page.

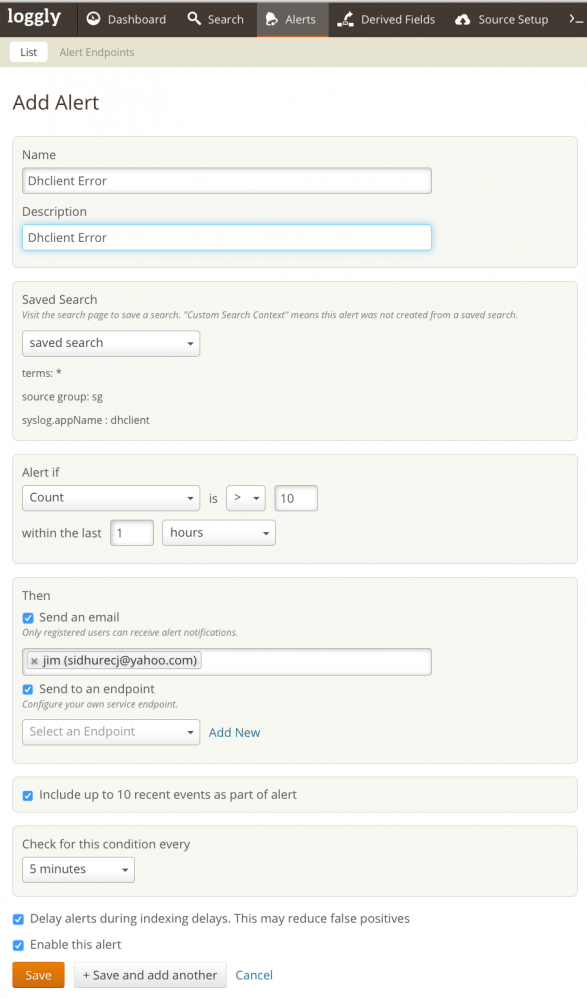
- From your Loggly account, navigate to the Alerts page, and click Add New.
GGH thinks this would need to stay.

- In the Saved Search section, choose one of your saved searches.
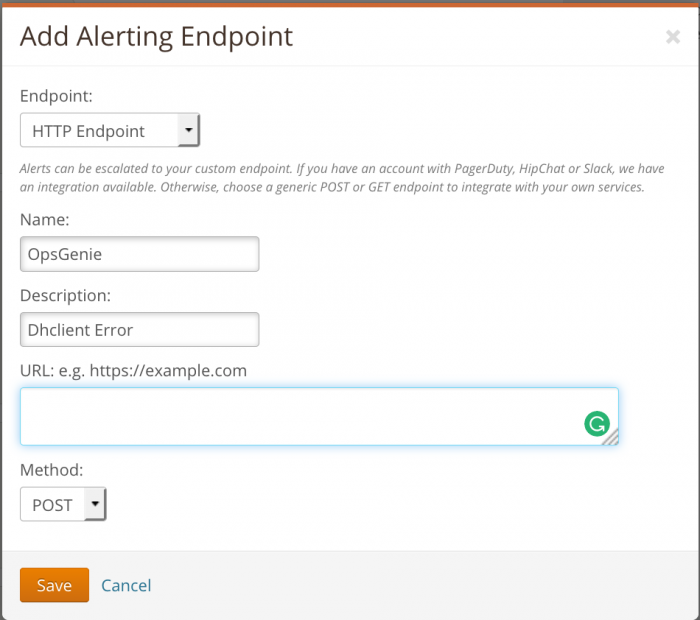
- Check Send to an endpoint, and click Add New.
- Under Endpoint, select HTTP Endpoint, and under Method, select Post. In the URL field, paste the API URL you copied.

- Click Save.
-
At the next dialog, check Enable this alert, and then click Save.
You have integrated with OpsGenie.
-
Alert properties can be configured from theLoggly Integration, Advanced Settings page.
-
You can now manage your Loggly alerts at OpsGenie and leverage its full alerting functionality.
