Deploy SEM on Amazon Web Services
To deploy SEM on Amazon Web Services (AWS):
See the system requirements for sizing, hardware, software, and port requirements.
Prepare for the deployment
-
If you are an existing SEM user, contact Customer Support to request access to the AWS Amazon Machine Image (AMI) for SEM.
If you are evaluating SEM, contact your SolarWinds Sales representative to request access to the AWS AMI for SEM.
-
Locate your AWS account ID and AWS Region. You will need this information in a later step.
-
Verify that you have a copy of the PuTTY SSH client. You will need this utility in a later step.
You can download PuTTY from the PuTTY website. - Download, install, and configure the AWS Command Line Interface (CLI) for AWS account access.
-
Create and download an access key.
In the AWS Console, navigate to user menu > My Security Credentials > Create Access Key.

See Managing access keys for IAM users for details (© 2023 Amazon Web Services, Inc, available at docs.aws.amazon.com, retrieved March 20, 2023).
-
Save the access key ID and secret access key to a CSV file on your computer.
Deploy AWS
- Verify that you have access to the AWS Amazon Machine Image (AMI) for SEM.
- Locate your AWS account ID and AWS Region.
- When you receive notification that your AMI is available, launch the AMI from the AWS EC2 console.
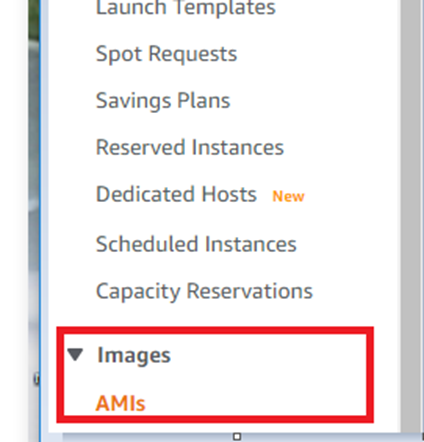
In the navigation menu. maximize Images and select AMIs.

In the drop-down menu, select Private images.

Select the SEM AMI, and then click Launch.
-
In the Choose an Instance Type page, select the instance type. Select at least t3.large, as this selection covers the default specifications for SEM.
SolarWinds recommends you use an instance type with an SSD if this is going to be a high volume deployment.

-
Click Configure Instance.
-
In the Configure Instance Details window, adjust the allowed CPU as required. If you are using the recommended baseline 2 CPUs 8GB, do not select a CPU option that is less than this value.

-
Click Add Storage.
The Add Storage window displays on your screen.

-
In the Add Storage window, do the following:
-
Adjust the storage space, if required. Use the SSD options as they are needed to keep up with the amount of events being received by the SEM.
-
Modify
/dev/sdbfor additional log retention. You can change the disk size in the Size field if required.
-
- Click Add Tags.
- (Optional) If tags are part of your corporate policy, add a tag as required.

-
Click Configure Security Group.
The Configure Security Group window displays with the firewall policy for you syslog device and all agents.
-
Select Create a new security group, and then enter a security group name. For each firewall rule, enter the type, protocol, port range, source, and description.

- Click Review and Launch.
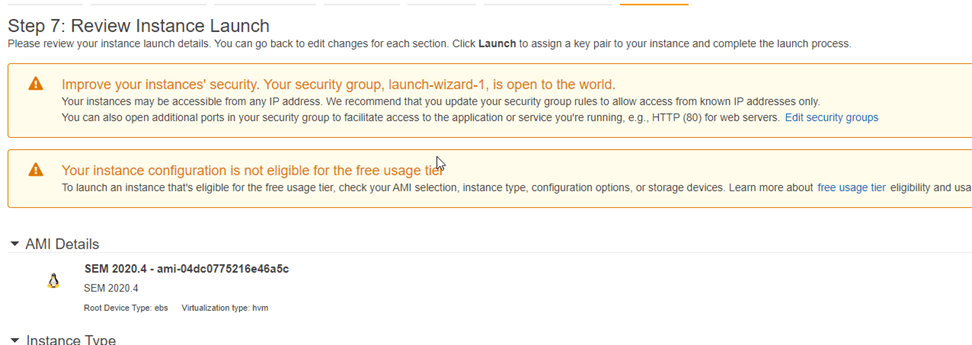
- In the Review Instance Launch window, review and verify your instance launch details.

- Click Launch to assign a keypair to your instance and complete the launch process.
-
Generate a key pair to connect using SSH to SEM.

(Screenshot © 2021, Amazon Web Services, Inc.)
-
Click the first drop-down menu and select Create a new pair.

(Screenshot © 2021, Amazon Web Services, Inc.)
-
In the Key pair name field, enter:
SEM - Click Download Key Pair.
- Open PuTTY.
-
Import the private key into PuTTY.
See Connect to your Linux instance from Windows using PuTTY from the AWS Documentation website for instructions.
-
Select the checkbox to acknowledge that you have access to the selected private key file (SEM.pem). This is required to log in to your instance.

(Screenshot © 2021, Amazon Web Services, Inc.)
- Click Launch instances.
-
