Interact with the remote computer during a support session
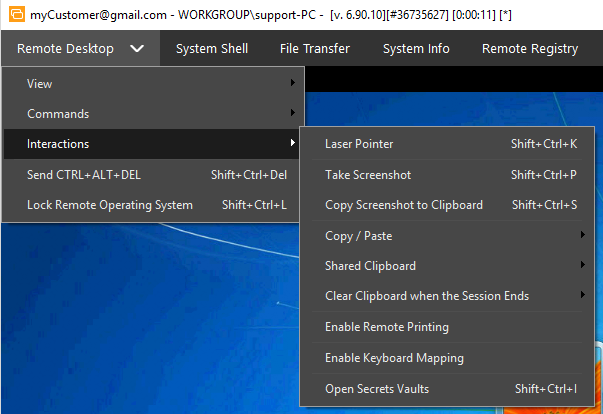
The Interactions menu contains the following features that can directly interact with the remote computer:

- Laser Pointer – reproduces mouse movements as a colored dot on the remote computer.
- Take Screenshot – saves a screenshot of the remote screen as a JPEG image.
- Copy Screenshot to Clipboard –saves and copies a screenshot to the remote clipboard.
- Copy / Paste
Use the Shift+Ctrl+C and Shift+Ctrl+V shortcuts to avoid clicking outside of the remote machine during a support session.
- Copy/Paste > Get Remote Clipboard – Shift+Ctrl+C: copies the remote clipboard contents (text only) to the local clipboard.
- Copy/Paste > Send Local Clipboard – Shift+Ctrl+V: copies the local clipboard contents (text only) to the remote clipboard.
- Copy/Paste > Insert Copied Password: the Windows Viewer takes the copied text and simulates key presses on the remote machine to insert the password.
Copying passwords or sensitive information must be handled with care. Do not perform copy operations of sensitive information with multiple open sessions.
- Shared Clipboard – disables the clipboard synchronization entirely. You can also opt to keep a partial synchronization, either from the local to the remote machine, from the remote machine to the local machine, or bidirectionally.
- Clear Clipboard when session ends – clears the remote agent, local clipboard, or both at the end of a session.
- Enable Remote Printing/Local Default Printer – enables printing from the remote computer, and allows the technician to specify a default printer on the local device.
- Enable keyboard mapping - ensures local characters are typed correctly on the remote end of an support session.
- Open Secrets Vault - open the Password Secrets Vaults, select the credentials you want to use, and insert the password for the selected vault.
