Install WHD with an external PostgreSQL database
During the installation procedure, you can select the embedded PostgreSQL database as your primary database. This database is installed on your WHD server.
WHD also supports PostgreSQL 13.7 and 14.3 as external databases. If you choose to install a PostgreSQL database on an external server, perform the procedures in this section. When you are finished, back up the database.
Set up the external server
-
Download and install PostgreSQL 13.7 or 14.3 on the external server.
See the PostgreSQL website for instructions.
-
Ensure that the external server can communicate with the Web Help Desk server in your Enterprise network.
Install Web Help Desk
-
Log in to the WHD as an administrator.
-
Install the application on the WHD server.
See Install WHD in a stand-alone deployment for instructions.
-
When the following window displays, STOP. Leave this window open.
Configure Web Help Desk with the external server
-
On the Web Help Desk server, open a File Explore window and navigate to:
C:\Program Files\WebHelpDesk\pgsql3\pgAdmin4\bin -
Double-click
pgAdmin4. -
Click Dashboard.
-
In the pgAdmin management tool window, click Add New Server.
-
In the Create - Server window toolbar, click General.
-
Enter
whdto enable all whd users privileges to access the database.
This enables all whd users privileges to access the database.
-
Click the Server group drop-down menu and select
Serveras the parent node for the server.
-
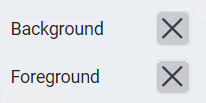
(Optional) Leave the Background and Foreground checkboxes selected to specify the background color for the server using the color-picker.
-
Ensure that the Connect now checkbox is selected to enable the client to connect to the server when you complete the database setup in pgAdmin4.

-
(Optional) Enter a comment regarding this database connection.

-
Click Connection in the toolbar.
-
Enter IP address or the fully qualified domain name (FQDN) of the server host.
For example,
localhost.
-
Enter the listener port number of the server host. The default value is
5432.
-
Enter the initial database name to which the client will connect. The default is
postgres. If you are using pgAgent or adminpack objects, install these resources on the external database server.
 -
Enter the role that will be used when authenticating with the server. The default is
postgres.
-
Enter a password this role must enter to authenticate with the database server. .
 Record this password and keep it in a secure location. You will need this information in a future step
 -
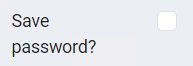
(Optional) Select the checkbox to save the password for future use. Leave this checkbox deselected for additional security.
-
Leave the Role and Service fields blank.
-
Click Save.
-
In the toolbar, click Connection.
-
Enter the IP address or the fully qualified domain name of the server host. For example,
localhost.
-
Enter the listening port number of the server host. The default value is 5432.

-
Enter the name of the initial database to which the client will connect. The default value is
postgres.
-
Enter the username that specifies the name of a role used when authenticating with the server. The default is
postgres.
-
Enter a user password used to authenticate with the server.

-
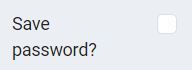
(Optional) Select the checkbox to enable pgAdmin to save the password.
-
Leave the Role and Service fields blank.
-
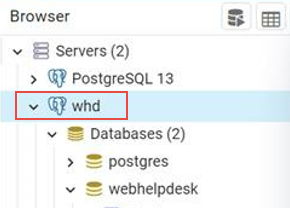
In the Browser menu, expand Servers and click whd.
-
In the toolbar, click Privileges.
-
Select all options.
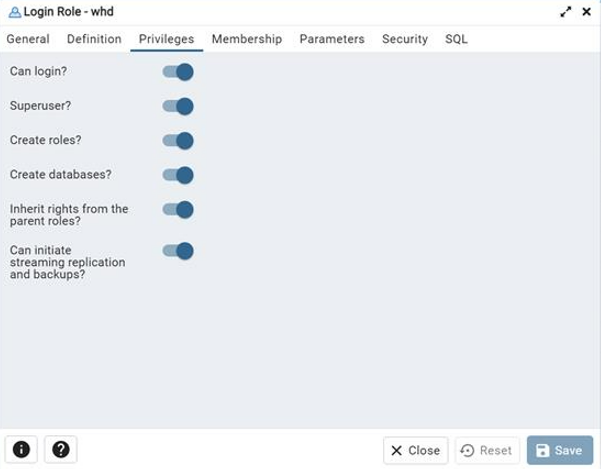
After you select and save all options, the whd user can:
-
Log in to the database
-
Act as a superuser within the database
-
Create roles
-
Create databases
-
Inherit rights from the parent roles
-
Initiate streaming replication and backups
-
-
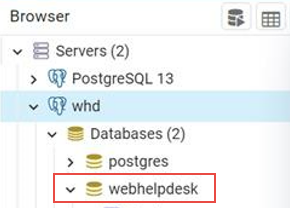
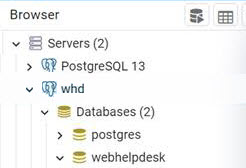
In the Browser navigation menu, expand whd and select webhelpdesk.
-
In the toolbar, click General.
-
Add a descriptive name for the database. For example,
webhelpdesk. This name will display in the pgAdmin tree control.
-
Click the drop-down menu and select
whd. This is the database owner.
-
(Optional) Enter comments about the database.

-
Click Save.
Complete the installation
-
Close pgAdmin4.
-
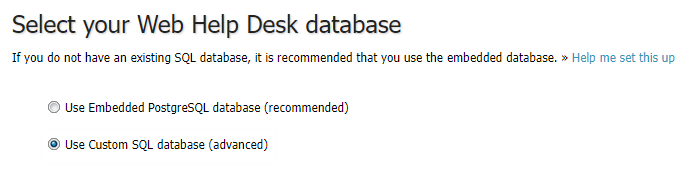
Return to the Select your Web Help Desk database window in the installation procedure.
-
Ensure that Use Custom SQL database (advanced) is selected.
-
Click the Database Type drop-down menu and select PostgreSQL (External).

-
In the Host field, enter localhost. In the Port field, enter 5432. This is the default port.

-
Enter the name of the Web Help Desk database. For example, webhelpdesk.

-
Enter the username.

-
Select the Create database and user account if necessary checkbox, enter the admin user name and password, and then click Create.
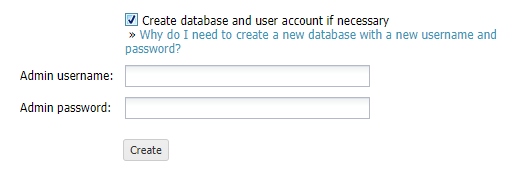
WHD creates the SQL database for your deployment.
When the procedure is completed, the installer displays the following message:
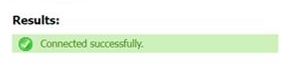
If Results displays an error, follow the instructions on your screen, make the necessary changes, and then click Create.
-
Click Next.
-
Go to Install WHD in a stand-alone deployment in the WHD Installation and Upgrade Guide.
-
Scroll down to Complete the installation.
-
Go to step 5 and continue the installation.
Back up the database
- Log in to the WHD server as an administrator.
-
Create a directory for your database backup file.
For example:
D:/Backup -
On the Web Help Desk server, open a File Explore window and navigate to:
C:\Program Files\WebHelpDesk\pgsql3\pgAdmin4\bin -
Double-click
pgAdmin4. -
In the navigation pane, maximize Servers > whd > Databases.
-
Right-click
webhelpdeskand select Back Up. -
Enter a name for your backup file. You can also click the ellipsis, navigate to a directory, and select a file that will contain the archive.

-
Click the Format drop-down menu and select Custom. This option creates a custom archive file that you can use with pg_restore to create a copy of the database. This format allows you to select a database object to restore from the backup file.

-
Click the Encoding drop-down menu and select the character encoding method for the archive.

-
Under Dump options, accept all default settings.
-
Click Backup.
When the backup is completed, a pop-up window displays:
Successfully completed.
Restore the database
-
On the Web Help Desk server, open a File Explore window and navigate to:
C:\Program Files\WebHelpDesk\pgsql3\pgAdmin4\bin -
Double-click
pgAdmin4. -
In the navigation pane, maximize Servers > whd > Databases.
-
Right-click
webhelpdeskand select Restore. -
Click the Format drop-down menu and select the archive file format you selected in Back up the database. For example, select Custom or tar to restore from a custom archive file.
-
Double-click the Filename ellipsis and select your backup file.
-
Click Restore options and select all default selections.
-
Click Restore.
When the restore is completed, a pop-up window displays:
Successfully completed.