Create action rules for ticket processing
Action rules create customized processes for unique situations. You can create action rules that define when, what, who, and how issues are approved, tracked, assigned, and handled. Action rules create a customized process for unique use cases.
Using parent/child service relationships, you can configure your action rules to trigger tasks that automate your ticket processing.
Below is the action rule screen located at Setup > Processes > Action Rules. This screen lists all of your action rules and their corresponding priority order.

The Action Rules includes three tabs: Action Rule Info, Criteria, and Actions. The following sections provide details about setting up your action rule settings in each tab.
Action Rule Info tab
Use this tab to add an action rule name, description, and additional information. When you are finished, the action rule displays in the Action Rules screen based on the priority order.

In the Action Rule tab, you can also:
- Enable or disable the action rule.
- Specify the priority level when included with multiple action rules.
- Stop associated rules with a lower priority.
- Trigger the action rule based on a set of criteria.
- Trigger an action rule based on keywords in the email subject.
Criteria tab
Use this tab to select the conditions that must occur before a ticket triggers the action rule.

For example, to address service requests, issues, or problems initiated by the CEO, you can select the following options from the drop-down menus.

When the ticket meets this condition, Web Help Desk triggers the action rule.
Action tab
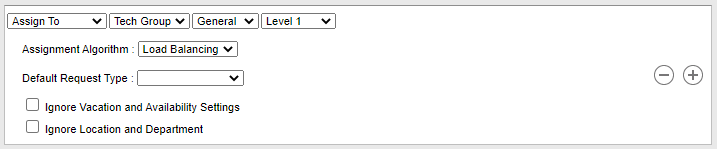
Use this tab to select the action that executes when the action rule criteria are met.

This tab includes several actions you can select in the drop-down menus to configure your action rule.
The Assign To action assigns the ticket to a specific tech or tech group.

The Change Priority action assigns the ticket to a specific status based on the nature of the ticket.

For example, if your CEO contacts the help desk to request an immediate action, you can create an action rule with Change Priority set to Critical so it jumps to the top of the ticket queue.
The Change Status action changes the ticket status to another status type based on the action rule.

The Modify Ticket action provides options to automatically modify specific information within the ticket, such as Client and Location, Ticket Details, and Tech Note tabs in the ticket.
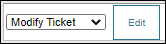
For example, you can create a new action that assigns all new employee on-boarding tickets to a specific tech or request type.
The Send email action sends an email to one or more specific recipients with a predefined subject and message to one or more recipients in your organization.

For example, when you create a ticket to address a CEO issue, you can add an action to send an email to the director stating that the ticket is being processed and will be resolved as quickly as possible.
Add an action rule
- In the toolbar, click Setup > Processes > Action Rules.
-
Click New.

-
Select the checkbox to enable this action rule.

-
Select a priority for this action rule. The action rule priority determines the trigger order of all action rules. Only one action rule can be executed at a time.
-
Enter a name for this action rule.

-
Enter a description of this action rule.
-
Select the Cascade check box to trigger all defined actions for a ticket. Do not select Cascade to trigger only the highest priority action.

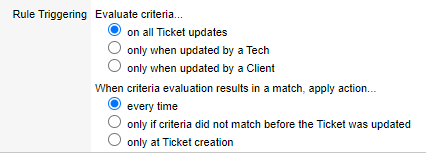
-
Select the rule triggering options to define when and how often Web Help Desk applies the action rule.
- Click the Criteria tab.
-
Configure the conditions that tickets must match to trigger the action.

Use the following guidelines to configure the conditions:
-
Every condition in the All section must be true. If any condition is false, the action is not triggered.
Web Help Desk evaluates these conditions using the Boolean AND operator.
-
The Any section defines a group of conditions. At least one of these conditions must be true to trigger the action, but they do not all have to be true.
Web Help Desk evaluates these conditions using the Boolean OR operator.
-
If both sections include conditions, all conditions in the All section and at least one condition in the Any section must be true.
Web Help Desk evaluates the two groups with a Boolean AND operator between the groups:
(all_1 AND all_2) AND (any_1 OR any_2) -
If no conditions are defined in the All section, at least one condition in the Any section must be true.
- Click the Actions tab.
-
Specify the action to take when the conditions are met.
- Click Save.