Create filters in SEM
Using the SEM Console, you can create custom filters for your event log stream to complement existing SEM filters. On the Add New Filter page, create filters by dragging and dropping default filter fields to the right side of the page, and set up values and conditions using this fields, to build a filter that determines which events are monitored.
- Log in to the SEM Console.
- On the toolbar, click the Live Events tab.
- To create a filter within a group, move the mouse pointer over the group heading to expose the vertical ellipsis
 icon.
icon.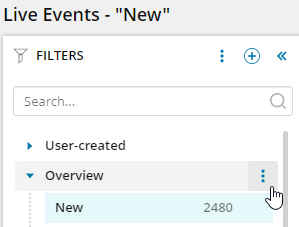
- Click on the vertical ellipsis icon and select Add New Filter.

To create a filter outside of the groups, click the add
 icon at the very top of the column, and select Add New Filter.
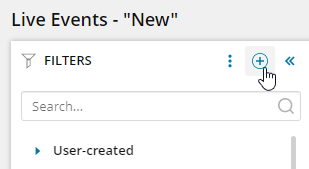
- Enter a descriptive name for your new filter.
To establish notifications for the new filter, you can create a rule based on your filter with one click.
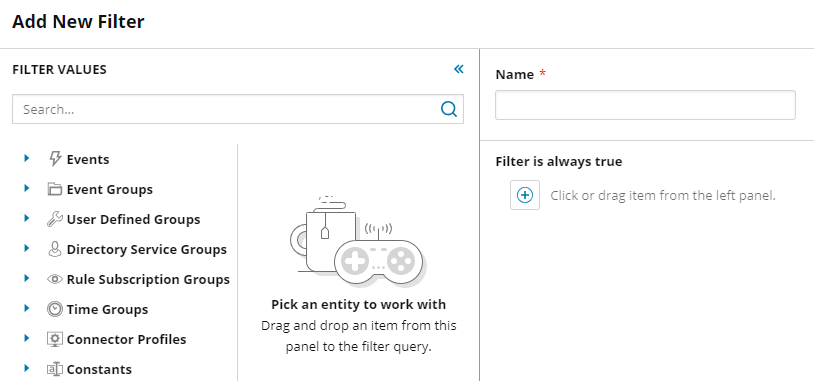
- Add the filter fields to a filter.
Expand Events or Event Groups to display the filter entities, and then select an entity and an optional corresponding filter.
Hover your mouse arrow over the information
 icon to view a description of the entity.
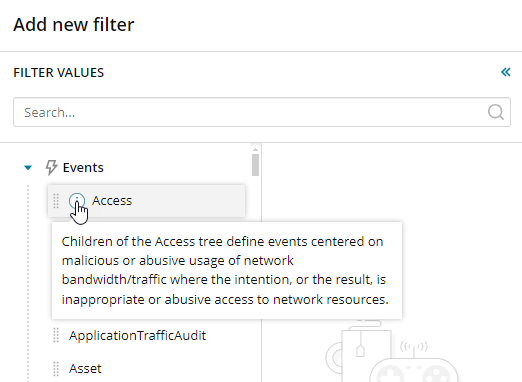
Some filter entities, such as those in the Events group, can be expanded to show filter fields. Hover your mouse arrow over the information
icon to view a description of the field. 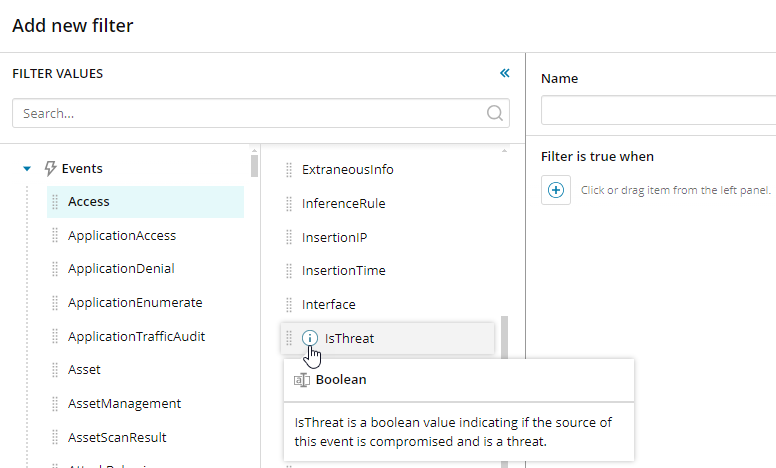
Drag the entity or field to the panel.
When an entity is selected and then you select and drag a field, the entity and field are included together.
When you drag a filter field into the filter builder, the place to drop it is illuminated with a blue line.

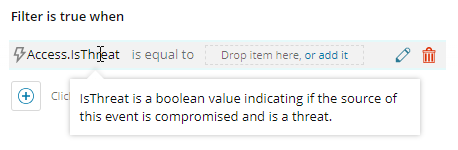
Hover your mouse cursor over the filter name to view a description of the entity...
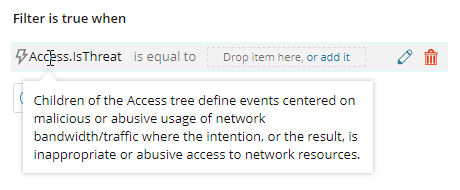
...and the corresponding field.
Click the edit
 icon.
icon. 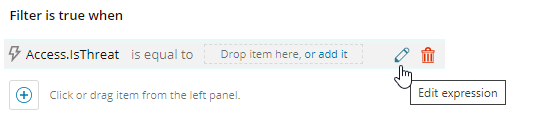
Click the drop-down menus to change this to your required condition.
For example, in this case the only meaningful change you can make is from "Access.IsThreat is equal to True" to "Access.IsThreat is equal to False".
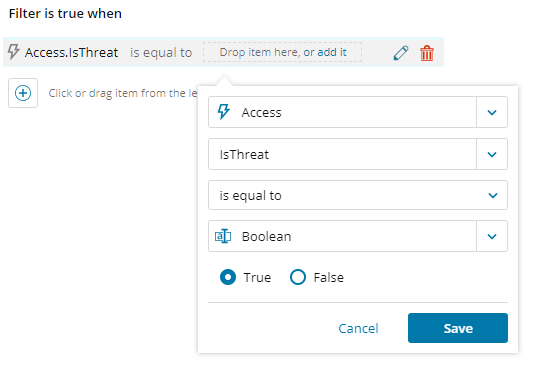
Other conditions can involve strings, numerical values, or group values (see below for using group values). For information on using operators (such as "is equal to", "is in", etc) see Compare values with operators.
- When you are finished, click Save.
- To add additional conditions, drag the required field beneath the previous condition. A blue line displays where to drop it.

Initially, multiple conditions are assumed to be additive, and the AND operator is displayed.
- Click AND, and then select OR to change the operator.
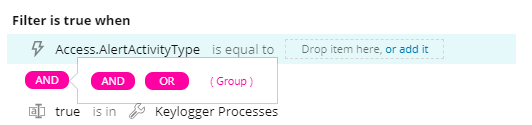
If you create a multiple condition that combines conditions with AND and OR operators, group the conditions accordingly. For example, the following condition flags an error as the condition is ambiguous.
-
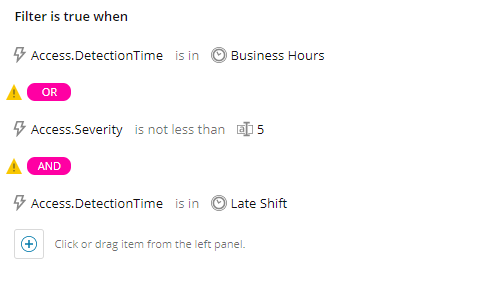
Click on AND, and select Group.
In the following configuration, the detection time occurs during business hours or events where the detection time occurs during the late shift.

The condition is redisplayed.

- Click Save to save the filter. The filter is now available in the left column.