Configure directory service groups in SEM
Perform the following steps to select the Active Directory groups to synchronize with SEM. If the connector is running, the synchronization process runs every five minutes.
- Log in to the SEM Console.
- On the toolbar, click Configure > Directory Service Groups.
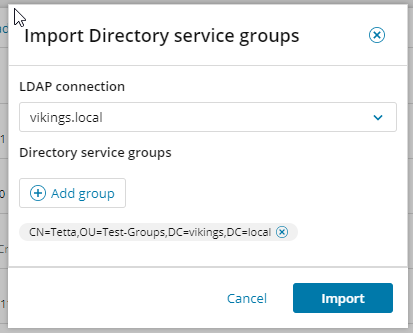
- Click Import Directory service group.
The Import Directory service groups dialog is displayed.
-
Click the drop-down menu and select the LDAP configuration to use.

-
Click Add Groups.
A dialog window opens where you can enter the Distinguished Name (DN) of the directory service group you want to add.

For example:
cn=A-group, ou=support, dc=mycompany, dc=com.
- Click Search group to verify the group exists.
- If the group is found, click Add group.
- If you want to import further groups, repeat step 5 through step 7.
- Click import.
View a directory service group member
The Directory service groups page lists all group synchronized with SEM. Select a DS group to view the members of that group.
-
Log in to the SEM Console.
-
On the toolbar, click Configure > Directory service groups.
- Select the targeted group checkbox, and then click Show members.
The Show members window displays with a list of group members.
Remove a directory service group
The Directory service groups page lists all group synchronized with SEM. To remove a service group, perform the following steps:
-
Log in to the SEM Console.
-
On the toolbar, click Configure > Directory Service Groups..
- Select the targeted group checkbox, and then click Delete.
The Directory Service Group is removed from the SEM Console.