Deploy agents
You can deploy Patch Manager agents to online or offline computers, multiple computers using WSUS, and computers using the WMI Providers installer.
- Online computers
- Offline computers
- Multiple computers using WSUS
- Computers using the WMI Providers installer
Deploy agents to online computers
Push the Patch Manager agent to the client computer from the Patch Manager Administrator Console. After the agent is installed on the client, the agent communicates back to the server to request a certificate. After you approve the certificate exchange, the agent is ready for use.
- Log in to the Patch Manager Admin Console as an administrator.
-
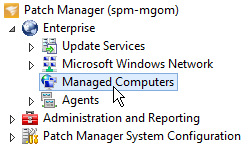
In the navigation pane, expand Enterprise and select Managed Computers.
- In the center pane, select a computer that requires an agent.
-
In the Actions pane, click Deploy Client Components.
- In the Task Options Wizard, select Install or Repair Client Components to prepare the client system to work with Patch Manager, and click Next.
-
Select the following options, and click Next:
- Install WMI Providers: Installs the WMI providers on your managed computer
- Install the Patch Manager Agent: Installs the agent on your managed computer to poll for WSUS updates
- Select Install using Remote install Service, and click Next.
- Select the clients you want to deploy the components, and click Next.
- Review your selections, and click Finish.
Deploy agents to offline computers
Push the Patch Manager agent to the client computer from the Patch Manager Administrator Console. After the agent is installed on the client, provision the agent with a certificate so agent approval is not required.
To minimize errors during your agent deployment, do not deploy an agent with the same host name on two or more computers.
- Log in to the Patch Manager Admin Console as an administrator.
- In the navigation pane, expand Enterprise > Managed Computers.
- In the center pane, select a computer that requires an offline agent deployment.
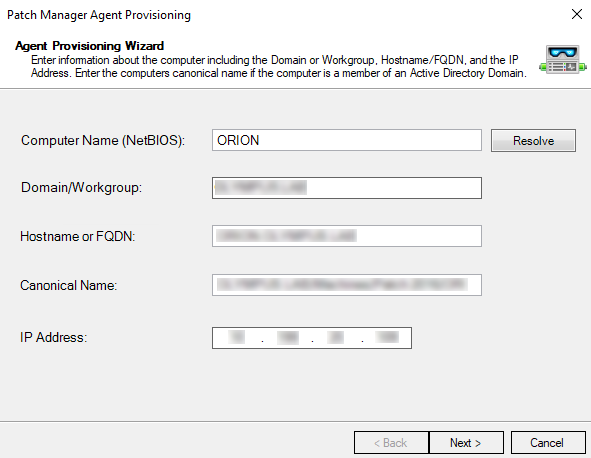
- In the Actions pane, click Provision Agent Offline.
-
In the Agent Provisioning wizard, ensure that the host information is correct, and click Next.
-
Click Browse and select the location where you want to place the provisioning installer.

- Select the Recreate existing certificate checkbox if you do not want to use the existing certificate.
- Enter the password used to protect the signed Patch Manager server certificate, and click Finish.
Distribute agents using WSUS
To distribute the agent to multiple computers at once, create a WSUS installer package and distribute the package through the WSUS server.
- Log in to the Patch Manager Admin Console as an administrator.
- In the navigation pane, expand Enterprise > Managed Computers.
- In the center pane, select the targeted computer.
- In the Actions pane, click Deploy Client Components.
- In the Task Options Wizard, select Install or Repair Client Components, and click Next.
-
Select the following options, and then click Next:
- Install WMI Providers: Installs the correct providers on your managed computer
- Install the Patch Manager Agent: Installs the Patch Manager agent on your managed computer
- Select Create a WSUS Installer Package, and click Next.
- Select the clients you want to deploy the components, and click Next.
-
Review the information in the dialog box, and click Finish.

- Publish the package.
Deploy agents using the WMI Providers installer
The SolarWinds Windows Management Instrumentation (WMI) Providers for managed clients provide additional management and inventory tools that are not native to WSUS. Without them, you can only use Patch Manager to interface with WSUS and not directly with the managed clients.
By default, Patch Manager does not deploy the WMI providers automatically unless you enable the Automatic all provision SolarWinds WMI Providers option under Management Groups > Settings. When enabled, Patch Manager deploys the WMI Providers to the managed computers as needed for specific configuration management tasks.
Install the SolarWinds WMI Providers on the managed computers
-
Ensure that WMI-in and WMI-out are enabled on the workstation. If these settings are disabled, you cannot access the machine.
See your Windows documentation for instructions.
- Log in to Patch Manager as an administrator.
- In the navigation menu, locate and select the group that contains the targeted workstation.
- To run the task on a specific computer, select the computer in the center pane and then click Check and Manage Computer Connectivity in the Actions pane.
- In the Computer Access Management window, select Install the WMI Providers (if not installed) and select the appropriate options.
- Select all options outside of the SolarWinds WMI Providers Actions group except Enable DCOM (if disabled).
- Click OK to run the task.