AWS CloudTrail Logs
Loggly provides the infrastructure to aggregate and normalize log events so they are available to explore interactively, build visualizations, or create threshold-based alerting. In general, any method to send logs from a system or application to an external source can be adapted to send logs to Loggly. The following instructions provide one scenario for sending logs to Loggly.
Loggly provides the ability to read your AWS CloudTrail logs directly from your AWS S3 bucket. Amazon CloudTrail support is built into the Loggly platform, giving you the ability to search, analyze, and alert on AWS CloudTrail log data.
What You Can Do With AWS Cloudtrail Logs
Cloudtrail logs keep a record of all AWS API calls and help you answer key security and compliance questions. Amazon describes this in detail in their white paper called Security at Scale: Logging in AWS. Here are some common questions you can answer:
- What actions did a user take over a given period of time?
- For a given resource, which AWS user has taken actions on it over a given time period?
- What is the source IP address of a given activity?
- Which user activities failed due to inadequate permissions?
- Which user changed the settings of a security group and when did the change occur?
- When was a particular Elastic IP (dis)associated with a network interface?
- Which user launched or terminated an EC2 instance?
Configuring Cloudtrail Logs with Loggly
Loggly reads AWS CloudTrail logs directly from your AWS S3 bucket. Here’s how to give Loggly permission and configure it to read them.
1. Log into your AWS console
If you don’t already have one, you’ll have to create an Amazon account.
2. Subscribe to CloudTrail
From your AWS console, go to the Management and Governance section, and then choose CloudTrail.
Click Create a trail.
The Quick trail create window opens. If you want to customize your names more than outlined below, go to the full Create trail workflow and follow directions there.
Follow the guidance provided by AWS Services.
3. Provide permission to Loggly to read from the bucket
Loggly needs permission to pull the CloudTrail log data from your S3 bucket. The easiest way to accomplish this is by creating a new IAM user on your account. The new user only has permission to read from the S3 bucket.
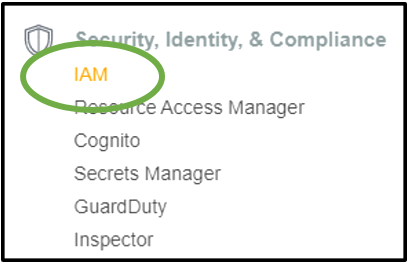
Go back to your AWS dashboard and select IAM from the Security, Identity & Compliance section.
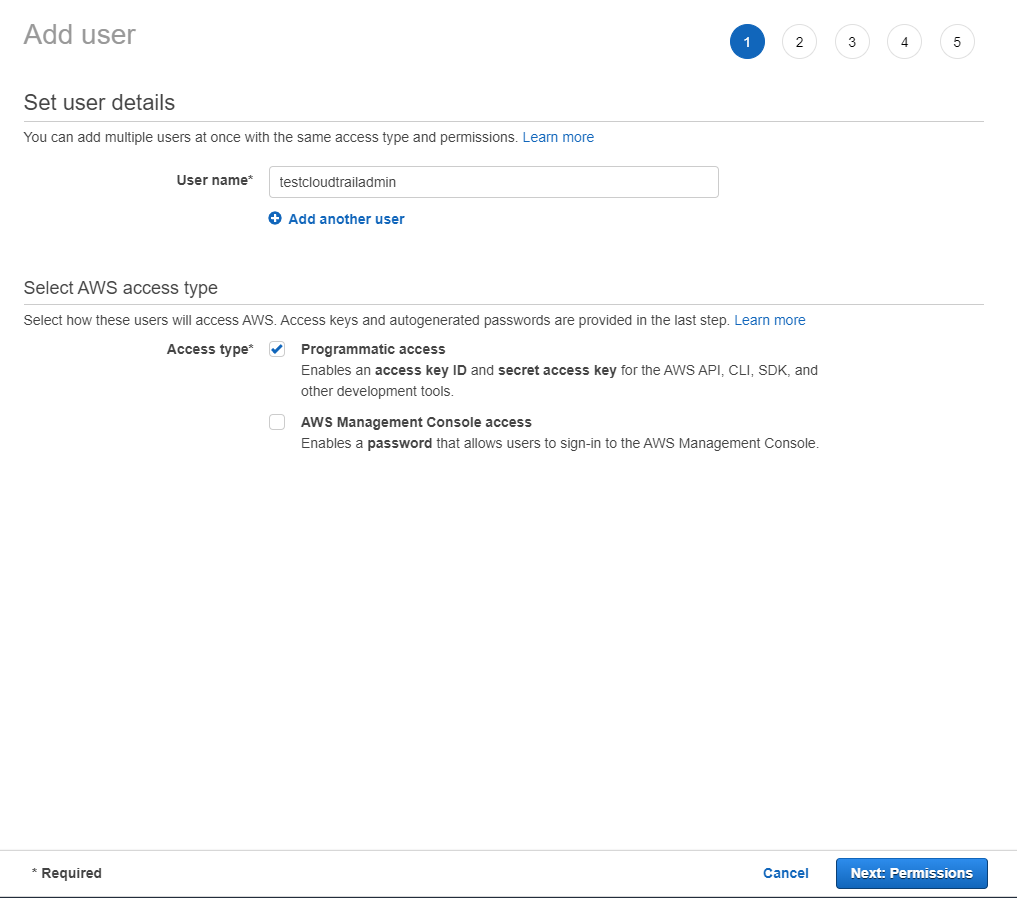
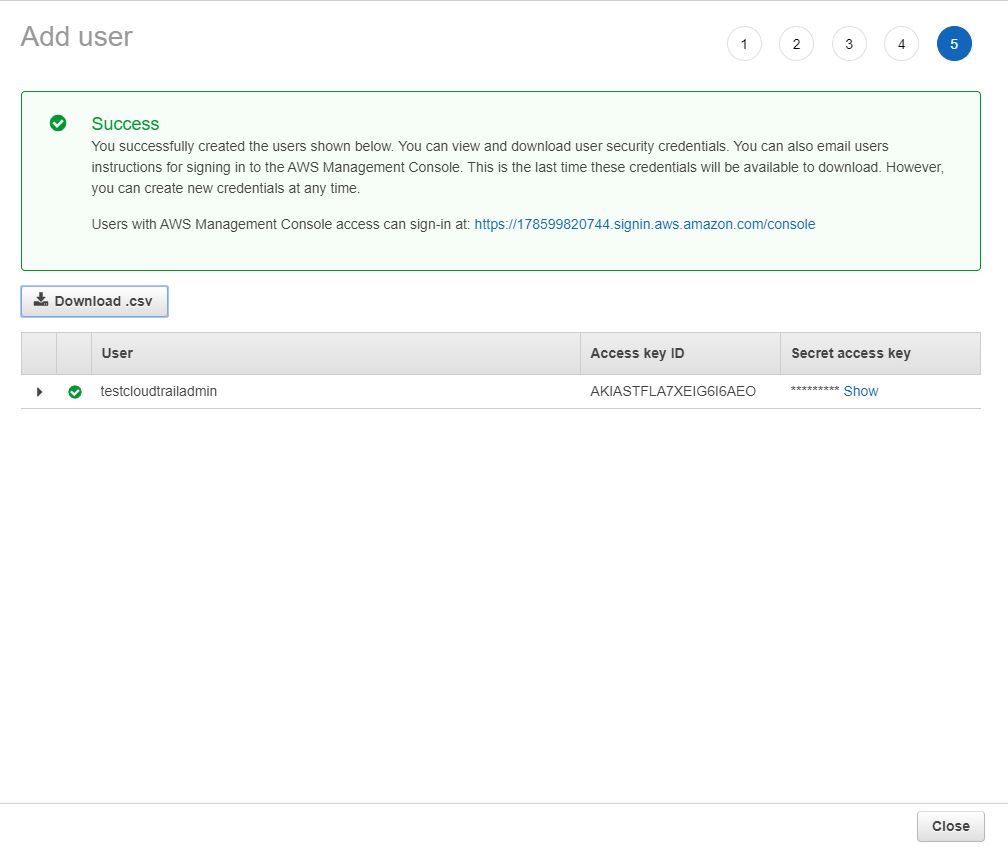
From your IAM dashboard, choose Users from the left menu. Then, create a new user & make sure to download the credentials. (You’ll need to provide these to Loggly in Step 4.)
After the user is created, select the user from your user list. Under the Permissions tab, choose Add inline policy.
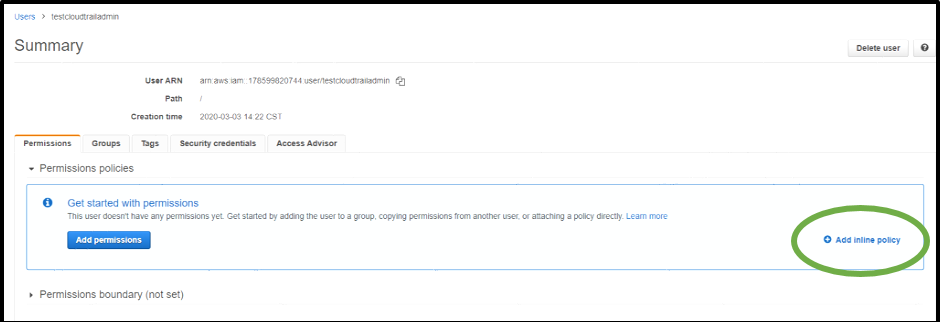
Loggly needs access to list the contents of the bucket and get objects within the bucket.
Grant List Bucket Permissions
- Service: S3
- Actions: ListBucket
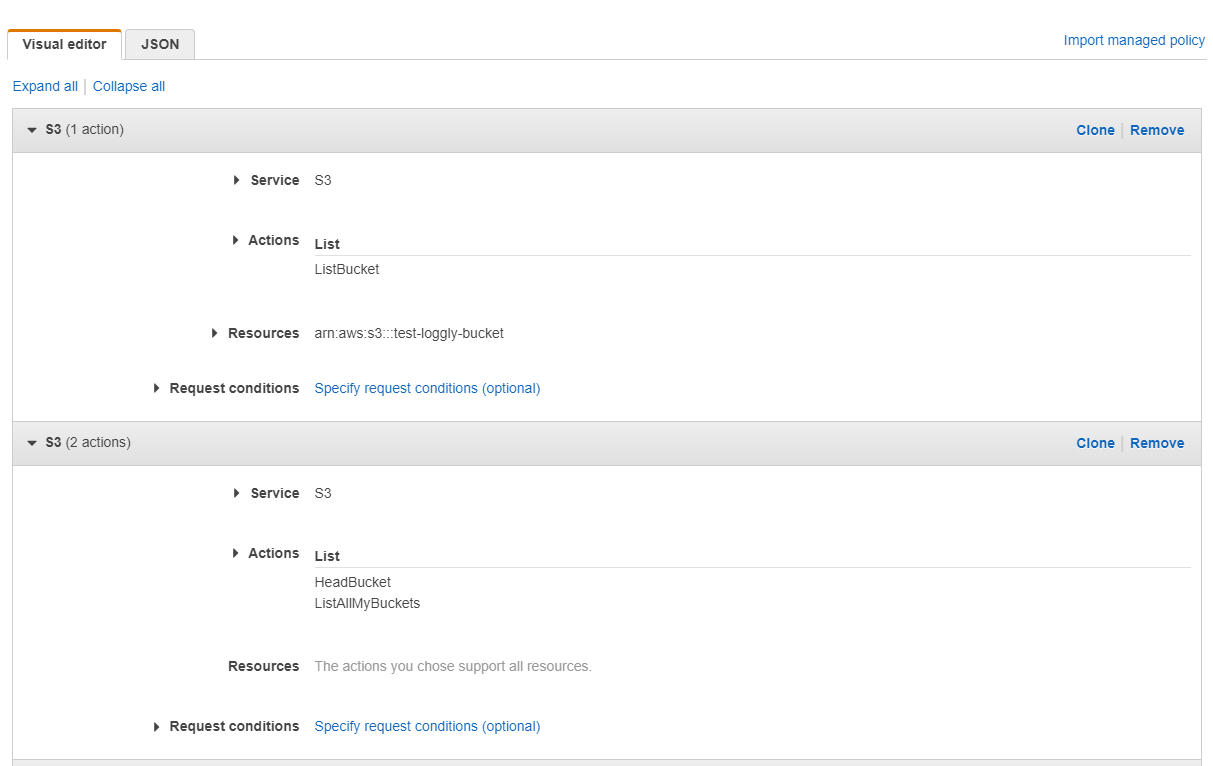
Under Resources, if the name of the bucket you set up is test-loggly-bucket, enter this:
arn:aws:s3:::test-loggly-bucketin the Edit ARN dialog box.
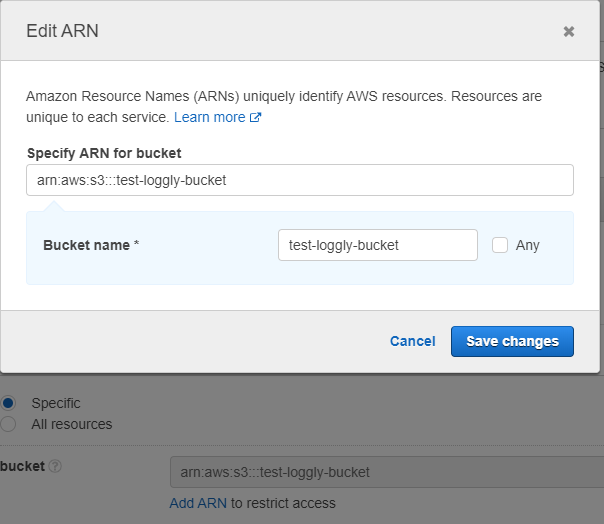
Grant Get Bucket Location Permissions
- AWS Service: S3
- Action: GetBucketLocation
Under Resources, if the name of the bucket you set up is test-loggly-bucket, enter this:
arn:aws:s3:::test-loggly-bucketGrant Get Object Bucket Permissions
- Effect: Allow
- AWS Service: Amazon S3
- Action: Get Object
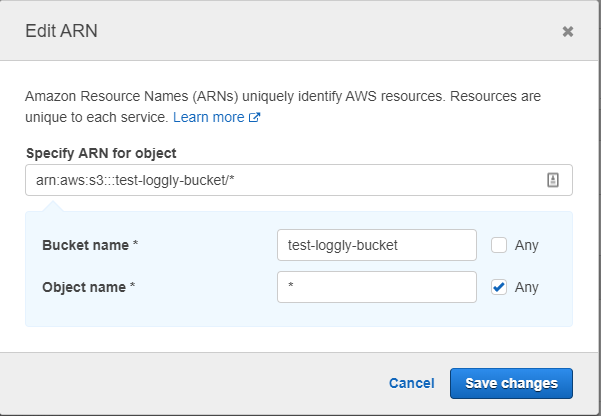
This time, the ARN needs to point to the specific location of your CloudTrail logs. In most cases, use something like this:
arn:aws:s3:::cloudtrail-bucket/*

If you selected a file prefix during CloudTrail bucket setup, be sure to specify it here and click Save Changes.
4. Establish your new S3 bucket with Loggly
Return to Loggly. After you have set up CloudTrail and an IAM user, you’ll need to provide Loggly with that information so it can read from the bucket. Only account owners and account administrators can set up CloudTrail within Loggly. If that’s not you, contact the account owner before you can continue.
If you are the account owner or admin, go to the account page in Loggly and select AWS CloudTrail.
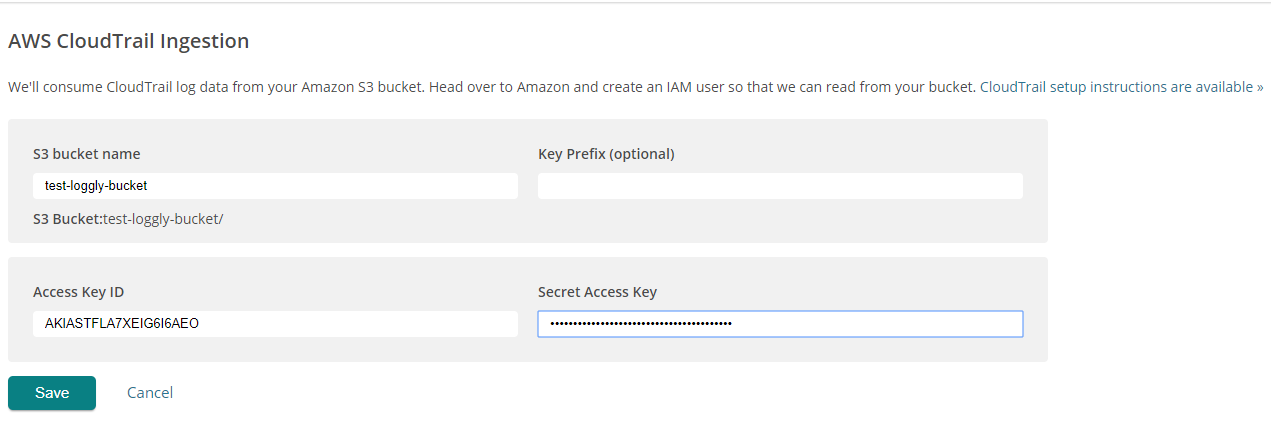
Enter each of these fields into the input boxes, and then click Save:
- S3 Bucket Name – the name of the bucket you entered in Step 2
- Key Prefix (optional) – a key prefix or directory to store the AWS logs in; it must include a / at the end
- Access Key ID – the access key ID you received in Step 3
- Secret Access Key – the secret access key you received in Step 3
Loggly pulls logs from your S3 bucket
You are finished. That’s all you need to do. After access to your S3 bucket is verified, the log data streams directly to Loggly.
After the initial setup of S3 bucket it could take a few hours for the configuration to complete.
After the stream begins, head over to the Loggly Search page and search for:
logtype:cloudtrail
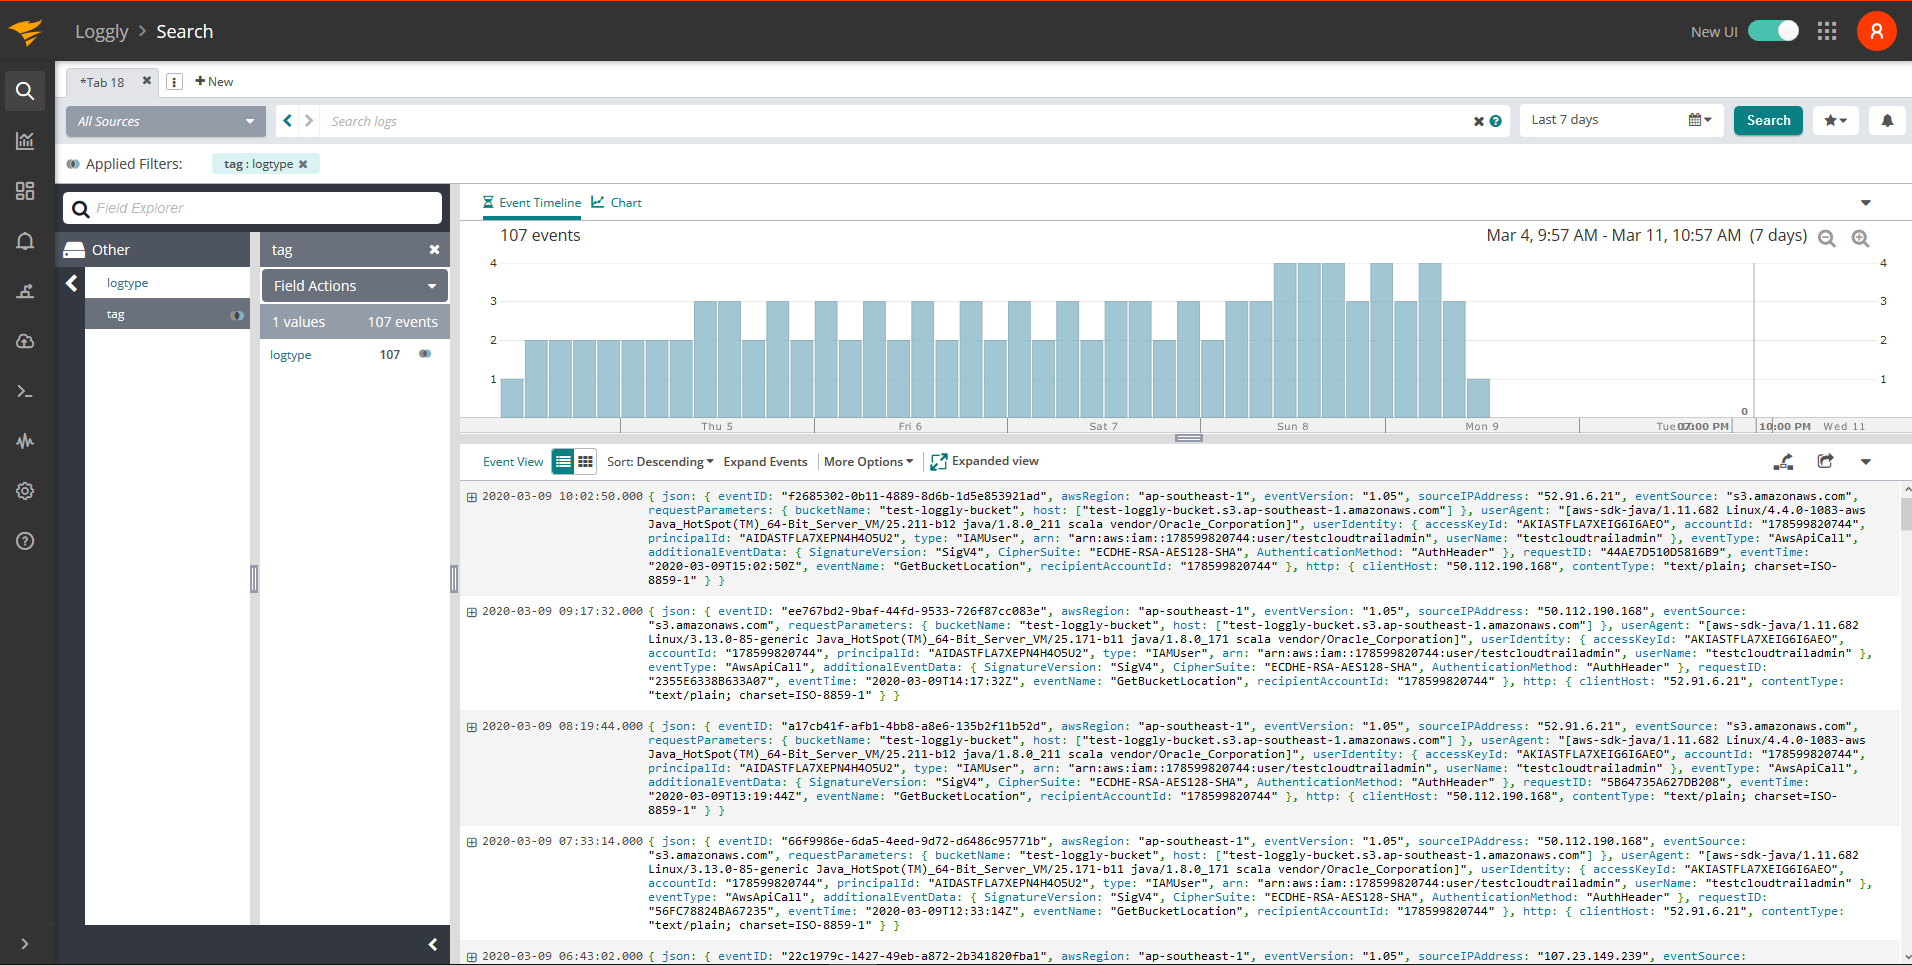
You’ll find all of your CloudTrail logs are fully parsed and ready to be analyzed. Look for the logtype cloudtrail and all other fields are prepended by json., for example, json.sourceIPAddress. Here are a some example searches for you to use:
-
Find the top events within your CloudTrail logs, but don’t include the Describe events:
logtype:cloudtrail NOT json.eventName:describe -
Find who is using Root permissions the most often:
logtype:cloudtrail json.userIdentity.type:"Root"
Look at the left panel to find which sourceIPAddress is generating the most requests.
Troubleshooting AWS CloudTrail Logging
Already configured Cloudtrail, but don’t see events yet?
When you first set up Cloudtrail, Loggly ingests all the Cloudtrail logs that it finds in your bucket. Depending on the volume of your AWS logs, it may take some time to start seeing them (especially most recent events). Feel free to contact the Solarwinds support team if your logs do not appear within 24 hours.
Why is there a spike of Cloudtrail events in the first few days?
By default, Loggly marks each ingested event with the timestamp found in the Cloudtrail information. However, if the timestamp is more than 7 days in the past it will mark the event with the ingestion time instead. This only affects what day/time that event gets attributed to in the UI but does not modify the actual timestamp data in the raw event.
See these related links: AWS Config Logging, AWS S3 Logs, and AWS SNS messages.
