Create and manage rules to determine which database instances are assigned to alerts
When you are creating or updating an alert definition, you can manually select the assigned database instances, or you can use a rule to identify instances that meet one or more conditions. For example, you could create a rule that assigns all production Oracle database instances owned by the eCommerce Business Unit.

If you choose Use rule, you must select an existing rule or create a new rule that identifies the group of instances you want the alert to monitor. As you add or removed monitored instances, or as the characteristics of the instances change (for example, the version is upgraded or custom property values change), DPA automatically updates the list of instances.
View information about existing rules
-
Open the list of existing rules:
-
If you are creating an alert definition, click Use rule.
-
If you are not creating an alert definition:
-
From the DPA menu in the upper-right corner, click Options.
-
Under Monitor Setup > Report, Metrics, & Alerts, click Manage Rules.
The Rules page shows information about each existing rule, such as the name, description, and number of alerts that use the rule.
-
-
-
To find the rule you are interested in:
-
Enter a string in the Search text box to search for terms in a rule name or description.
-
Select an option from the drop-down menu above the list to change the sort order. For example, sort by assigned alerts to locate any unused rules. By default, rules are sorted by name.

-
-
To see additional information about a rule, click the > to the right of "Assigned alerts" on that row.
The Details pane shows information such as the rule definition and the alerts that use the rule.

-
Click Matched Databases to see the database instances that meet the rule conditions.

Create a new rule
-
Open the list of existing rules.
-
Click Create rule.
The Rule builder page opens.
- Enter a unique rule name and, optionally, a description of what instances this rule assigns.
- Under Assign database instance, add the first condition:
- Click
 .
. Select a database property or a custom property.
Select an operator. Available operators include:
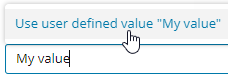
contains The selected property must contain the specified value. does not contain The selected property must not contain the specified value. = The selected property must exactly match the specified value. != The selected property must not match the specified value. <= (Numeric properties only.) The selected property must be less than or equal to the specified value. >= (Numeric properties only.) The selected property must be greater than or equal to the specified value. < (Numeric properties only.) The selected property must be less than the specified value. > (Numeric properties only.) The selected property must be greater than the specified value. Select a value from the drop-down menu, or type a value and click Use user defined value.
Click Add condition.
- Click
- Add other conditions as needed. See the following sections for more information:
-
To see how many instances that meet the rule conditions, click Evaluate rule. Hold the mouse pointer over the number to display the list of instances.

-
Click Save to save the rule and return to the Rules page.
Change the AND operator to an OR operator
When you add an additional condition, the Boolean operator joining the conditions is AND by default. To use an OR operator:
-
Add an additional condition. The connecting operator is AND.

-
Click the AND operator. The available operators are displayed to the right.

-
Click the OR operator. The connecting operator changes to OR.

Group and ungroup conditions
Grouped conditions are surrounded by parentheses, and they are evaluated together. For example, the following rule would identify instances that 1) are either Oracle or SQL Server and 2) have a value of Production for the custom property Deployment Stage.

Group conditions
You can group conditions in either of the following ways:
-
If you have two or more conditions, you can automatically group all existing conditions when you add a new condition. Click the
below the existing conditions.
DPA places parentheses around all existing conditions to group them, and the Rule condition dialog box opens.

-
To group a pair of existing conditions without adding a new condition:
-
Click the operator between the conditions you want to group. Options are displayed on the right.

-
Click (Group). DPA places parentheses around the conditions to group them.

-
Add a condition without grouping existing conditions
If you have two or more conditions, complete the following steps to add another condition without grouping the existing conditions.
-
Hold the mouse pointer over any condition.
-
Click the
to the right of the condition.
The new condition is added below the selected condition, and the existing conditions are not grouped.

Ungroup conditions
-
Hold the mouse pointer over either parenthesis.
-
Click the
 to the right of the parenthesis.
Rearrange conditions
You can change the order of the conditions or move a condition into or out of a group.
-
Hold the mouse pointer over a condition.
-
Click the
 and drag the condition to a different location. As you drag the condition, blue lines indicate where you can drop it.
Edit a condition
-
Hold the mouse pointer over the condition.
-
Click the pencil icon to the right of the condition.

The Rule condition dialog box opens.
-
Change one or more values, and click Edit condition.
Remove a condition
-
Hold the mouse pointer over the condition.
-
Click the trash can icon to the right of the condition.

The condition is removed. If all remaining conditions were grouped, the grouping is removed.
Edit a rule
-
Open the list of existing rules.
-
Select the rule, and click Edit. Or from the Details pane, click Commands > Edit rule.
-
Change any fields. See the previous sections for more information.
-
Click Save to save the rule and return to the Rules page.
Delete a rule
-
Open the list of existing rules.
-
Look at the Assigned alerts value. If any alerts use this rule, open the Details pane and note which ones use it so that you can update the alert definitions.
-
Select the rule, and click Delete. Or from the Details pane, click Commands > Delete.
A confirmation prompt warns you that the rule will be removed from any alert definitions that use it.
-
Click Delete at the confirmation prompt.
The rule is deleted and removed from any alert definitions. The alert definitions now have no instances assigned to them. Edit the alert definitions to choose a different rule or manually assign instances.