OpsGenie
With OpsGenie, you can receive alert notifications via email, SMS, mobile push, or phone call. You can then manage the alert life cycle (acknowledge, take/assign ownership, close, etc) through the OpsGenie web UX or using their mobile device app.
OpsGenie Information
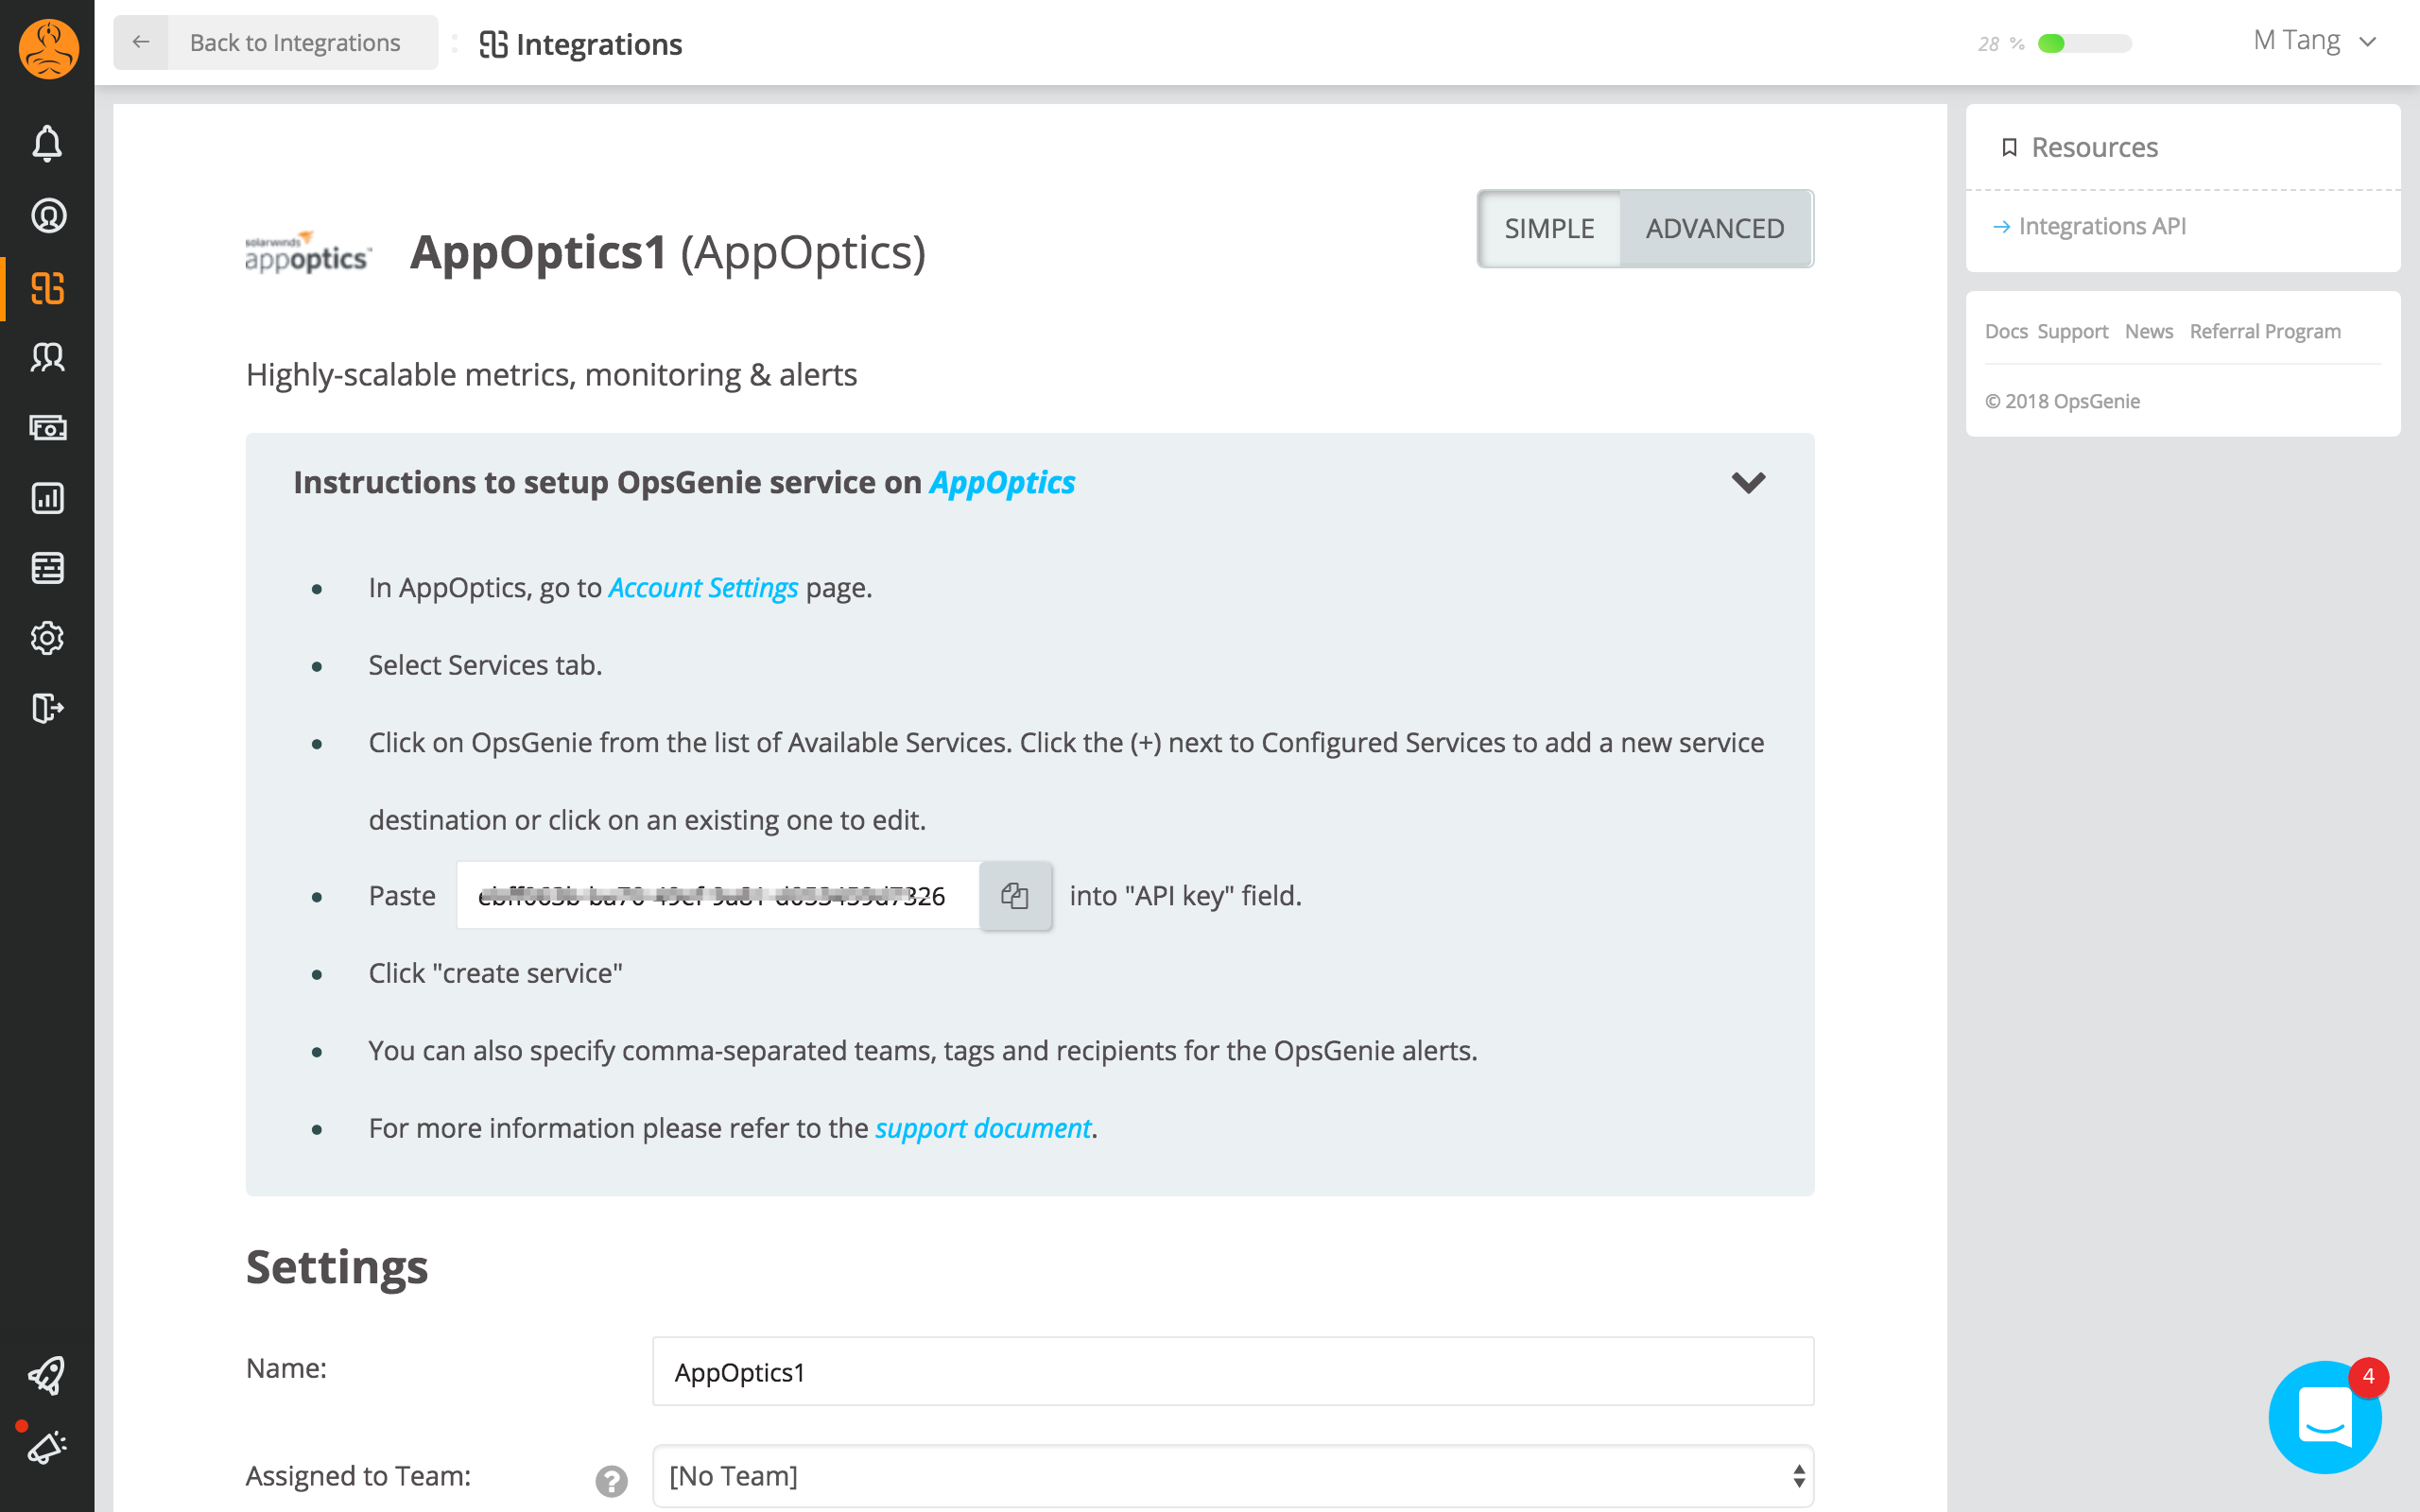
- In your OpsGenie account go to the OpsGenie AppOptics Integration page.
- Specify who is notified of AppOptics alerts using the Teams field. Auto-complete suggestions are provided as you type.
- Copy the integration API Key. This is used in the AppOptics configuration.
- Save the Integration.

AppOptics Configuration
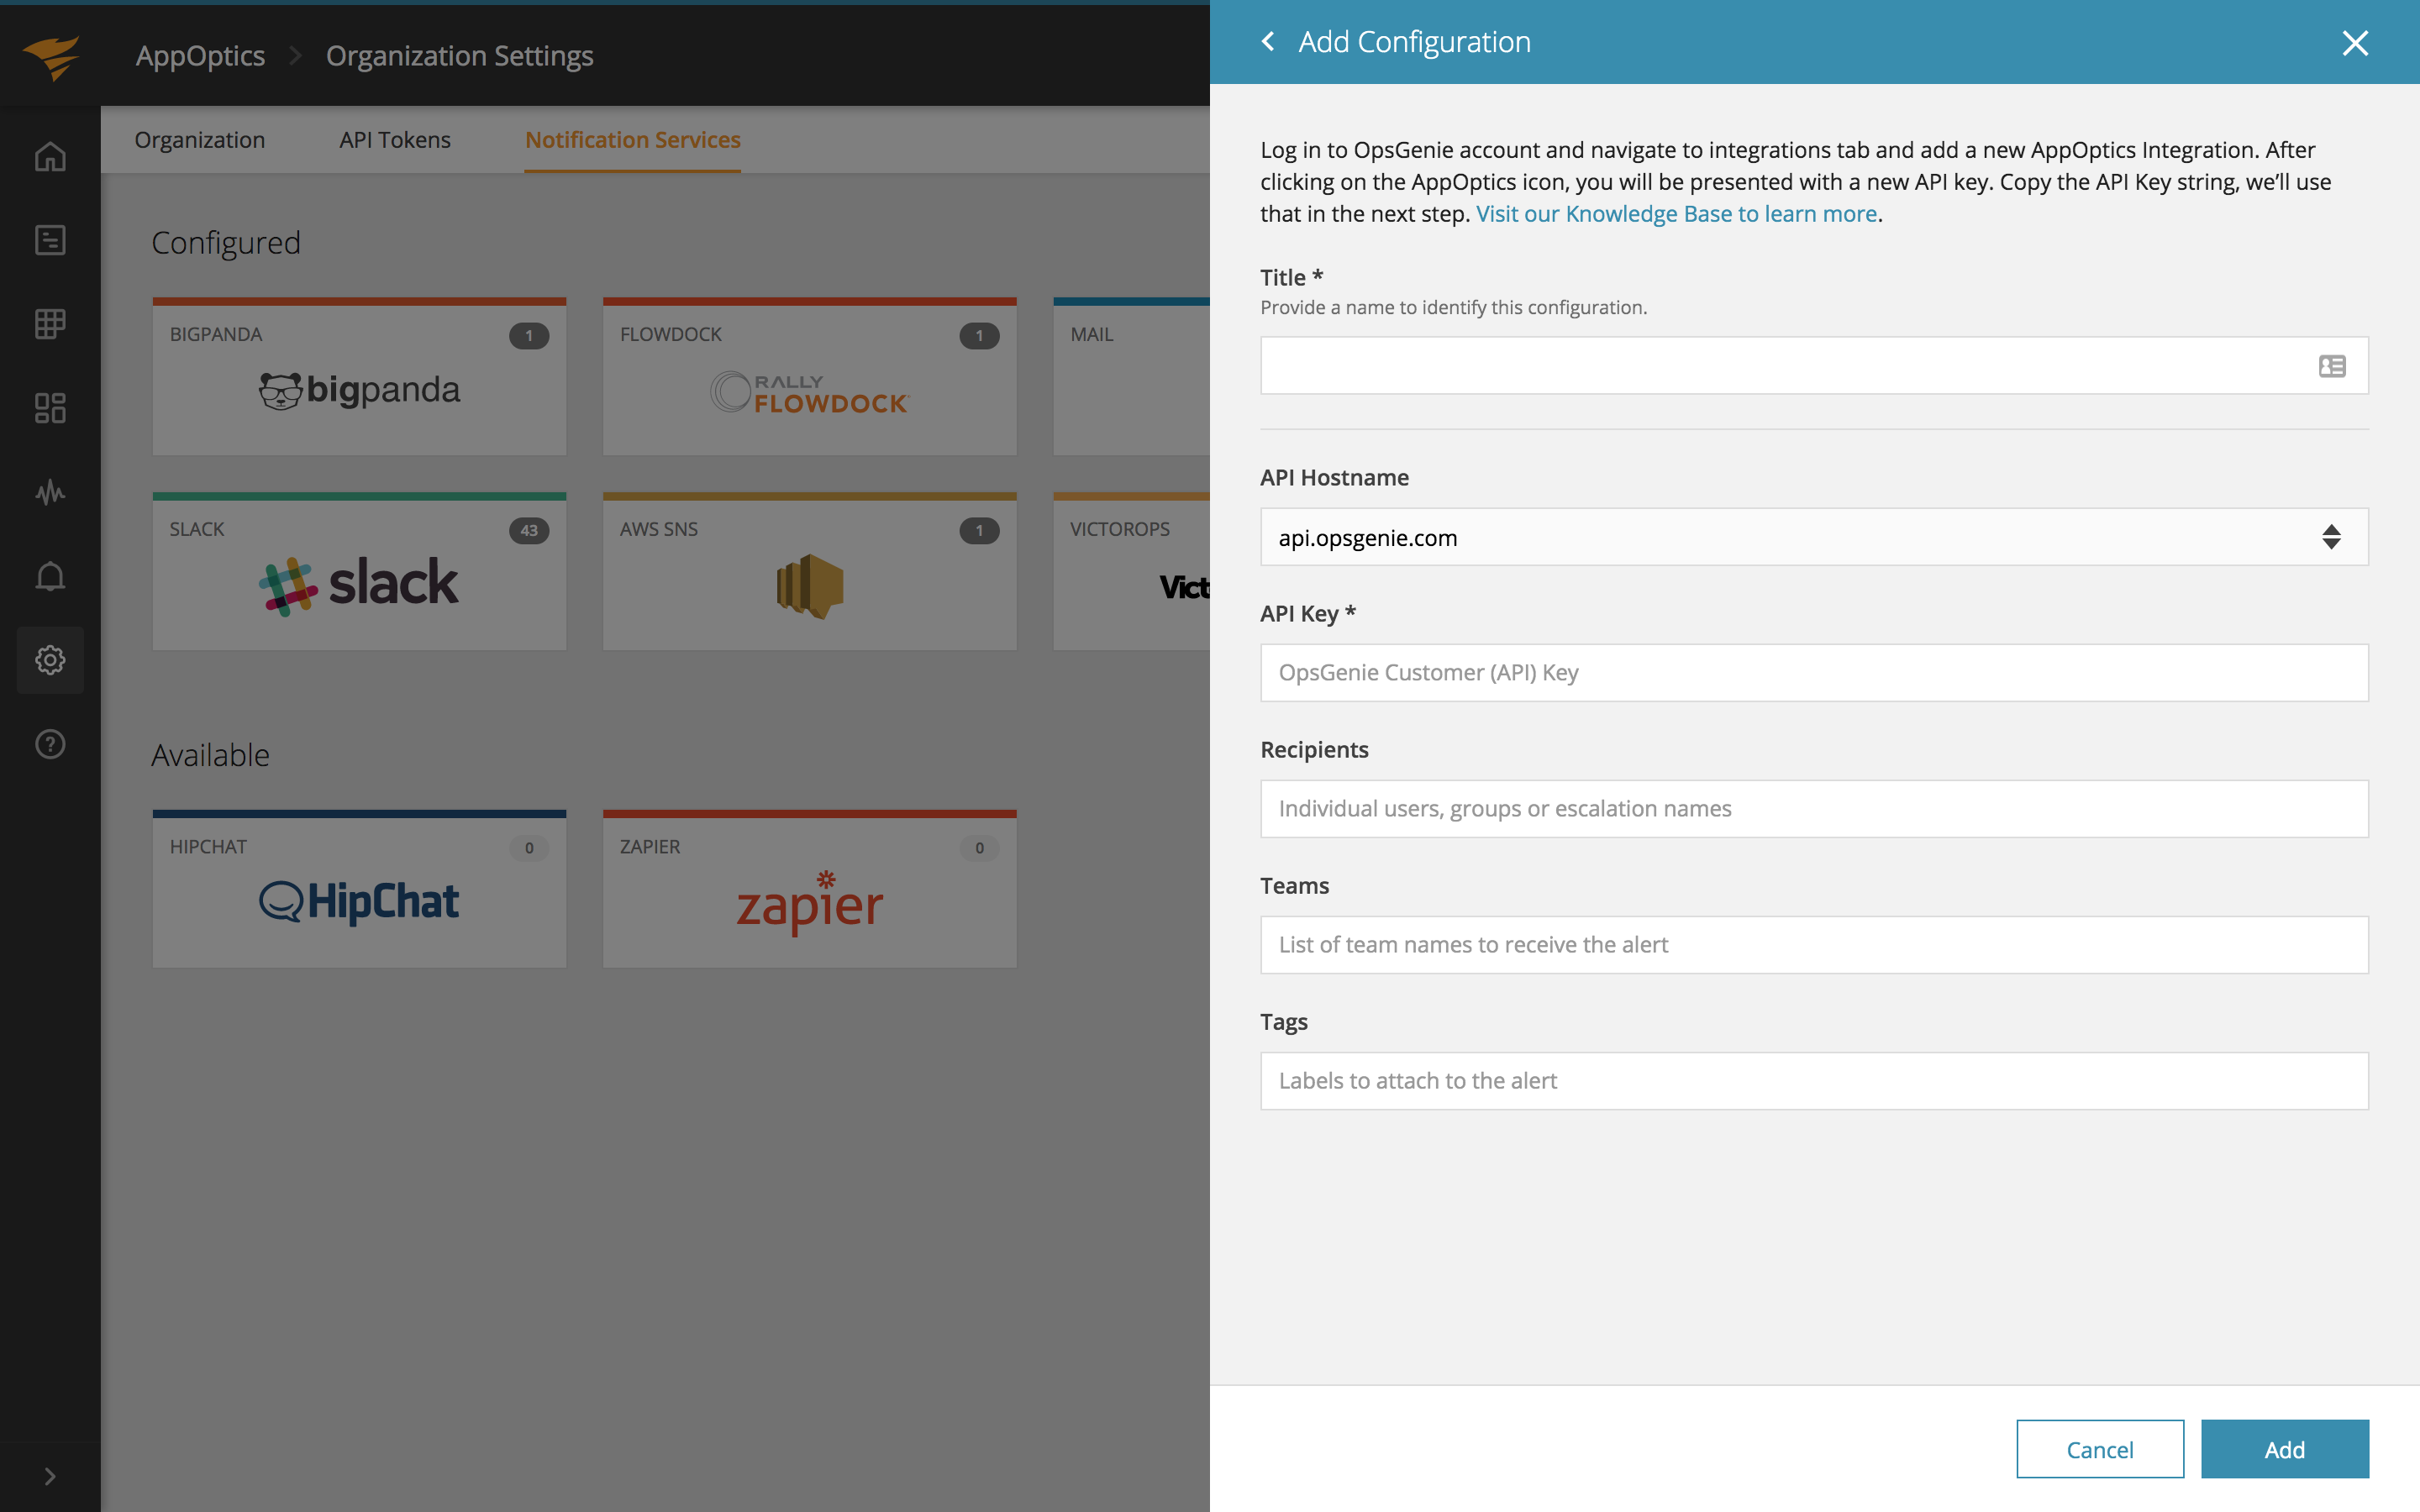
With your OpsGenie information in hand, navigate to the Settings section on the navigation menu to the left and choose Notification Services. Click on the OpsGenie integration, then on the "Add Configuration" button.

Enter the OpsGenie configuration details:
- Title: Give the service destination a name.
- API Hostname: Hostname for US or Europe.
- API Key: The API Key you copied from OpsGenie (REQUIRED).
- Recipients: A comma separated list of email addresses to notify. If not specified this defaults to "all". (OPTIONAL)
- Teams: A comma-separated list of OpsGenie teams to notify. (OPTIONAL)
- Tags: A comma-separate list of tags to apply to alerts sent to this service. (OPTIONAL)

Creating Alerts
After setting up the service you can tie alerts to a service destination. You can read more about creating alerts in the Alerts knowledge base article.
Alert Notifications
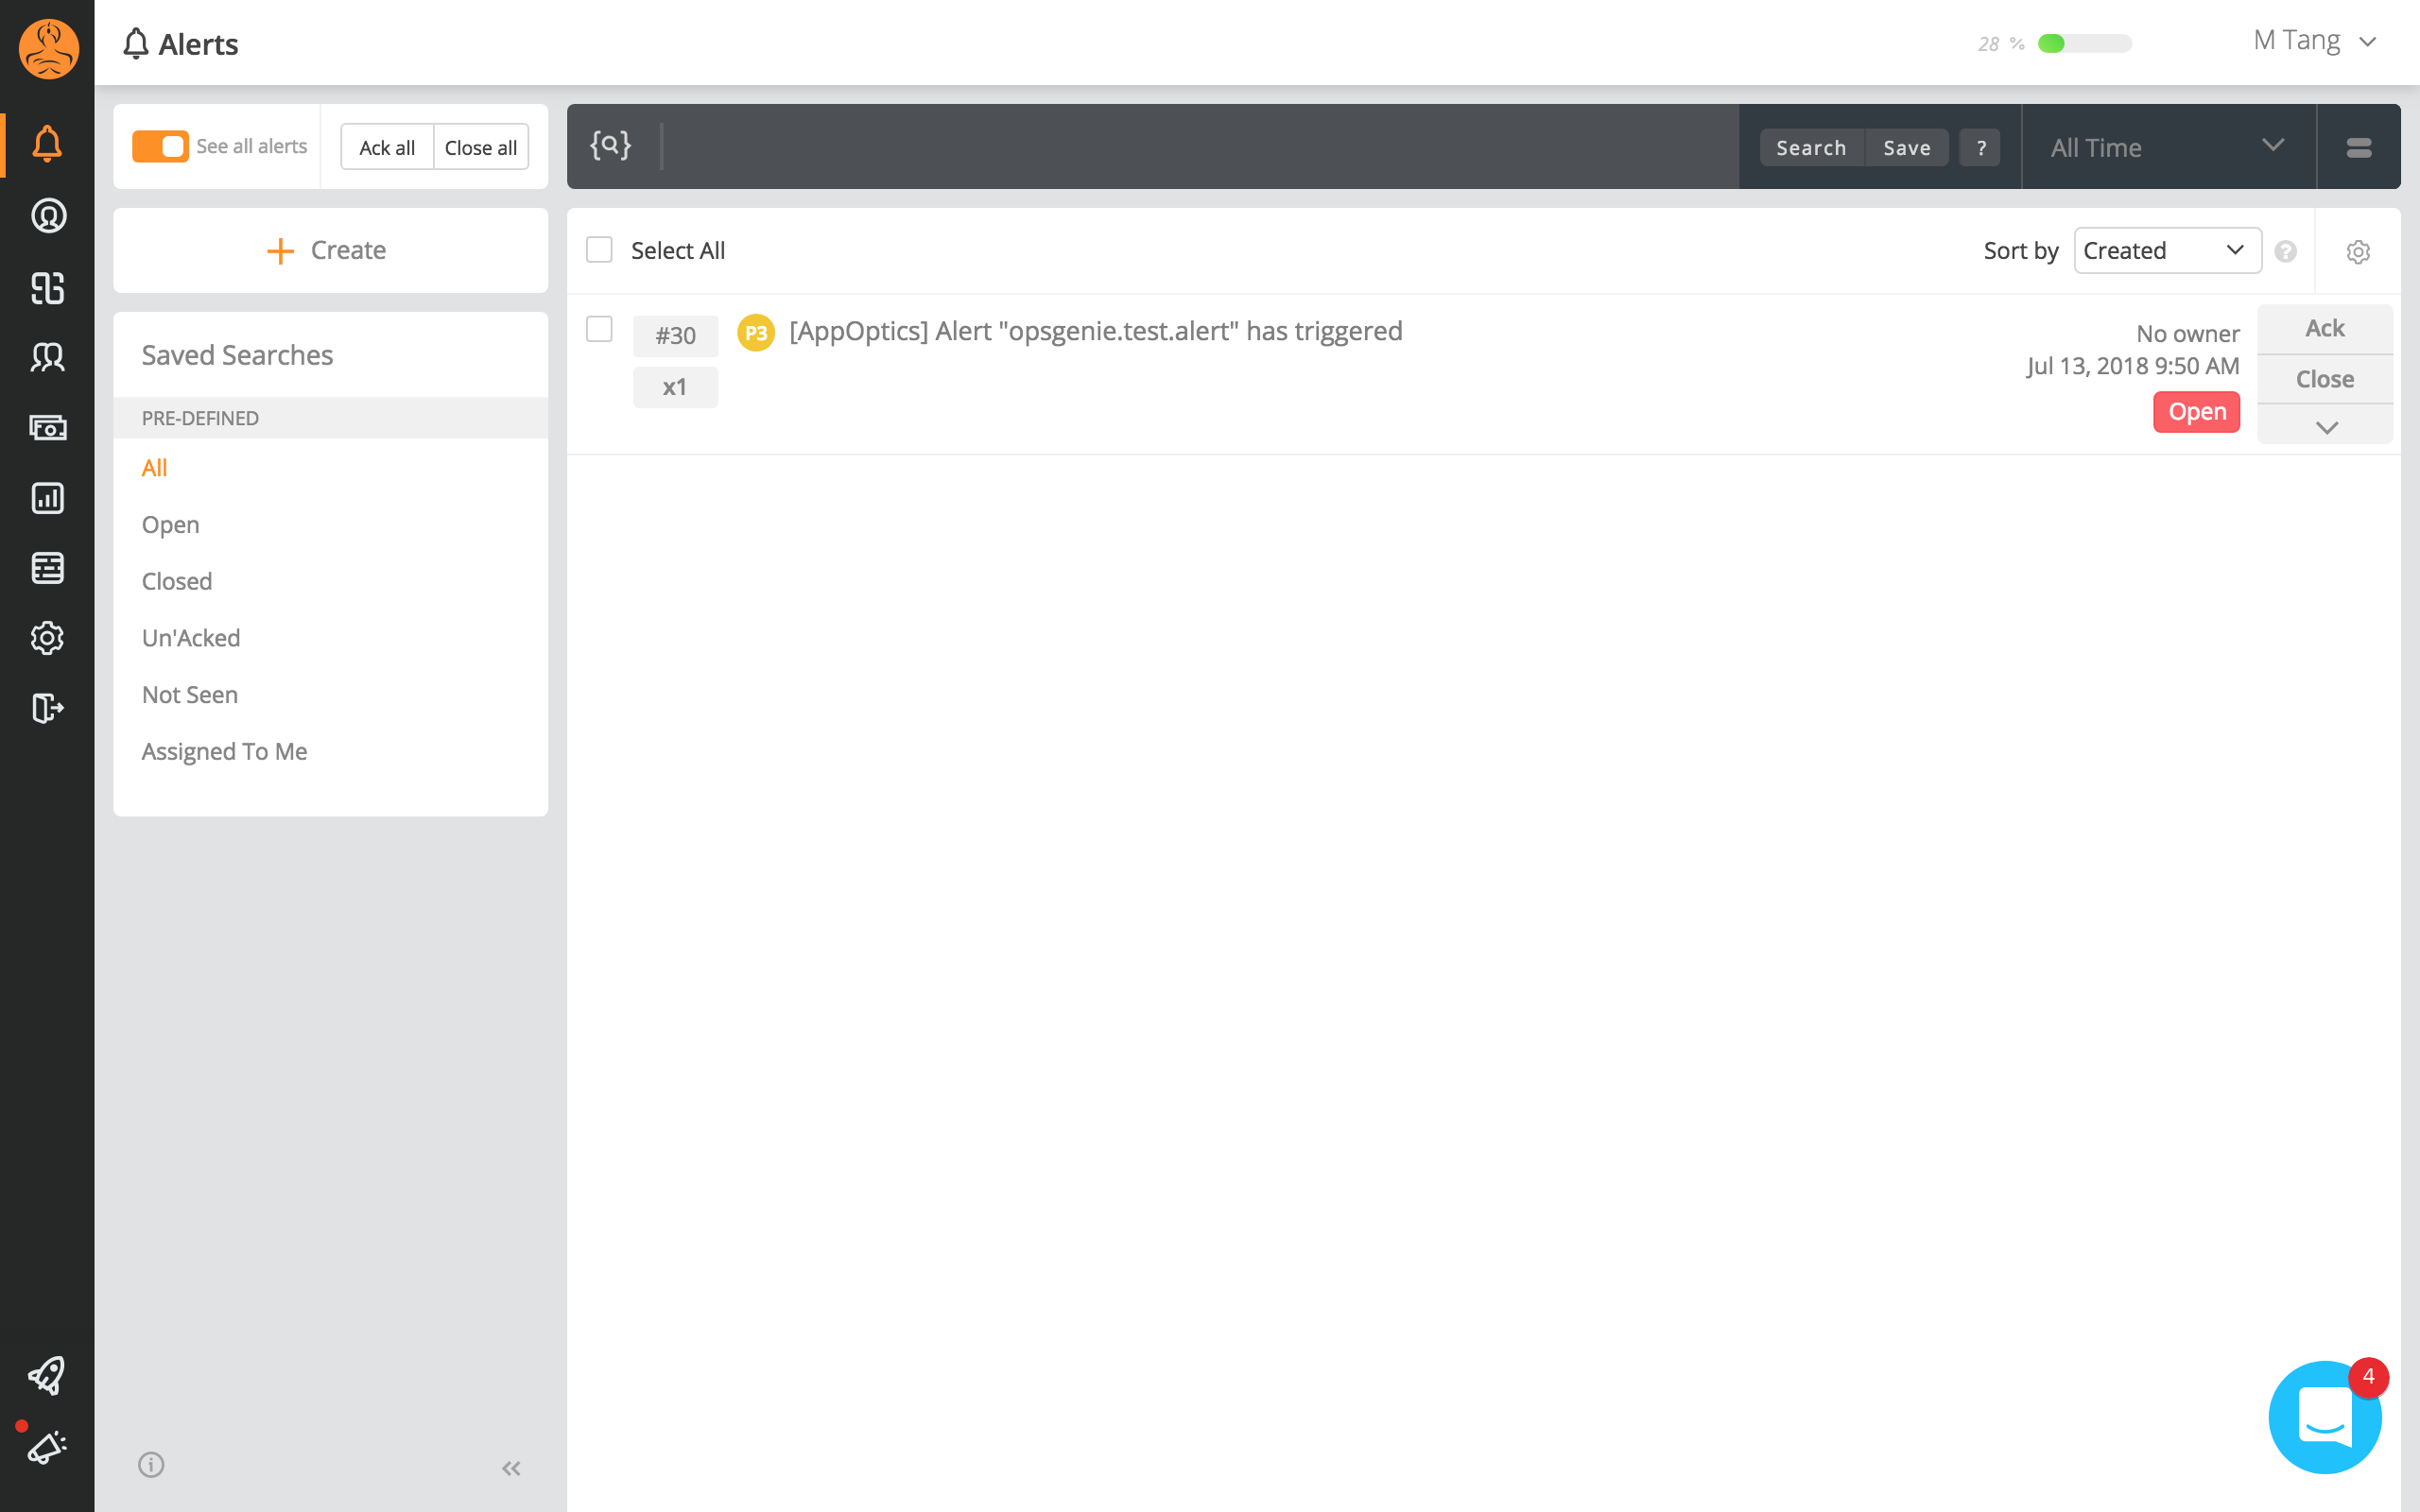
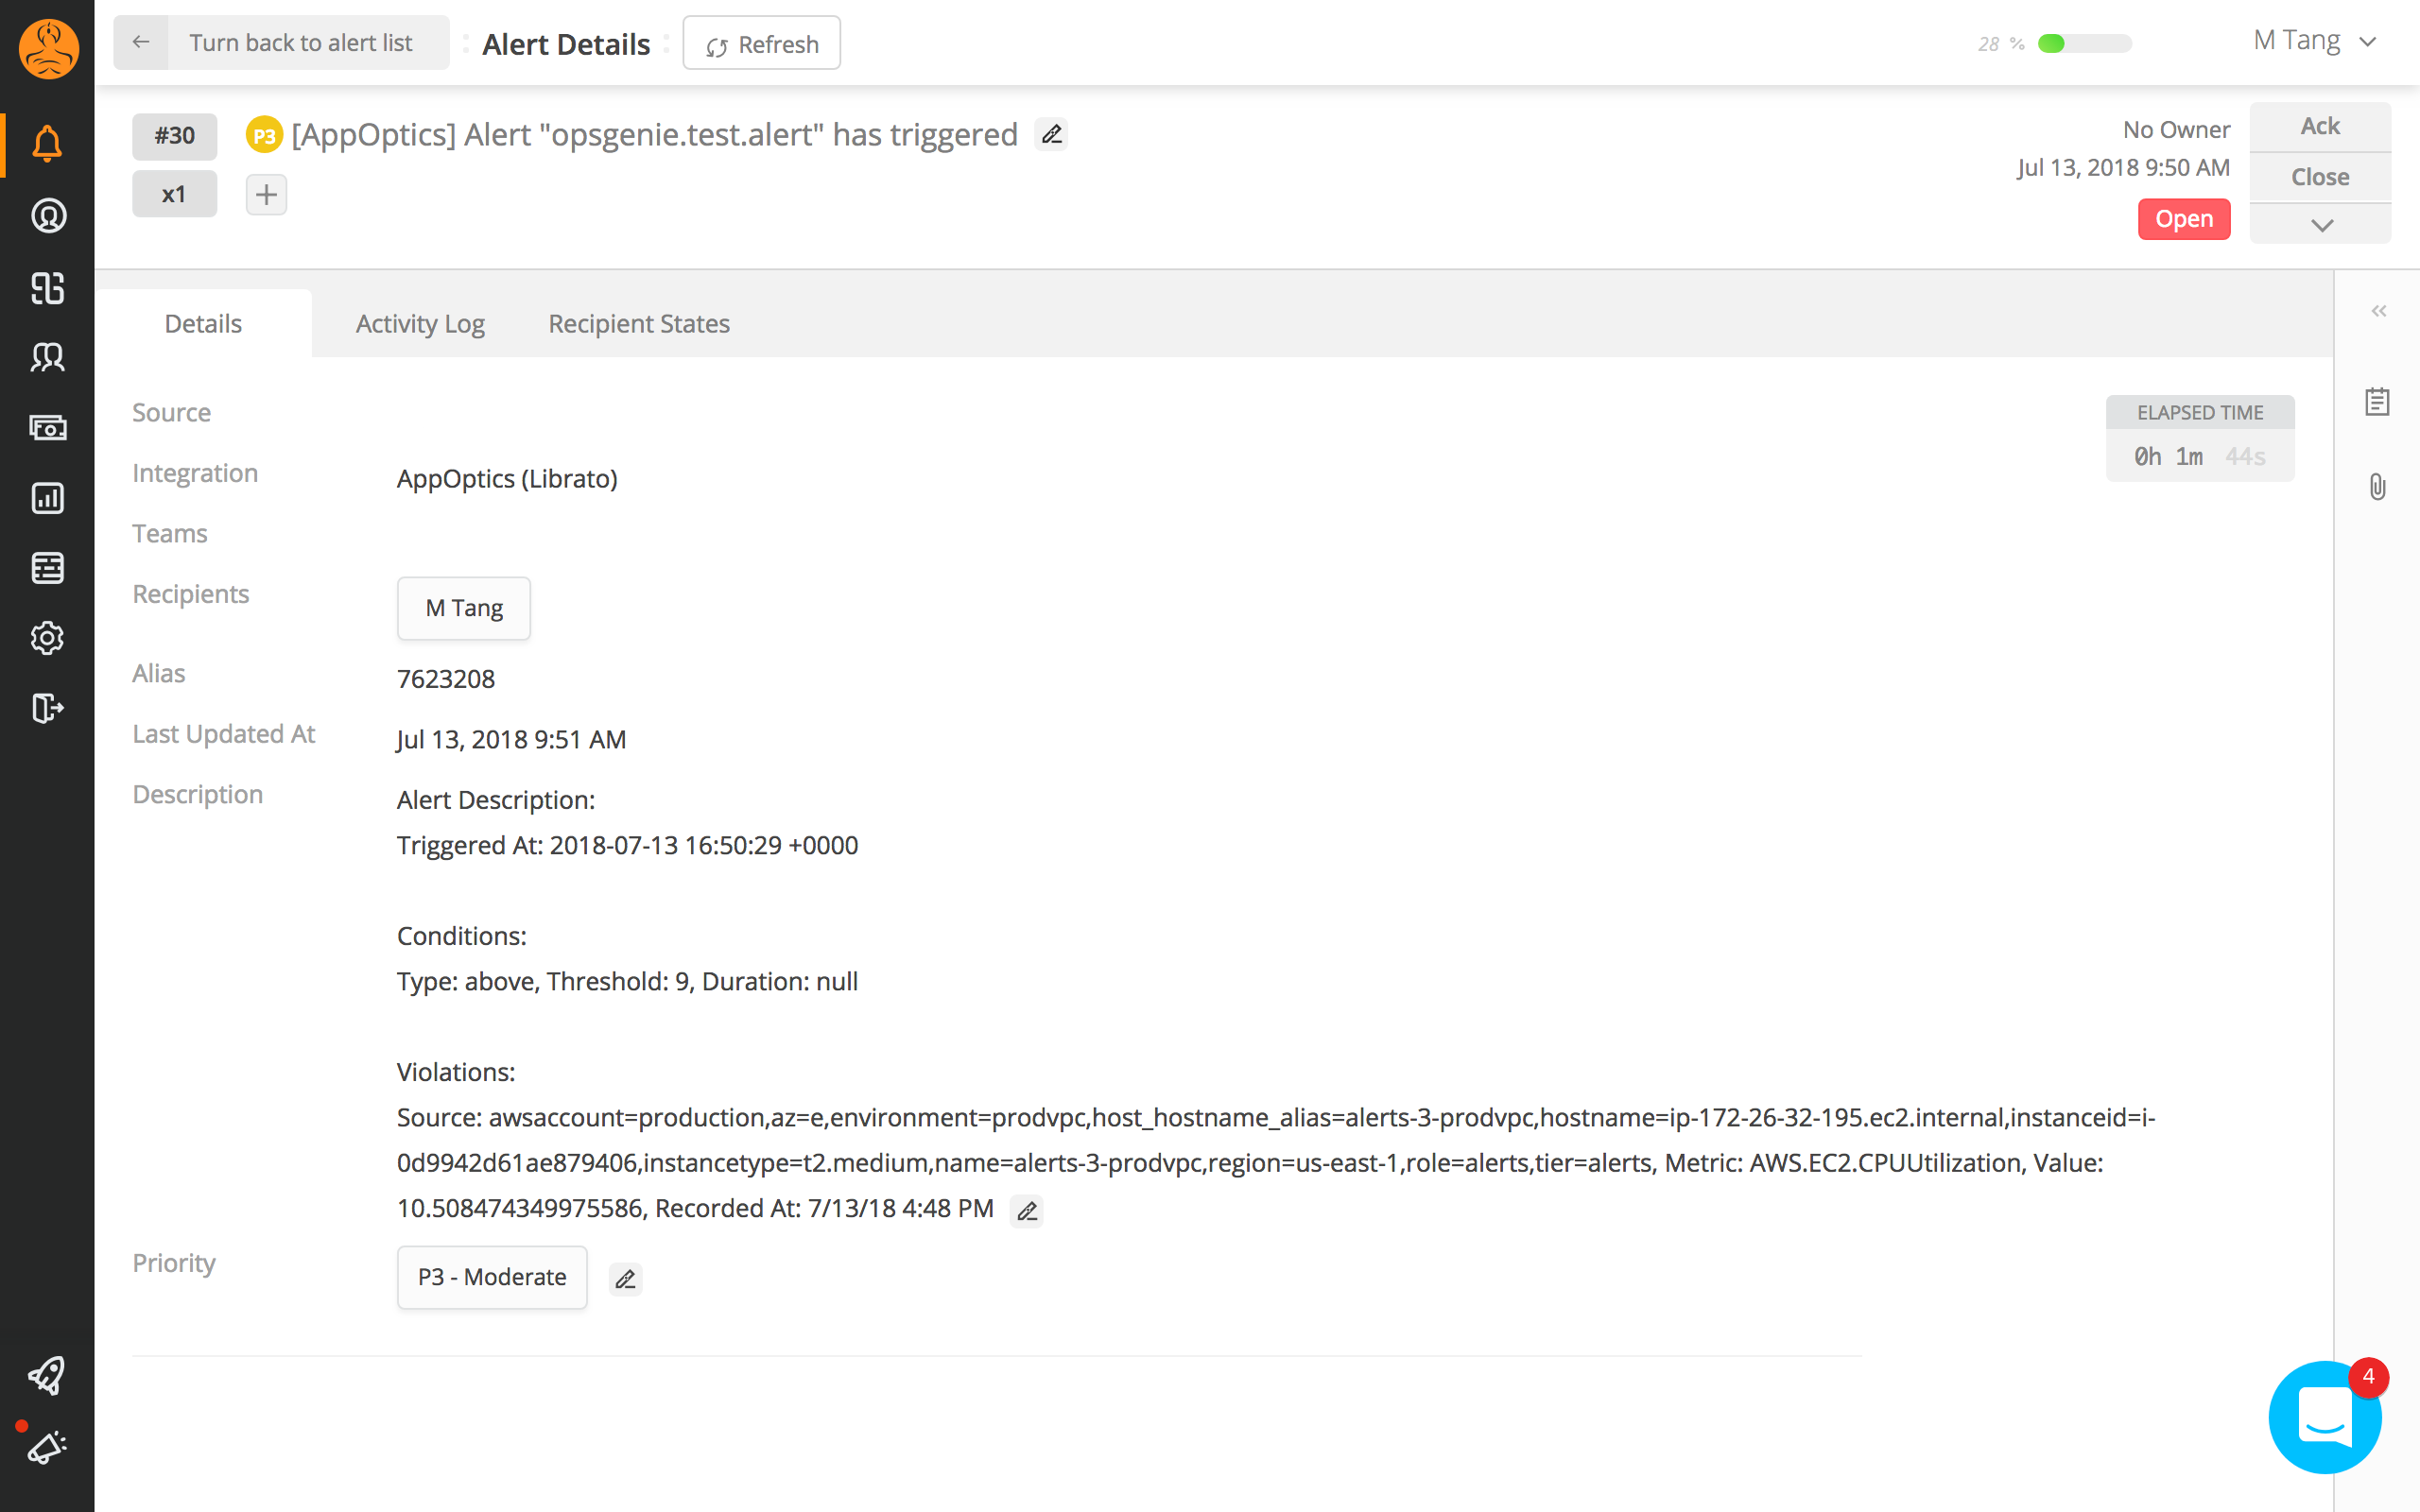
When an alert fires the payload is sent to OpsGenie.

Clicking on the alert will bring up a page with more alert details and links to manage the alert's life cycle:

Navigation Notice: When the APM Integrated Experience is enabled, AppOptics shares a common navigation and enhanced feature set with other integrated experience products. How you navigate AppOptics and access its features may vary from these instructions.
