Install Patch Manager in a stand-alone deployment
SolarWinds strongly recommends that you install the SolarWinds Platform on a server that is neither public, nor internet-facing. To learn about best practices for configuring your SolarWinds Platform installation securely, see Secure Configuration for the SolarWinds Platform.
These instructions describe how to install Patch Manager on a dedicated server with Windows Server Update Services (WSUS) enabled on a separate server.
See the Patch Manager Administrator Guide for advanced deployment scenarios and instructions for integrating Patch Manager with System Center Configuration Manager (SCCM).
To complete the installation:
- Use the Local Administrator account to install the software. The domain account is subject to your domain group policies, which can block the installation tasks.
- If you are installing Patch Manager using a remote SQL Server instance, run the installation file as an existing, fully-qualified domain account with sysadmin rights on the SQL Server database server.
Before you begin
-
Review the pre-flight checklist.
This checklist helps you:
- Verify that system requirements are met, all required software is installed, and required roles and features are enabled.
- Gather the information required to complete the installation.
- Prepare the Patch Manager server to ensure it is set up and configured for a Patch Manager deployment.
-
Install the WSUS server on a separate server in your deployment running a supported Windows Server operating system. Record the host server name for use in a later step.
You can also install the WSUS server after you complete the installation.See the Microsoft technical documentation website for instructions.
See Requirements for a list of supported Windows Server operating systems.
-
Select and configure the SQL database that meets your deployment requirements.
- Set up and configure the managed systems to receive updates from the WSUS server.
Download the installation files and license from the Customer Portal
- Go to the SolarWinds Customer Portal.
- Log in using the SolarWinds customer ID (SWID) and password issued to your organization.
- Click Downloads > Download Product.
- On the Product Downloads page, click the drop-down menus and select Patch Manager and the corresponding license.
-
Under Patch Manager MMC Downloads, download the Patch Manager software.
For a new installation, download the Patch Manager full package.
To update your existing installation, download Patch Manager server and console upgrade package.
- Follow the prompts on the screen to complete the download.
-
Run the installer.
- Double-click the installation package.
- Extract the contents of the downloaded installation ZIP file to your server.
-
Double-click the installer.
You may need to verify if the installation file is blocked. To check, right-click the file and select Properties. If required, click Unblock, and then click OK.
The installer verifies that the required Microsoft .NET Framework version is installed on your server. If required, the installer downloads the software for you.
-
If prompted, click Install to install Microsoft .NET Framework. Otherwise, go to the next step.
Downloading and installing Microsoft .NET Framework can take more than 20 minutes. If your system reboots, run the installation again.
-
Select the following options, and click Next:
- Install the Patch Manager server components
- Install the Patch Manager administration console
-
If prompted, enter your email address in the SolarWinds Registration window, and then click Continue.
This registration is for receiving product information from SolarWinds and is required to continue the SolarWinds Patch Manager installation.
The installer extracts the files and initiates the Patch Manager Setup wizard.
Complete the Patch Manager Setup Wizard
-
In the Welcome window, click Next.
- If you accept the terms of the license agreement, select the checkbox and click Next.
-
Accept the default destination (recommended) or select another location, and click Next.
-
Click Next to copy the program files to your system.
This process may require several minutes to complete.
-
When prompted, click Finish to exit the Setup Wizard and open the Configuration Wizard.
Complete the Patch Manager Configuration Wizard
- In the Configuration Wizard Welcome window, click Next.
-
Select Primary Application Server as the server role, and click Next.

-
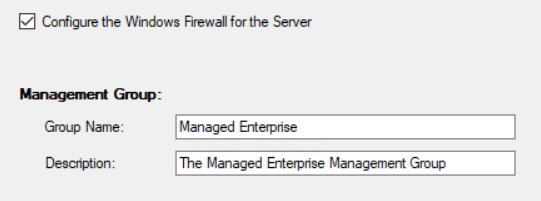
Accept the default server settings, and click Next.
-
Enter a password with local admin rights to the Patch Manager server. Record the password and machine name (for example,
AUS-CLD-DPT-011) and store them in a secure location. This password is used to log in to the Patch Manager Console.If the SQL server is remote, enter the user name and password for your domain account.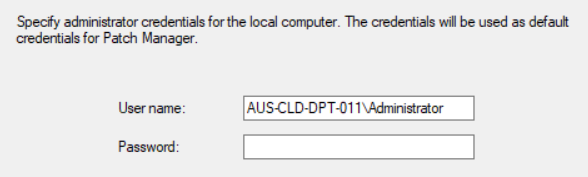
-
Click Next.
-
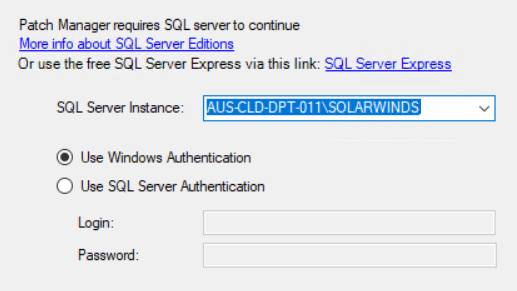
Click the drop-down menu and select the SQL Server instance of the Patch Manager database. Click More info about SQL Server Editions for information about all available SQL Server options.
If you choose SQL Server Express as your database, click this option link to download and install the software from the Microsoft Download Center.
-
Select Use Windows Authentication to log in to the database or select Use SQL Server Authentication and enter the login and password credentials.
-
Click Next.
-
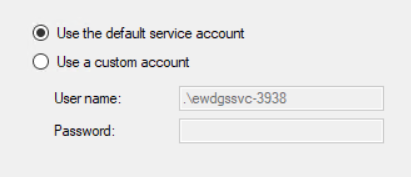
Select the account used to run the Patch Manager Service. If you decide to use a custom account, select this option and enter your user name and password.
-
Click Next.
-
If your Patch Manager deployment is not integrated with the SolarWinds Platform, deselect the Enable Web API checkbox and go to the next step.
If your Patch Manager deployment is integrated with the SolarWinds Platform, set up the Web API to connect the Patch Manager Service with the Patch Manager Web Module on the SolarWinds Platform server.
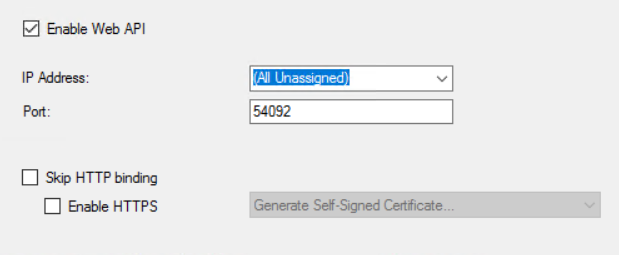
To set up the Web API with an HTTP connection:
-
Select the Enable API checkbox to enable the connection.
-
Click the IP Address drop-down menu and select the IP address of the Primary Application Server.
-
Select the Skip HTTP bonding checkbox to prevent any changes within the Web API. The configuration wizard will disable the IP address, port, and SSL certificate options.
To set up the Web API with an HTTPS connection:
-
Select the Enable API checkbox to enable the connection.
-
Click the IP Address drop-down menu and select the IP address of the Primary Application Server.
-
Deselect the HTTP bonding checkbox.
-
Select the Enable HTTPS checkbox to create a secure HTTPS connection and generate a self-signed certificate. The Port field changes to 54093, which provides a secure connection. The Generate Self-Signed Certificate field is now active. When you click Next, the wizard generates a self-signed certificate for signing connection packages.
You will install the self-signed certificate in a later section.
-
-
Click Next.
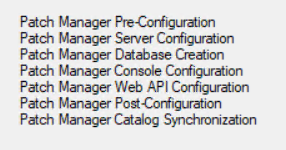
The Configuration Wizard lists all items that will be configured for your installation. For example:
-
Click Next to continue.
The wizard configures your selections in the deployment and synchronizes your Patch Manager third party catalog.
 This process may take several minutes to complete.
 -
In the Success screen, select the checkbox to run the Patch Manager administration console after the wizard is finished.

-
Click Finish to exit the Configuration Wizard and set up the Patch Manager Console.
Set up the Patch Manager Console
-
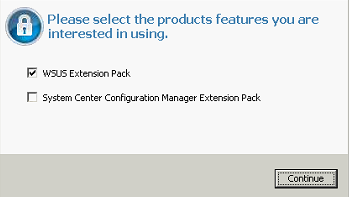
After the console opens, select WSUS Extension Pack. If you plan to run SCCM in your deployment, select System Center Configuration Manager Extension Pack.
-
Click Continue.
-
In the Welcome to Patch Manager screen, click Cancel. You can return to this screen at a later time.
-
In the Actions column, click Connect to an Application Server.

-
In the Connect to Application Server window, review the connection information and make any changes as needed. Click Resolve to refresh the credentials.
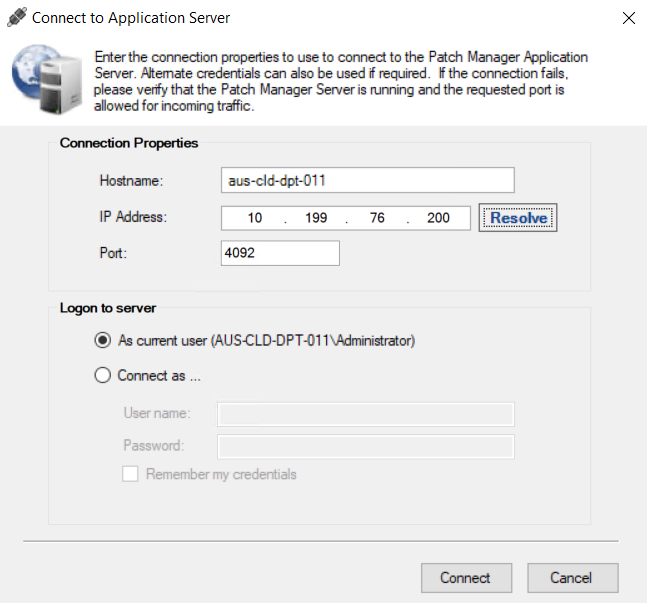
-
Click File > Exit.
-
Log in to the Patch Manager Console.
By default, the installer adds a shortcut to the desktop. You can also log in by clicking the Windows menu and selecting SolarWinds > SolarWinds Patch Manager Console.
-
In the Welcome to Patch Manager screen, click Cancel. You can return to this screen at a later time.
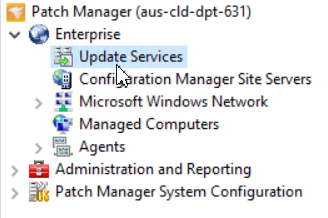
-
In the left navigation menu, expand Enterprise, right-click Update Services, and select Add or Modify WSUS Server.
-
In the Server Name field, enter the name of the WSUS server.

-
Click Resolve. The remaining fields auto complete.
The default port is 8530 (HTTP) or 8531 (HTTPS). In the following example, the selected port is 8531. Make sure the selected port is correct for your configuration.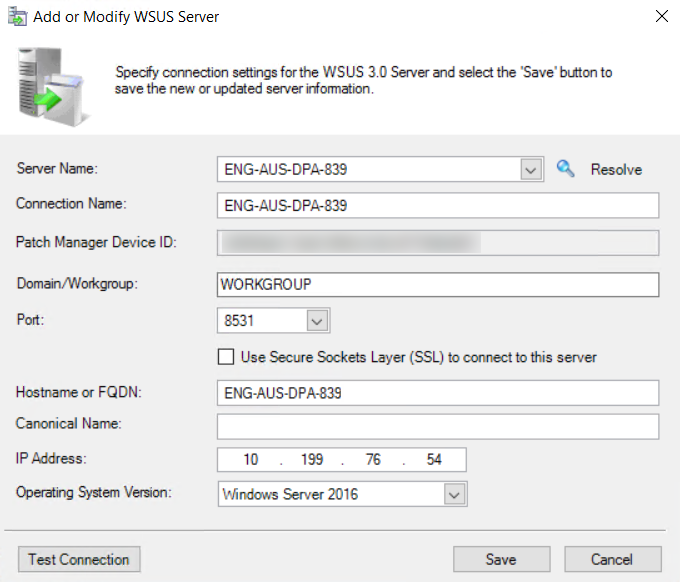
-
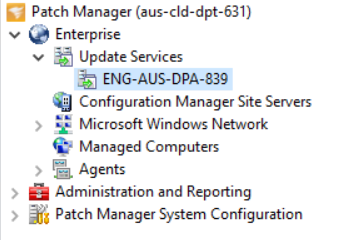
Click Save.
The WSUS server credentials are saved, and the WSUS server name displays in the navigation menu under Update Services.
Locate the Patch Manager database
-
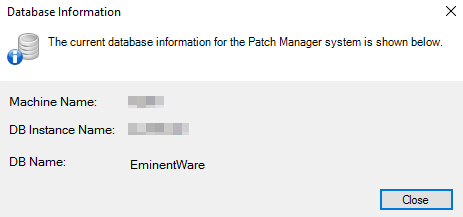
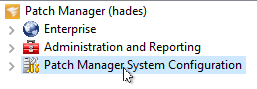
In the navigation menu, select Patch Manager System Configuration.
-
In the Patch Manager System Tasks pane, double-click Database Information.
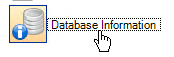
The Database Information dialog box displays without the machine, database, and database instance names.