Logstash Logs Via Syslog
Loggly provides the infrastructure to aggregate and normalize log events so they are available to explore interactively, build visualizations, or create threshold-based alerting. In general, any method to send logs from a system or application to an external source can be adapted to send logs to Loggly. The following instructions provide one scenario for sending logs to Loggly.
Logstash logs can easily be sent to Loggly via Syslog which is more reliable. We will automatically parse the logs sent by Logstash in JSON format. Although you can send logs from any of Logstash’s inputs, we show one example showing a standard Logstash input. These instructions were tested with versions 5.x, 6.x and 7.x of Logstash. For alternatives, please see the Advanced Options section below.
Logstash Logging Setup
1. Configure Logstash To Output To Syslog
Download the logstash tar.gz file from here.
Unzip and Untar the file
sudo tar -xzvf logstash-7.4.2.tar.gz
Move the folder to /opt/
sudo mv logstash-7.4.2 /opt/
Go to the folder and install the logstash-output-syslog-loggly plugin
cd logstash-7.4.2
sudo bin/logstash-plugin install logstash-output-syslog-loggly
Create a logstash-loggly.conf file and add it to the root folder of the Logstash directory. We included a source field for logstash to make it easier to find in Loggly.
vim logstash-loggly.conf
If you want to use the NON-TLS syslog configuration, which logs over the port 514, add the following to the file:
input{
  file{
    path => "FILENAME"
    start_position => beginning
  }
}
filter{
  mutate{
    add_field => ["timestamp", "%{@timestamp}"]
  }
}
output{
  syslog {
    host => "logs-01.loggly.com"
    codec => "json"
    port => 514
    protocol => "tcp"
    ssl_verify => "false"
    rfc => "rfc5424"
    key => "TOKEN"
    pen => 41058
  }
}
If you want to use the TLS configuration, which logs over the secure 6514 port, add the following to the file:
input{
  file{
    path => "FILENAME"
    start_position => beginning
  }
}
filter{
  mutate{
    add_field => ["timestamp", "%{@timestamp}"]
  }
}
output{
  syslog {
    host => "logs-01.loggly.com"
    codec => "json"
    port => 6514
    protocol => "ssl-tcp"
    ssl_verify => "false"
    rfc => "rfc5424"
    ssl_cacert => "/opt/logstash/logs-01.loggly.com_sha12.crt"
    ssl_cert => "/opt/logstash/logs-01.loggly.com_sha12.crt"
    ssl_key_passphrase => false
    ssl_key => "/opt/logstash/logs-01.loggly.com_sha12.crt"
    key => "TOKEN"
    pen => 41058
  }
}
Put this file in the root folder of the logstash directory.
Replace:
- FILENAME: enter the filename, with absolute path, of the logs are to be monitored
- TOKEN: enter your customer token from the source setup page
- SSL CERTIFICATE: you can get the certificate from here. Either download the certificate in the working logstash directory or update the certificate path in the TLS configuration. Please note that you have to replace the correct path for all three ssl_cacert, ssl_cert and ssl_key values.
2. Sending Logstash Logs to Loggly
Run Logstash to send the files to Loggly. This command will run it in the background. Please run it inside the root folder for Logstash.
sudo bin/logstash -f logstash-loggly.conf &
3. Verify Logstash Events
Search Loggly for events with the Logstash tag in json.source field over the past 20 minutes. It may take a few minutes to index the event. If it doesn’t work, see the troubleshooting section below.
tag:loggly-syslog
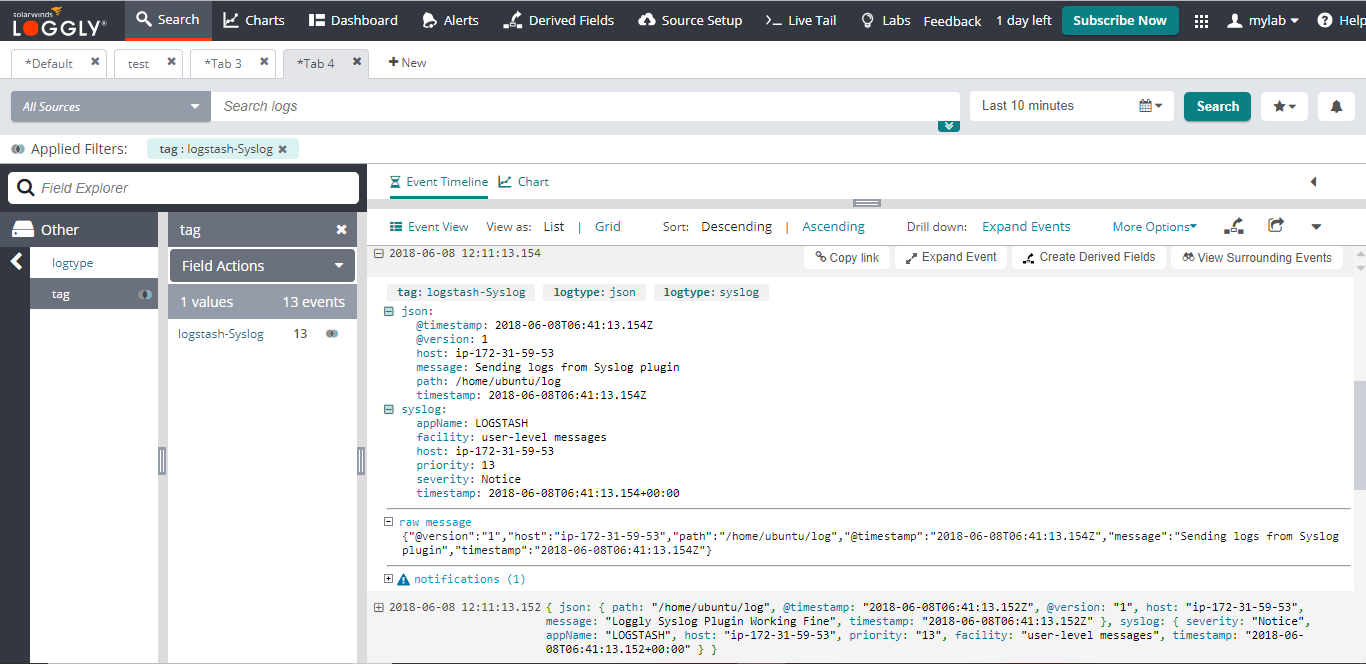
Click on one of the logs to show a list of JSON fields (see screenshot below). If you don’t see them, please check that you are using one of our automatically parsed formats.
Advanced Logstash Logging Options
- Contrib-plugin – Extended contrib plug-ins for Logstash
- Search or post your own Logstash logging or Logstash log types questions in the community forum.
Troubleshooting Logstash Logs
If you don’t see any data show up in the verification step, check for these common Logstash logging errors.
How to check:
- Wait a few minutes in case indexing needs to catch up
- Check to see if the logstash-loggly.conf is properly created and placed in the proper location. It should be in the root of the logstash folder downloaded from the web
- Check if you are running commands in the proper location, you should be inside the root of the logstash folder downloaded from the web
- Check if the file path provided in the logstash-loggly.conf file is correct
- You can’t send JSON data to the current Loggly output plugin because it escapes the data before inserting it into the message. You can fork and modify it as needed.
- Run "sudo tcpdump dst logs-01.loggly.com and port 80″ to verify HTTP events are being sent to Loggly
- If you are using logstash version 5.x and greater, make sure you have at a minimum, java 8 installed and the environment variable set properly.
Still Not Working?
- Search or post your own Logstash question in the community forum.
The scripts are not supported under any SolarWinds support program or service. The scripts are provided AS IS without warranty of any kind. SolarWinds further disclaims all warranties including, without limitation, any implied warranties of merchantability or of fitness for a particular purpose. The risk arising out of the use or performance of the scripts and documentation stays with you. In no event shall SolarWinds or anyone else involved in the creation, production, or delivery of the scripts be liable for any damages whatsoever (including, without limitation, damages for loss of business profits, business interruption, loss of business information, or other pecuniary loss) arising out of the use of or inability to use the scripts or documentation.