Create the custom ticket fields
The Ticket Custom Fields screen allows you to create custom tickets fields for your request types. When you are finished, you can attach one or more custom fields to a request type.
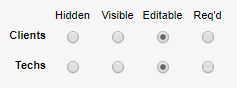
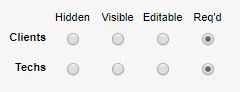
When you open a new ticket and select a request type, any custom fields attached to that request type display in the ticket under Custom Fields. The custom field can be hidden, visible, editable, or required for techs or clients based on your needs.
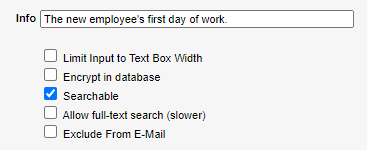
You can add a pop-up message to the custom field by entering message text in the Info field. When you add text to this field and click Save, an Information ![]() icon displays in the custom field. When a tech or client (based on your assigned permissions) clicks this icon, the pop-up message displays next to the field.
icon displays in the custom field. When a tech or client (based on your assigned permissions) clicks this icon, the pop-up message displays next to the field.
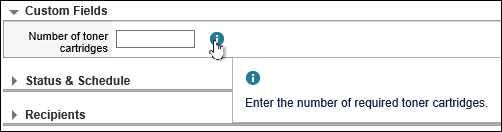
The ![]() icon displays next to each custom field in the Ticket Custom Fields window that is configured with a pop-up message.
icon displays next to each custom field in the Ticket Custom Fields window that is configured with a pop-up message.

The following table lists all custom fields you can add to your tickets. These custom fields display under Custom Fields in the ticket.
| Field | Description |
|---|---|
| Text |
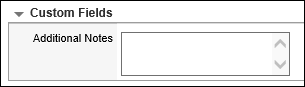
Creates a text box for 80 characters and up to 15 lines of text. For example, you can create a custom text field called Additional Notes and attach the custom field to any request type so a tech or client can add additional ticket information.
|
| Numbers |
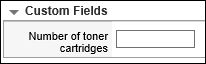
Creates a text box for 80 characters and up to 15 lines of text or numbers. For example, you can create a custom number field called Toner Cartridges and attach the custom field to the Printer/Toner request type so the tech or client can indicate how many toner cartridges are requested.
|
| Currency |
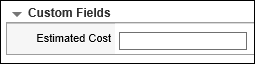
Creates a text box for 80 characters and up to 15 lines of text or numbers. For example, you can create a custom currency field called Estimated Cost and attach the custom field to a Hardware request type. This provides a quick reference for any hardware costs included with the ticket.
|
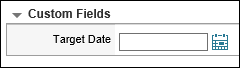
| Date |
Creates a calendar field to add a date to the ticket. For example, you can create a custom date field called Target Date to identify the date when a task in the ticket must be completed.
|
| Date/Time |
Creates a field with a calendar and time drop-down menus so you can add a date and time to the ticket. For example, you can create a date and time field called Delivery Date and Time and attach the custom field to a Facilities request type. This field can indicate when equipment will be delivered to the customer.
|
|
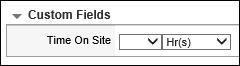
Time Period |
Creates a field with days and hours drop-down menus under Custom Fields to add the elapsed time and minutes. For example, you can create a time period custom field called Time On Site and attach the field to the Facilities request type to indicate the amount of time you spent at the customer site.
|
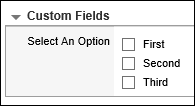
| Multiple Choice |
Creates a field with one or more checkboxes. The user can select one or more options. For example, you can create a multiple choice custom field called Select An Option and list each option in a text file separated by a semicolon. When you select and upload the text file in the Ticket Custom Fields window and click Save, the options display in the Options field.
If you want to include only one option (for example, Yes or No), enter the option text in the Option field. Point your mouse arrow over Options for details. |
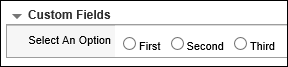
| Single Choice |
Creates a field with one or more radio buttons. The user can only select one option. For example, you can create a single choice custom field called Select An Option and list each option in a text file separated by a semicolon. When you select and upload the text file in the Ticket Custom Fields window and click Save, the options display in the Options field.
If you want to include one option (for example, Yes or No), enter the option text in the Option field. Point your mouse arrow over Options for details. |
| Popup Menu |
Creates a field with one or more options in a drop-down menu. The user can only select one option. For example, you can create a single choice custom field called Select An Option and list each option in a text file separated by a semicolon. When you select and upload the text file in the Ticket Custom Fields window and click Save, the options display in the Options field.
If you want to include one option (for example, Yes or No), enter the option text in the Option field. Point your mouse arrow over Options for details. |


To create a custom ticket field:
- Click Setup > Tickets > Ticket Custom Fields.
-
Click New.
The Ticket Custom Fields screen displays the default values for a new custom field.
-
Enter a label to identify this field.

- To accept the default options, go to step 12. Otherwise, go to step 6.
-
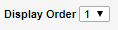
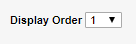
Click the Display Order drop-down menu and select this field's position within the Custom Fields section of a ticket.
-
In the Clients and Techs sections, specify whether each group can see or edit the custom field.
Techs with admin accounts can edit all custom fields.
-
Select the Type of input this field will accept.

The remaining fields change based on your selection. Mouse over the selections for details.
-
In the Info field, enter a description, and then select whether the field is searchable or excluded from email. Hover your mouse arrow over the remaining options and select any additional options as needed.
-
Click the Display Order drop-down menu and select the position where this option is listed in the Custom Fields list.
For example, to display this selection as the first option in the Custom Fields list, select 1.
-
Select the display options for clients and techs. For example, if this field is a required custom field option for tech and client tickets, select Req'd for both options.
-
Click Save.
The Request Types field and an Edit link is displayed on the Ticket Custom Fields screen.
- Specify which request types apply to this custom field. Only tickets with the selected request type will display this field.
- Click the Edit link. A new tab displays a list of request types.
Select one or more request types. To display the custom field on all tickets, click Select All below the list.

- Click Done to close the tab.
- Click Save.
Verify the custom field
-
In the toolbar, click Tickets.

-
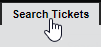
Click the Search Tickets tab.
-
Click New Ticket.

- In the Client Info tab, search for and select a client.
- Click the Ticket Details tab.
-
In the Request Type drop-down menu, choose the request type that includes your custom field. For example, Facilities.

- Complete the remaining ticket fields, and click Save.
- Close and then reopen the ticket.
-
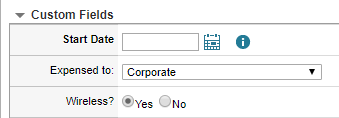
Scroll down to Custom Fields.
The Start Date displays as the first option because the display order is set to 1.
Edit the custom field
- Click Setup > Tickets > Ticket Custom Fields.
- In the Label column, locate and click the custom field you want to edit.
-
Edit the field as required.
Click
 for details.
 - Click Save.