Create user accounts
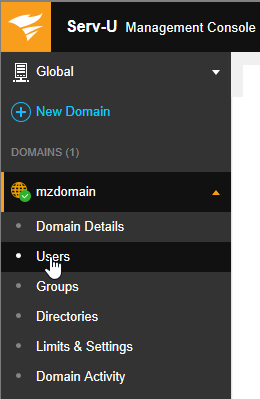
After your first domain is created, you are taken to the user's page of the Management Console. Click Yes to start the User Wizard and create a new user account.
You can run this wizard at any time by navigating to the Users menu under Global or Domain, and then clicking Wizard on the Users page.


- Provide a login ID for the account. The login ID must be unique for the domain. Other domains on your server can have an account with the same login ID.
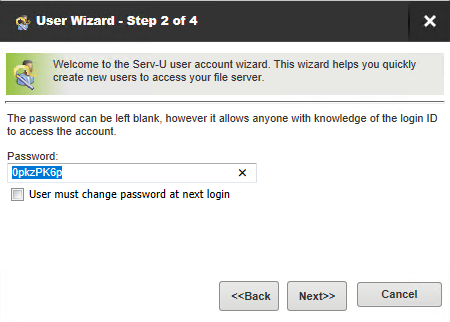
- After specifying a unique login ID, you must also specify a password for the account. A suggested password is supplied. You can make this field blank to allow anyone who knows the login ID to access this domain.
Check the User must change password at next login if you want the user to create their own password next time they log in.

Click Next to continue.
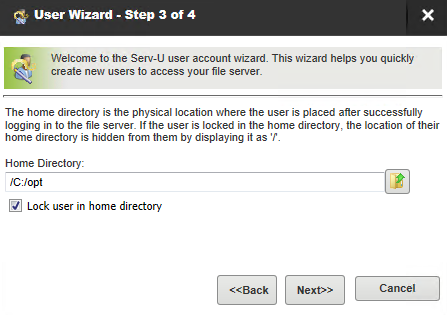
- Specify a home directory for the account.
The home directory is the location on the hard drive of the server, or on an accessible network resource that the user account is placed in after a successful login. It is the location you want the user account to use when sending and receiving files on the server. Type the location or click Browse to select a location on the hard drive. If users are locked in their home directory, they cannot access files or folders above the directory structure of their home directory. Additionally, the actual location of their home directory is masked and displayed as "
/".
Click Next to proceed to the last step.
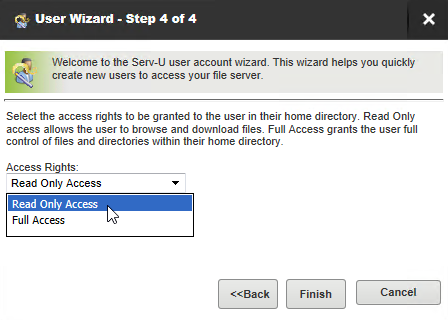
- Select the directory access rights.
Access rights are granted on a per-directory basis. However, access rights can be inherited by all subdirectories contained in an accessible directory. The default access is Read Only, which means that the user can list files and folders in their home directory and can download them. However, they cannot upload files, create new directories, delete files or folders, or rename files or folders. If Full Access is selected, the user can do all of these things. After the user is created, you can configure the access rights in more detail by editing the user, and selecting the Directory Access page

Click Finish to create the user account.
To create an anonymous
account, specify anonymous or ftp as the login ID.
You can also specify a name and email address for the user account. The email address is used by Serv-U to send email notifications and recovered passwords to the user account.

Click Next to continue.
The Serv-U File Server is now accessible and ready for sharing. You can create more accounts just like this one to share with friends, family, or colleagues. Each user can have a different home directory. This way you can share different files with different people.
Notes
- End users who do not have home folders cannot log in to Serv-U. Full permissions make it easy to test all functions from your FTP client or browser. You may want to enforce stricter permissions after testing.
- When you connect from your browser to the HTTPS interface of Serv-U on port 443, you may be warned about an invalid certificate. This is normal when you connect to a server using a temporary certificate. You can ignore the certificate error and continue. Production deployments typically use a commercial web certificate from a trusted certificate authority.
- Secure file sharing must be enabled on Serv-U before you can try it. Select the option under Domain Limits & Sittings > File Sharing to enable it.
- When you connect from your browser to the HTTPS interface of Serv-U on port 443, or to the FTPS interface of Serv-U on ports 21 or 990 for the first time, you may be asked to trust the SSH fingerprint of the remote server. This is expected behavior when connecting to any SFTP or SSH server.
- You must configure an SMTP server to test email notifications.
Share files
Domain users can send or receive files from guests. To send file sharing invitation emails, configure your SMTP settings. This configuration only needs to be set once for the entire server or a domain.
File sharing is disabled by default.
