Configure a SEM agent
For non-network devices, you can install a SEM agent on workstations and servers to collect and normalize log data before it is sent to SEM.
The SEM agent also collects security data from each device (such as Windows event logs and database logs) and transmits this data to SEM. The agent creates a small footprint on the device and prevents log tampering during data collection and transmission.
Using the SEM agent, you can:
- Capture events in real-time
- Encrypt and compress data for efficient and secure transmission to SEM
- Buffer events locally if you lose network connectivity to SEM
SEM provides access to the most frequently installed agents.
Install a Windows agent
Perform the following steps to install a Windows agent on a workstation.
- Review the SEM agent pre-installation checklist.
- Log in to the SEM Console.
-
In the toolbar, click Configure > Nodes.

-
Click Add agent node.

- Follow the on-screen instructions to install an agent.
- Place the agent installation file (local installer or remote installer) on the local hard drive.
- Right-click the installation file, and then select Run as administrator.
- In the Manager Host field, enter the SEM IP address.
- Verify that the SEM Manager is receiving agent data.
In the left column, select the Agent and Connected check boxes.
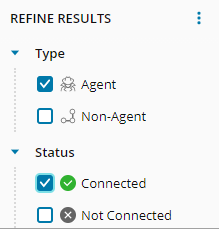
In the center console, locate the targeted node and verify the connection status.

Configure the agent
Perform the following steps to configure your SEM agent with one or more SEM connectors.
-
Identify a SEM connector for the targeted agent.
-
Log in to the SEM Console.
-
On the toolbar, click Configure > Nodes.

-
In the Refine Results column, expand Type and select the Agent checkbox.

-
Select an agent, and then click Manage node connectors.

-
In the Refine Results column, sort the list of available connectors by status, type or category.

-
Under Available connectors, locate the targeted connector. Click the tooltip for a description.

-
Select the connector checkbox.

-
In the toolbar, click Add Connector.

-
In the Add Connector window, select the output type. Configure these values if SEM is configured to save raw (unnormalized) log messages.

Select Normalized to save normalized log messages.
Select Raw + Normalized to save unnormalized and normalized log messages.
Select Raw to save unnormalized log messages.
-
Under Sleep time, click the up- or down-arrow to adjust the number of seconds between log reads (if required).

-
Click Save.
Your changes are saved to the connector profile. The connector is added to the Configured connectors list.
-
(Optional) Repeat step 7 through step 12 to add additional connectors to the agent.
-
Click Done.
The new connector displays in the Nodes with all available agents and non-agents based on your Refine Results selection.
See Manage the monitored nodes for details on how to refine the node results, edit a connector profile, edit an active response connector profile, and more.