Import and export historical event queries
You can export search queries from SEM historical events in JSON format either as individual queries or by exporting multiple queries.
Export a single query
To export a single query:
- On the SEM Console, click the Historical Events and Reports tab.
- Select the queries tab and open the category containing the required query.
- Move the cursor over the required query and click on the vertical ellipsis icon
 .
.
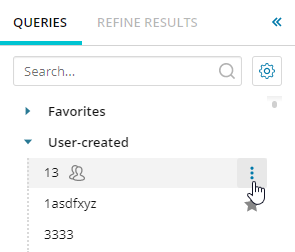
The Queries menu is displayed.
- Click Export.
- Enter a meaningful filename and click Save.
Export multiple queries
To export all search queries:
- On the SEM Console, click the Historical Events and Reports tab.
- Select the Queries tab.
- Click the gear icon at the top of the queries list.

-
The Manage Saved queries window is displayed.
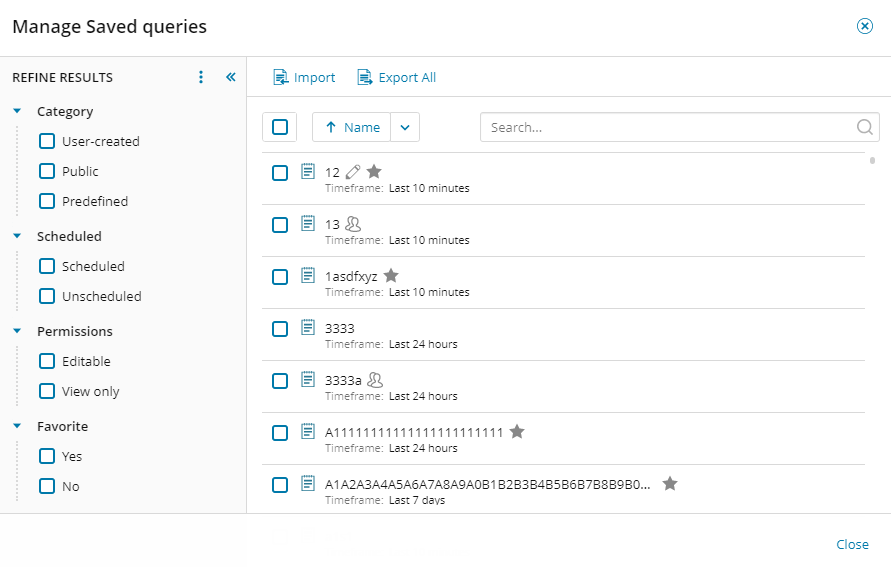
- Initially the options are Import and Export All. These change depending on how you proceed.
- To export all your queries, click Export All.
- To export a set of queries, use the checkboxes on the left to filter queries by category, whether scheduled or not, etc and select Export Filtered.
- To export specific queries use the checkboxes in front of the query names and click Export.
- Enter a meaningful filename and click Save.
Import queries
To import search queries that have been previously saved as a JSON file:
- On the SEM Console, click the Historical Events and Reports tab.
- Select the queries tab.
- Click the gear icon at the top of the queries list.
The Manage Saved queries window is displayed.
- Click Import.
The Import Queries window is displayed.
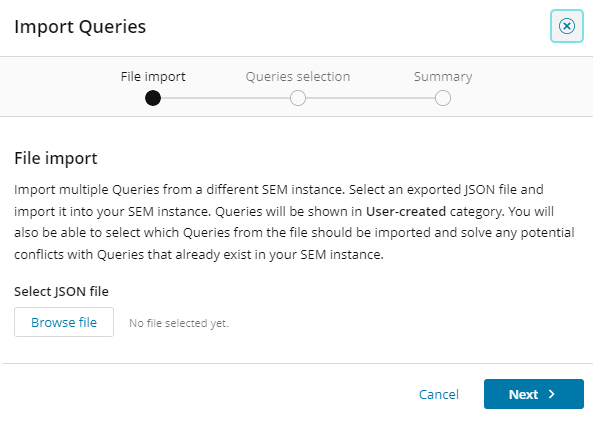
- Click Browse file, navigate to the required JSON file, and click Open.
- Click Next.
The queries contained in the selected JSON file are listed.
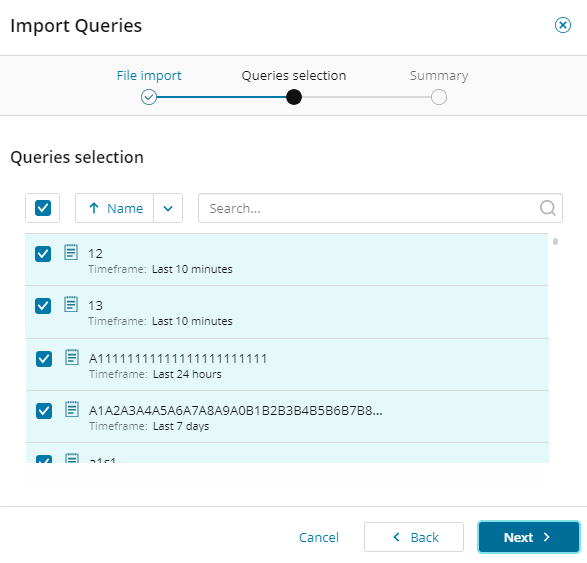
- Filter out any queries you do not want to import by unchecking the boxes in front of the query names, then click Next.
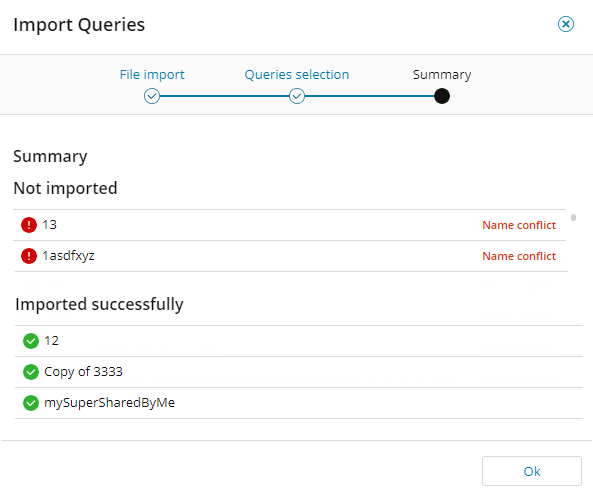
The import process begins. The queries that are successfully imported are listed. Those that cannot be imported are shown along with the reasons why.
- When the import is complete, click OK to close the box. The queries will now be listed in the appropriate categories in the Queries column.