Jira Cloud Integration
You can use this integration guide to install and configure the Incident Response extension in Jira Cloud to create issues in Jira projects for multiple Jira Accounts when there is an incident in Incident Response either Automatically or Manually and sync the status bidirectionally.
Pre-requisites
-
A valid Incident Response cloud subscription or a trial account (in either the Pro, Premium or Enterprise plans)
-
A user account in Jira Cloud version with
Administratorprivileges -
Only the Account Owner and Users with the
Manage Extensionspermission will be able to enable, disable and manage Extensions in Incident Response -
Users with
Updaterole for services, will be able to override default team configuration at service-level
Configuring the Extension
In Jira Cloud: Installing Incident Response App
-
Login to your Jira Cloud account and install the Incident Response Jira Cloud plugin corresponding to your data centre.
-
Click on Configure once the app has been installed
-
Copy the
Jira Client Tokenthat is available in Step 2 of the Configuration page
Plugin for the US data center - Squadcast Jira Cloud plugin
Plugin for the EU data center - Squadcast for Jira Cloud (EU only version)


In Incident Response: Configuring Jira Cloud Extension
You can connect multiple Jira accounts to your Incident Response account and configure different accounts & projects for the teams & services. This would be the global configuration for the Jira Cloud extension. After configuring the same, you can map multiple Jira Cloud projects to one or more Incident Response Services by following the steps here.
-
In Incident Response, navigate to Settings and select the Extensions tab from the left navigation sidebar
-
Move over to the Jira Cloud extension and click on Integrate
-
Paste the previously copied
Jira Client Tokenand click on Save & Next -
Choose a name for your Jira account, for the connection, and click Next
-
Then, select teams that will have access to this account. Jira tickets will be created for incidents for each service that has been created by a selected team. Lastly, click Save & Integrate


Now, your Jira account has been set up in Incident Response. You can edit or delete this Jira Account.
If you are using both Jira as an alert source and Jira Cloud extension, sometimes it might cause duplicate ticket/incident loops depending on your configuration. In order to prevent that, please add this condition reporter.displayName != "Squadcast" to your JQL query configuration under your Jira Webhook configuration for Incident Response alert source.

Similarly, you can add multiple accounts using the above given steps.
To set up default configurations for your teams
-
Navigate to the Team Configurations (Default) section, click on Add Configuration.
-
Select
Teamwithin Incident Response,Jira Accountyou previously set up. Then, select theJira Projectin which tickets need to be created, select theIssue Type.

Select the Mode in which you want to add tickets to Jira for incidents in Incident Response: Manually or Automatically. Then, map the Jira Issue Status to the available Incident Response incident statuses and click on Save

Your Default Team Configuration is set up!
This by default applies to all teams within Incident Response that you have selected.
You can override the default configuration at a service level by changing the default configuration, similar to Slack channel configuration.
You can configure multiple default team configurations using the above given steps.
That’s it! Your Jira Cloud integration is good to go.
Usage of the Automatic and Manual Modes
Automatic mode
If you have chosen the Automatic mode while configuring Jira cloud then you need not do anything. Any incident triggered for the selected Service(s) will automatically create an issue in the selected Jira Project with the configured Issue Type.
Manual mode
If Manual Mode is chosen, follow the below steps to create a ticket in Jira:
-
Open the incident in Incident Response and click on the More Actions button on the Incident Details page
-
Select Jira Cloud action and click on Create a ticket in Jira


A ticket will be created in the selected Jira Project with the configured Issue Type. This action will be recorded in the Incident Timeline with a hyperlink to the created Jira ticket.


Configuring a Jira Project for each Incident Response Service
If you would like for tickets to be created for incidents of each Service in a different Jira Project, you can configure so within the Services page.
Navigate to Services -> Service Overview -> select or search for your desired service.
Click on the service to navigate to the Service Details page.
In the top right, click More -> Jira Cloud Project
Here, map the Jira Account and Jira Project of your choice and click Next
Next, you can choose to either create tickets Manually or Automatically for the Service in the previously selected Project. Additionally, you can map the available Project Status to the incident states in Incident Response -
Triggered,Acknowledged,Resolved. Then, click Save
If you configure a Jira Cloud Project for a Service, this setting will override the previously configured Jira Cloud Extensions settings (the global/default team configuration in Settings > Extensions > Jira Cloud).
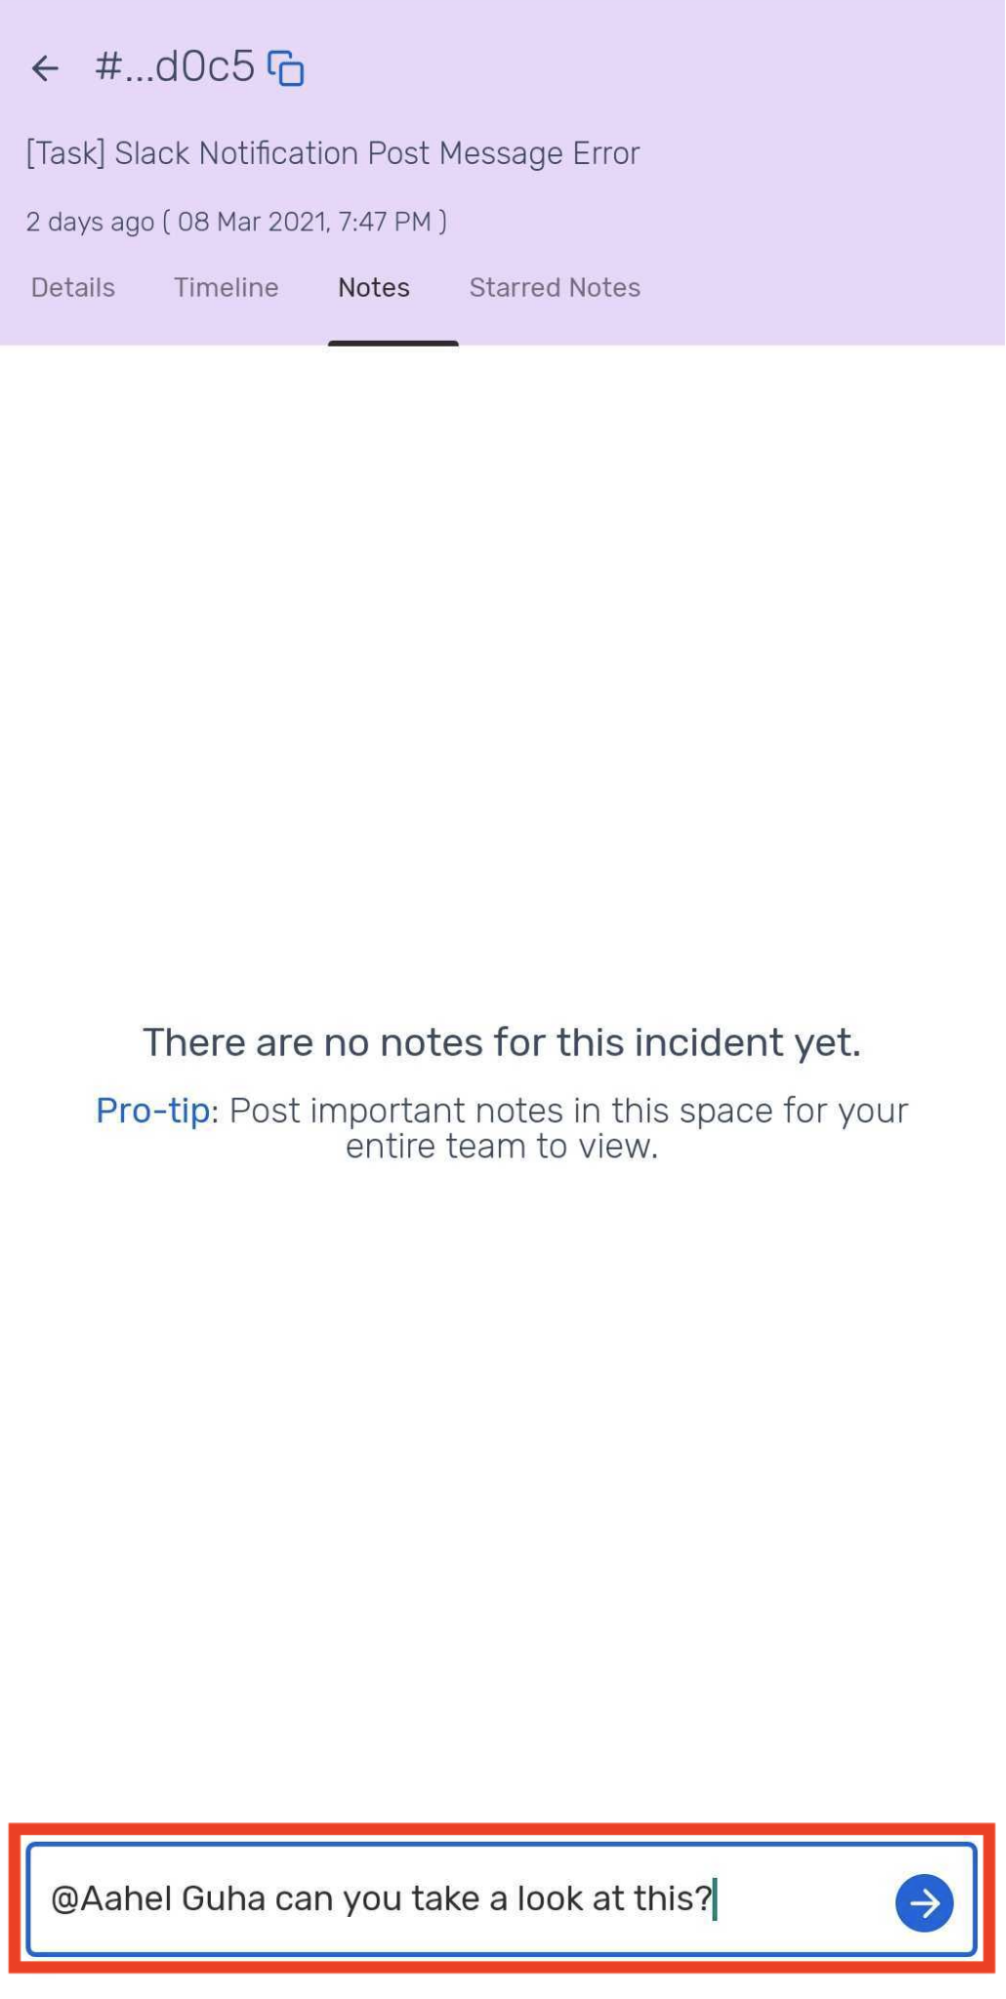
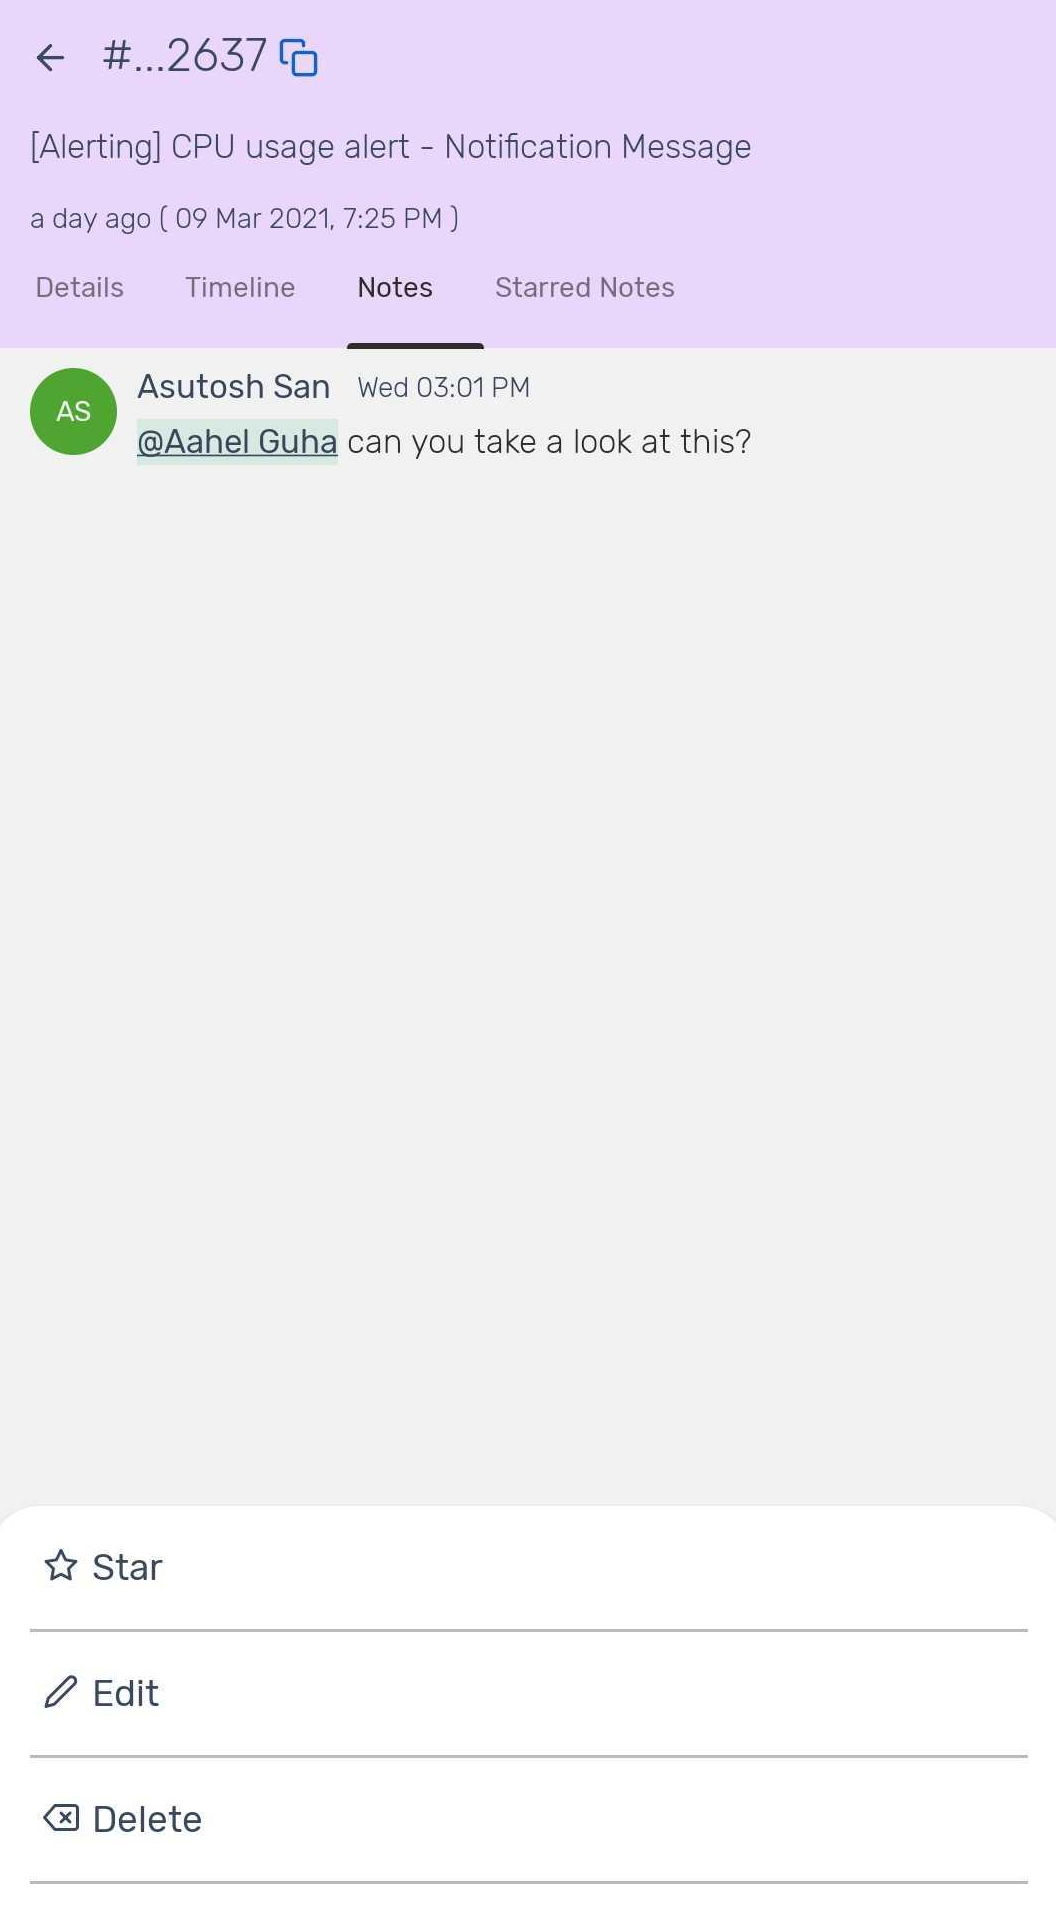
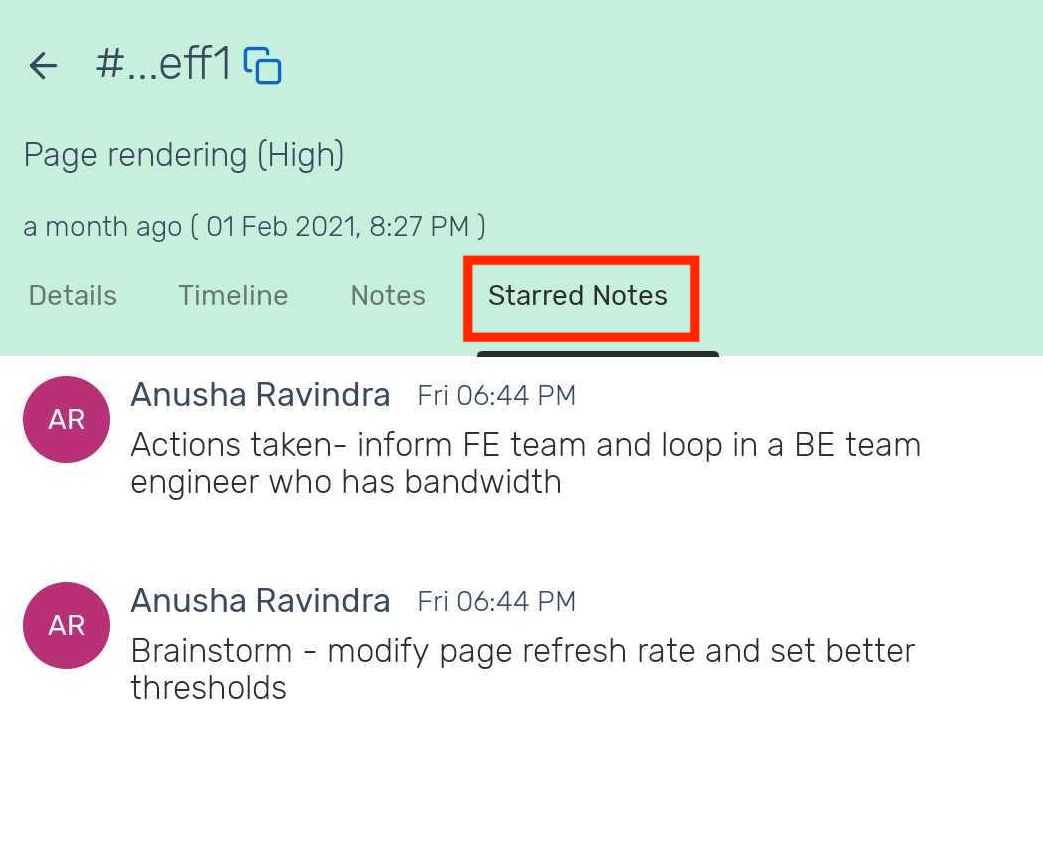
Jira Notes Sync
Sync your Jira notes seamlessly with your Incident Response account. This bidirectional sync ensures that any comment added to a Jira ticket will automatically appear in the Incident Notes section in Incident Response, and vice versa.
In Incident Response:
You can star a Jira note to mark it as important.
In Jira:
You can edit or delete Incident Response incident notes directly from Jira.
For all new users, this feature will be available upon configuring the extension. Existing users will need to update the Incident Response bot in Jira by following these steps:
In Jira Cloud, navigate to the Apps dropdown present in the top navigation bar.
Click on the Manage Apps button.
Search and click on the Incident Response bot from the Manage Apps page.
Then select the Update option to update the bot.