(Optional) Set up SMB file sharing to a Windows server
You can publish SEM reports to a file share an external Windows server using server message block (SMB) file sharing. This feature can help you streamline your SEM report delivery to department and management servers where authorized personnel can access their requested reports in a timely manner. You can configure SMB file sharing to one or more shares on a single Windows server.
When you run or schedule a SEM report, you can select the SMB connection as a sharing option.
Below is an example of the SMB configuration screen. Each connection lists the network path to the Windows share, server port number, and the username of the user who created the connection. After you create a new SMB connection, you can reload, edit, copy, or delete the connection.

Locate an SMB connection
The following table describes how to locate SMB connections in the Settings > Sharing > SMB tab.
| Action | Description |
|---|---|
| Locate a specific connection | Enter a search term in the Search field and then click the magnifying glass to display the results. to display the results. |
| Display all connections by host or name | Click  in the toolbar. in the toolbar. |
| List all connections in ascending or descending order | Click Name in the toolbar. |
| Collect the latest connection and redisplay the results | Click Reload data in the toolbar. |
Create an SMB configuration
Set up a network share on a Windows server and then create a new SMB configuration. The Windows server must have the SMB protocol enabled to establish an SMB connection.
Set up a network share on a Windows server
-
Select a Windows-based system in your organization to store your SEM reports.
-
Log in to the system as an administrator.
-
Enable the SMB protocol on the system and record the SMB version. You will need this information for a future step.
See your operating system documentation for instructions. -
On the server, open File Explorer and create a network share to store the scheduled reports.
Ensure that:
-
The share name does not exceed 64 characters.
-
The share name does not include blank spaces.
-
The path to the network share does not exceed 64 characters.
-
-
Record the network path to the network share. You will need this information for a future step.
-
Verify that the identical SMB protocol is enabled on your SEM server.
Create a new SMB configuration
-
Log in to SEM as an administrator.
-
In the toolbar, click the Settings icon.
-
In the Settings screen left column, click Sharing.
-
Click the SMB tab.

-
Click Add SMB configuration.

-
In the Name field, enter a name for this SMB configuration.
For example:

You can enter a name that includes up to 64 characters.
-
In the Path field, enter the network path to the Windows share on the targeted server.
For example:

You can enter a path that includes up to 4096 characters.
-
In the Port field, enter the port number of the target Windows server or accept the default selection. The default is port 445.
For example:

-
In the Username field, enter the name of the user who has the rights to the network share on the Windows server. Ensure that the user name does not exceed 64 characters.
For example:

-
In the Password field, enter the password of the user who has the rights to the network share.
-
Click the Minimum SMB version drop-down arrow and select the SMB version (for example, SMB311) that is running on the server hosting the network share.
For example:

-
Click Test.

If the username and password are valid, a message displays that confirms the new connection.

-
Click Create.
The new connection displays in the SMB window.
-
Repeat step 1 through step 13 to create additional SMB configurations to network shares in your organization.
Reload the connection data
To refresh your connection data, click Reload data in the SMB tab. When completed, all SMB connections in the SMB tab will contain the latest configuration data.

Edit an SMB connection
-
Log in to SEM as an administrator.
-
In the toolbar, click the Settings icon.
-
In the Settings screen left column, click Sharing.
-
Click the SMB tab.
-
Locate a connection you want to edit.
-
In the targeted connection, click
 and select Edit.
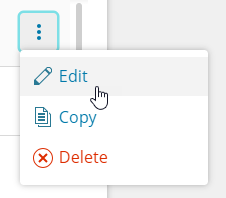
-
Edit the SMB connection settings as required.
For example, you can change the connection name.
Re-entering the username and password is not required.

-
Click Test.
If the username and password are valid, a message displays that confirms the new connection.
-
Click Create.
The updated connection displays in the Settings window.

Copy an SMB connection
If you plan to create several SMB connections in your deployment with a similar path, you can copy an existing connection and change the configuration settings and path to the new network share.
-
Log in to SEM as an administrator.
-
In the toolbar, click the Settings icon.
-
In the Settings screen left column, click Sharing.
-
Click the SMB tab.
-
Locate a connection you want to copy.
-
Click
and select Copy.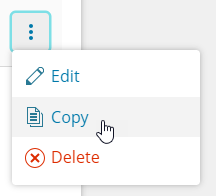
-
Update the connection settings with a unique name and path.

-
Click Test
If the username and password are valid, a message displays that confirms the new connection.
-
Click Copy.
The copied connection with the new connection settings displays in the SMB window.
Delete an SMB connection
-
Log in to SEM as an administrator.
-
In the toolbar, click the Settings icon.
-
In the Settings screen left column, click Sharing.
-
Click the SMB tab.
-
Locate a connection you want to delete.
For example:

-
Click
and select Delete.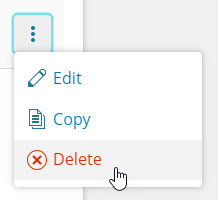
The following message displays in the console.

-
Click Delete.
The connection is deleted from the Settings window.