Perform actions against cloud instances and VMs: stop, reboot, delete, unmanage, poll now, or turn polling on/off
This topic applies only to the following products:
SolarWinds Observability Self-Hosted
IPAM — NAM — NPM — SAM — VMAN
With the necessary account permissions, you can perform the following actions via the AWS Cloud Instance Management widget or Azure Cloud VM Management widget displayed on the Cloud Summary page.
- Stop an AWS cloud instance/VM to block access to it. The cloud service erases all data and polling stops. If the Manage a cloud instance or VM as a SolarWinds Platform node, SAM and integrated VMAN retain licenses for it.
- Stop an Azure VM to remove it from the Hypervisor standpoint but maintain it in the control plane.
- Reboot a cloud instance/VM to restart it and preserve data.
- Delete a cloud instance/VM to remove it permanently from the cloud service. If the Manage a cloud instance or VM as a SolarWinds Platform node, select the option to remove the node from Orion. The cloud service deletes all stored instance/VM data. The instance/VM no longer appears as an available instance/VM for an account in the SolarWinds Platform Web Console.
-
Unmanage and manage a cloud instance/VM to release the license and halt polling, which is useful when performing maintenance. Cloud service APIs continue to poll.
If you disable SolarWinds Platform polling for an instance, VM, or managed node, the cloud service API continues to monitor for status but will not gather other metrics.
- Poll an instance/VM immediately.
- Turn polling on and off for an instance/VM.
Note the following details about performing actions against cloud instances and VMs:
- The page name on which you perform actions and the widget name depend on whether you selected AWS instance or Azure VM on the Cloud Summary page.
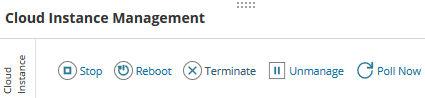
If you click an AWS instance on the Cloud Summary page, or in the Cloud Server Infrastructure widget, the AWS Cloud Instance Details page displays the AWS Cloud Instance Management widget, as shown in the following example:
- If you click an Azure VM on the Cloud Summary page, or in the Cloud Server Infrastructure widget, the Cloud VM Details page displays the Azure Cloud VM widget.
- Depending how Azure is configured for your organization, you may require different Azure credentials and/or permissions to perform actions. Consult a subscription administrator.
- You can also manage cloud instances/VMs in the AWS Management Console (© 2018, Amazon Web Services, Inc. or its affiliates, obtained from https://aws.amazon.com/console/ on October 22, 2018) or Azure Portal (© 2018 Microsoft, obtained from https://portal.azure.com, on October 22, 2018). Before doing so, review this section to learn about SolarWinds Platform settings that may need to be configured for instances/VMs changed outside of the SolarWinds Platform Web Console.
Stop an AWS cloud instance/VM
You can stop and restart an AWS cloud instance with an EBS attached volume to block polling for the instance (© 2018, Amazon Web Services, Inc. or its affiliates, obtained from https://docs.aws.amazon.com/AWSEC2/latest/UserGuide/Stop_Start.html on October 22, 2018). Data on the local volume for the cloud instance is cleared and is retained on the attached EBS volume.
SolarWinds does not recommend forcing an AWS cloud instance to stop because it does not allow the system to flush file caches or metadata. If you use this option, you will need to perform file system checks and repairs.
- In the SolarWinds Platform Web Console, select My Dashboards > Cloud.
- On the Cloud Summary page, locate the instance in the Cloud Instances Status Summary or Cloud Server Infrastructure widget.
-
Click the instance to open the AWS Cloud Instance Details page. If an instance is a managed node, this page is called "Node Details."
-
Click Stop in the AWS Cloud Instance Management widget.
-
When a confirmation message appears, click Yes to force the instance to stop.
- Perform file system checks and repairs to flush file caches or metadata, as necessary. See Troubleshooting Stopping Your Instance (© 2018, Amazon Web Services, Inc. or its affiliates, obtained from https://docs.aws.amazon.com/AWSEC2/latest/UserGuide/TroubleshootingInstancesStopping.html on October 22, 2018).
Stop an Azure cloud VM
You can stop an Azure cloud VM to remove it from the Hypervisor standpoint but keep it available in the control plane. Virtual machines in the Deallocated state do not incur compute charges.
- In the SolarWinds Platform Web Console, select My Dashboards > Cloud.
- On the Cloud Summary page, locate the Azure VM in the Cloud VMs Status Summary or Cloud Server Infrastructure widget.
-
Click the VM to open the Azure Cloud VM Details page.
If a VM is managed as a node, this page is called "Node Details."
-
Click Stop in the Azure Cloud VM widget.
Reboot a cloud instance/VM
A reboot restarts a cloud instance/VM while preserving data. For AWS instances, both the public DNS name and data on the attached EBS volume are retained. Azure VMs retain all data.
- In the SolarWinds Platform Web Console, select My Dashboards > Cloud.
- On the Cloud Summary page, locate the instance/VM in the Cloud Instances/VMs Status Summary or Cloud Server Infrastructure widget.
-
Click the instance/VM to open its Details page. If an instance/VM is a managed node, this page is called "Node Details."
-
Click Reboot in the Cloud Instance/VM Management widget.
-
When a confirmation message appears, click Yes.
Delete a cloud instance/VM
The Delete option on the Cloud Instance Details page permanently removes an instance/VM from your environment. The cloud service stops monitoring the instance/VM and deletes all stored data in its system. The instance/VM does not appear in the SolarWinds Platform Web Console.
If a cloud instance/VM is a managed node, the Delete option appears on the Node Details page. If you click Delete, the node is removed from the cloud service and SolarWinds Platform Web Console. Consumed SolarWinds product licenses are released.
- In the SolarWinds Platform Web Console, select My Dashboards > Cloud.
- On the Cloud Summary page, locate the instance/VM in the Cloud Instances/VMs Status Summary or Cloud Server Infrastructure widget.
- Click the instance/VM to open its Details page. If an instance/VM is managed as node, this page is called "Node Details."
- Click Delete in the Cloud Instance/VM Management widget.
- When prompted to confirm the deletion, click Yes.
Deleting an instance/VM permanently removes it, along with all associated data, from AWS or Azure.
The instance/VM is removed from the SolarWinds Platform Web Console and is no longer monitored.
Note that a cloud instance/VM managed as a node is not removed from the SolarWinds Platform until you delete it. To delete the node and release licenses:
- Select Settings > All Settings, click Manage Nodes.
- Locate the managed node.
- Click Delete.
Do not "unmanage" and then delete a cloud instance/VM that is managed as a node — the node will remain in an Unknown state in the SolarWinds Platform Web Console. To fully remove the managed node in the SolarWinds Platform, stop monitoring the cloud instance/VM before deleting it. See Manage monitoring for cloud service accounts.
Unmanage and manage a cloud instance/VM
Use the Unmanage/Manage option to pause and restart polling between the SolarWinds Platform and a cloud instance/VM that is managed as a node. When polling is active (and managed), this option appears as Unmanage.
This option is an SolarWinds Platform node setting that is useful to pause polling for maintenance, security updates, and more. It does not affect data through the cloud service, nor does it stop cloud service API polling.
- In the SolarWinds Platform Web Console, select My Dashboards > Home > Cloud.
- On the Cloud Summary page, locate the instance/VM in the Cloud Instances Status Summary or Cloud Server Infrastructure widget.
-
Click the instance/VM to open its Details page. If an instance/VM is managed as a node, the Node Details page appears.
-
In the Management widget, select Unmanage for an active node (or Manage for a paused node).
-
When prompted to confirm, click Yes to unmanage (or manage).
If you plan to delete a node, do not unmanage the node before deleting it. This will cause the node to enter an Unknown state. See Delete a cloud instance/VM.
Poll a cloud instance/VM immediately
By default, the SolarWinds Platform polls cloud services every five minutes. Use the Poll Now option to initiate an immediate poll and retrieve data from cloud service APIs.
- In the SolarWinds Platform Web Console, select My Dashboards > Cloud.
- On the Cloud Summary page, locate the cloud instance/VM in the Cloud Instances Status Summary or Cloud Server Infrastructure widget.
-
Click the instance/VM to open its Details page. If an instance/VM is managed as a node, the Node Details page appears.
-
Click Poll Now.
Manage monitoring for cloud service accounts
You can toggle monitoring on and off for a cloud service account, which will affect all cloud instances/VMs linked to the account. The SolarWinds Platform halts monitoring metrics account instances/VMs related but cloud service APIs continue checking instance/VM status, as displayed in the SolarWinds Platform Web Console.
- Access the Cloud Infrastructure Monitoring Settings page.
-
Click Manage Cloud Accounts.

- Navigate to the account for which you want control monitoring and click Choose Instances/VMs.
-
Locate the cloud instance/VM in the list that appears and toggle monitoring on or off.
