Train the clients
This section provides a template you can use to develop training materials for your Web Help Desk clients. Use this material as it is, or copy and revise it to reflect your organization's practices and Web Help Desk configuration.
Clients can use Web Help Desk to submit support requests (called tickets). They can view and update tickets as needed, and confirm that each ticket is resolved.
Ways to submit a ticket
You can submit a Web Help Desk ticket using any of the following methods:
- By Telephone: <your help desk telephone number>
- By Email: <your help desk email address(es)>
- Using the Web Help Desk web console: <your Web Help Desk URL>
The most efficient and direct way to enter your request is through the Web Help Desk Web Console.
Log in to the Web Help Desk Web Console
- Open a Web browser.
-
Enter your Web Help Desk URL.
For example:
https://<IP_address>:8443/helpdesk/WebObjects/Helpdesk.woawhere:
<ipAddress>is the IP address or hostname of your Web Help Desk server.8443is the secure port to your Web Help Desk server.
The Log In screen displays.
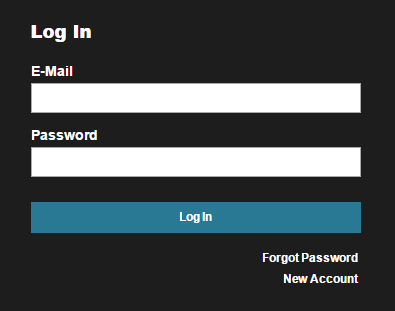
-
If you have an account, enter your login ID and password and click Log In.
If you do not have an account, click New Account, enter account information, and click Submit. This will display the Help Request page.
Review and update your Web Help Desk profile
Your profile includes contact information (such as email and cell phone) and preferences. Edit your profile to add or update the information. Your profile information will be used to contact you about requests. SolarWinds recommends reviewing your profile before you create your first request.
-
In the Web Help Desk console toolbar, click Profile to display your profile.
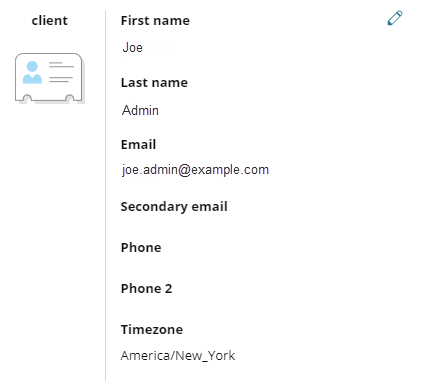
- Verify that your contact information is correct.
You can also enter additional contact information. For example, you can add a secondary email or phone number.
- Click Save to save any changes.
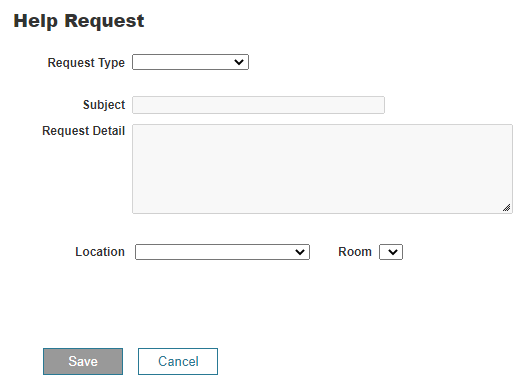
Create a ticket using the web console
-
If the Help Request page is not displayed, click Request in the Web Help Desk console toolbar.
-
Select the Request Type option that best describes the reason for your request.
After you select the request type, one or more subcategory fields may display. Select an option in each subcategory field.
Any Frequently Asked Questions (FAQs) associated with the selected request type are listed on the right. FAQs can often provide the information you need to resolve the issue. If one of the FAQs is related to your issue, click the FAQ title to open it in a separate browser tab.
- Enter a brief description of your request in the Subject field.
- In the Request Detail section, provide a detailed explanation of your request or problem.
- If you have supporting documents such as log files, screen shots, or configuration files, click Add File and attach them to the request.
-
Verify that your Location is correct.
If your organization has multiple locations, verify that the Location field shows your work location. This information can be used to determine which support team receives your request.
-
Select the Priority, using the descriptions listed below.
Priority Description Urgent A failure that severely impacts critical operations.
- The problem impacts an entire location or a significant number of users.
- Customers are directly impacted, or critical operations such as shipping, manufacturing, or order entry are unavailable or severely impacted.
If you select this option, make sure you are available for the initial response, or provide the name and phone number of an alternate contact.High An issue that degrades response times or affects normal operations.
- A website or service is functioning, but performance is degraded.
- The problem impacts a small to medium number of users.
- Customers are directly impacted, or critical operations such as shipping, manufacturing, or order entry are available but negatively impacted.
If you select this option, make sure you are available for the initial response, or provide the name and phone number of an alternate contact.Medium An issue that affects a small number of users or an individual user. A work-around is available.
Low Questions or requests for information. - Complete any additional fields associated with the selected Request Type. A blue information icon identifies the required fields.
-
Click Save to create the ticket.
The system sends you a confirmation message containing your ticket number.
Error message when creating a ticket
If a client receives an error stating that their email tickets are currently disabled for their account, do the following:
- Log in to the Web Help Desk Administrator Console as an administrator.
- Click Setup > Ticket > Options.
-
Under Client Options, select the Web Interface and email checkboxes.

If both options are disabled, clients can only view or update existing tickets. All new tickets must be created by a tech.
- Click Save.
- Click Setup > Companies & Locations > Locations & Rooms.
- In the Location column, click the location of the client.
- Click the
 icon to enter edit mode.
 -
In the Clients Can Save Tickets Using field, select the web interface and email checkboxes to enable clients to create tickets from this location.

Clients that are not allowed to create tickets using the web interface or email can only view and update existing tickets provided that their login is enabled.
- Click Save.
Locate a ticket
In the Web Help Desk console toolbar, click History.
The History screen lists all entered tickets.
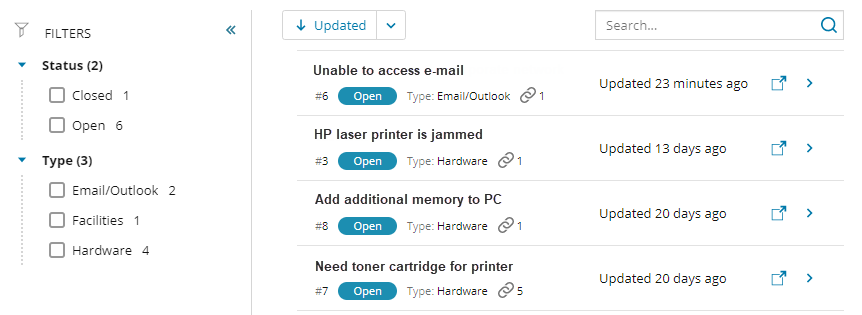
Beginning in Web Help Desk 12.7, the History screen now includes filters that allow you to sort your tickets based on status and request type. The new drop-down menu provides additional sorting options, allowing you to sort the ticket history by updated status, ID number, and subject.
Opening tickets in a separate window
The History window displays the  icon for each ticket. Click the icon to open a ticket in a separate window.
If the icon does not display in the window, do the following:
- Log in to Web Help Desk.
- Click Setup > General > Options.
-
Select the Show Icons for Referenceable URLs checkbox.

- Click Save.
Search for a ticket
In the Search field, enter the ticket number, ticket status, or a group of words contained in the Subject or Request Details fields, and then click Search.
The Ticket History page displays a list of tickets that match the search criteria.
A blue dot next to the ticket number indicates that the ticket was updated by the tech (the person responsible for resolving issues), and you have not viewed the new information.
Sort the list of tickets
Click a filter heading to sort by the values in that drop-down list.
Add information to a ticket using the web console
You can add information to a ticket by adding notes or attaching files.
- Click History in the toolbar.
- Locate the targeted ticket.
- Click the ticket to display the ticket details in the right column.
- Update the ticket notes or request details.
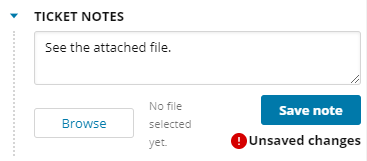
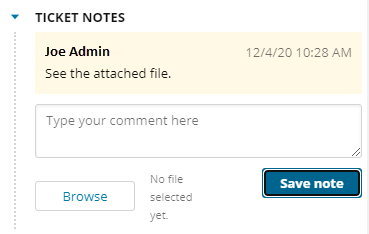
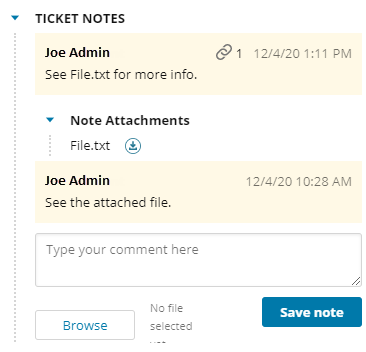
Ticket Notes
Under Ticket Notes, you can add a note and then attach files to the note.
Add a note
-
Under Ticket Notes, add a note in the text box.
A message displays, prompting you to save your changes.
-
Click Save note.
The note text displays under Ticket Notes, and the tech is notified.
Attach a file to a note
-
Under Ticket Notes, click Browse and select a file.
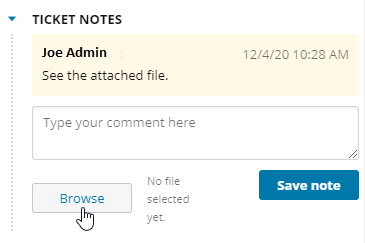
-
In the text box, add a note in the text box regarding the file.
A message displays, prompting you to save your changes.
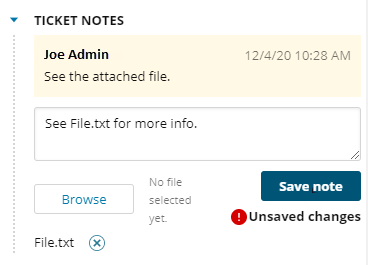
-
Click Save note.
The file displays under Note Attachments, and the tech is notified.
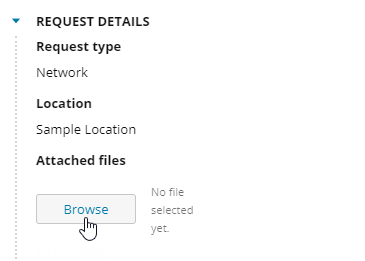
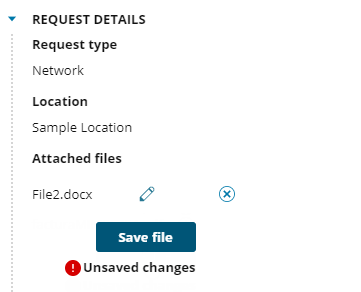
Request Details
Under Request Details, you can add an attachment.
Attach a file
-
Click Browse.
-
Locate and double-click the file.
A message displays, prompting you to save your changes.
-
Click Save file.
The file is saved, and the assigned tech is notified.
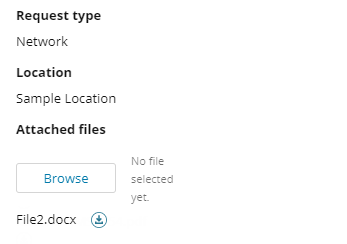 Click
Click to save the file to your system.
Add notes to a ticket using email
Web Help Desk can send emails when a change is made to your ticket. For example, if a tech needs additional information, the tech can add a note to describe the required information and Web Help Desk sends an email to request it.
You can add a note to the ticket from the email.
-
Click the Add Note link in the body of the email.
Do not reply to the email.
A new email is created.
- Replace the email text with the note you want to add.
-
Send the email.
Web Help Desk automatically updates the ticket and notifies the assigned tech that new information is available.
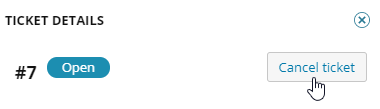
Cancel a ticket
If you no longer need the requested service, you can cancel the ticket.
- Click History in the toolbar.
-
Click the targeted ticket to display the ticket details.
For example, ticket #7.

-
Under Ticket Details, click Cancel ticket.
-
Click Yes to confirm.
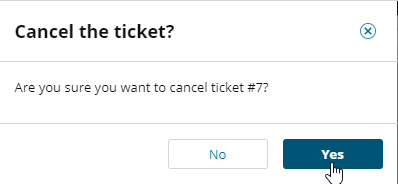
The ticket status is changed to Canceled and the assigned tech is notified.
Close a ticket
When the assigned tech resolves your request, Web Help Desk sends you an email. The email contains notes to describe what was done to resolve the reported issue, or what was provided to complete your service request.
If you are satisfied with the resolution:
- Click Yes to close the ticket.
-
Click Send to send the generated email.
You will receive an email confirmation that the ticket is closed.
If you are not satisfied with the resolution:
- Click No to notify the assigned tech.
- Click Send to send the generated email.
Get additional help from FAQs
FAQs describe common IT issues and their solutions. Techs can create FAQs to help users find answers and resolve problems.
To display the FAQs:
- Click FAQs in the toolbar.
-
Complete the fields and options for your search.
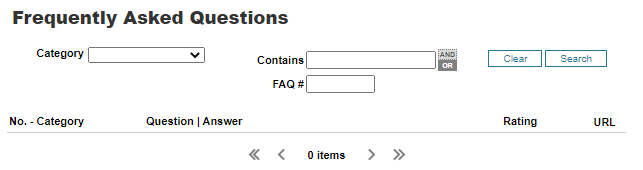
-
Click Search.
The FAQs that meet your search criteria display on-screen.
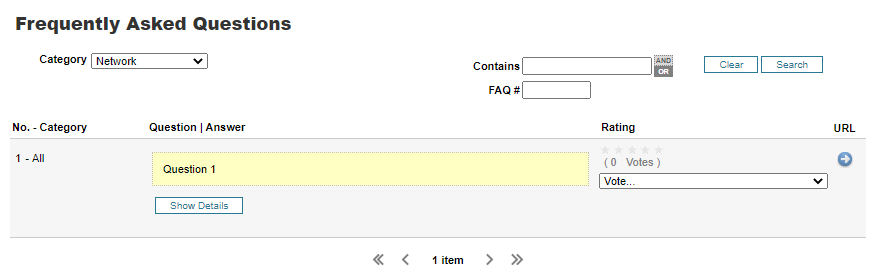
Below are options you can select in the window when the search is completed. This feedback assists the Web Help Desk development team with improving the FAQ functionality.
| Option | Description |
|---|---|

|
Click this option to display the answer to a question. |
|
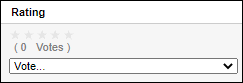
Click the drop-down menu and select an option that indicates whether the FAQ was helpful. Select a rating of 1 through 5 stars (5 being most helpful to 1 being least helpful). |

|
Click the arrow to displays the FAQ. Right-click the icon to copy and save the bookmark URL. |