Create tasks
Web Help Desk uses tasks to create tickets. A task contains one or more task elements, and each task element provides settings for a new ticket. When the task runs, Web Help Desk creates a ticket for each task element, either sequentially or all at once, depending on the configured task.
Tasks can run manually or automatically, at given intervals or based on specific criteria, depending on how you configure them. Tasks are especially useful for handling repetitive processes.
For example, if your HR department has a set of routine onboarding tasks to complete for a new employee, you can create a task called New Employee and define each task element required to help a new employee get started in their new position.
Related tasks can include:
- Completing tax and insurance forms
- Accessing network resources
- Configuring a new computer system
- Installing and configuring corporate and department-specific software
You can trigger a new task when required—for example, when you on-board a new employee. When you run the task, Web Help Desk generates a ticket for each task element. These tickets can be assigned to techs, who ensure each task element is completed.
You can create action rules that automatically trigger your tasks. See Automating parent/child tickets for more information.
To create a new task:
- Access the task screen.
- Create a new task.
- Add new task elements.
- Create new tickets from task elements.
Access the task screen
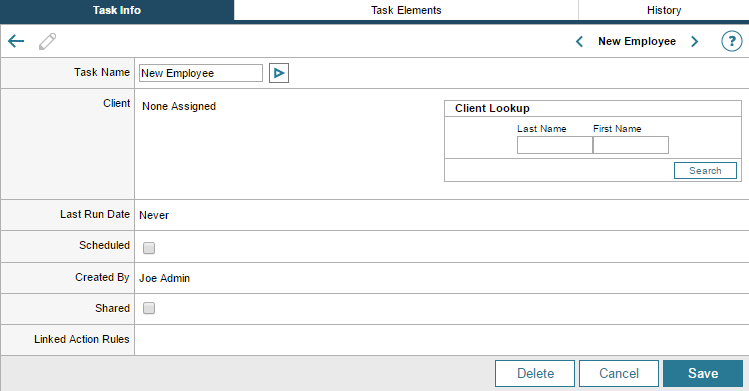
You can access the task screen by clicking Setup Tickets > Tasks. The following screen displays.

When you create a new task, the task displays in this screen.
Create a new task
-
Enter a name for the task. For example, New Employee.

-
(Optional) If this task pertains to a specific employee, search for the appropriate client in the Client Lookup box fields and assign a client to the task. Otherwise, leave these fields blank.

-
Select the checkbox to schedule this task to run at a specific time interval. Otherwise, leave this checkbox unchecked.
-
Select the checkbox to share this task with other users.

Selecting this check box will also make the task available as an action rule and be visible to other techs.
-
Click Save.
A message displays stating that the task was created successfully. The Task Elements and History tabs also display in the screen.

Add new task elements
- Click the Task Elements tab.
- Click New.
-
Click the drop-down menu and select 1 so this task element runs first.
-
(Optional) Select the check box to link this task to a parent ticket and automate parent/child ticket creation. When selected, the task element is inherited from the parent ticket.
-
(Optional) Select the location, room, and department where the task is performed.
-
Select the request type that applies to this task. For example, for new hire tasks, you can select HR.

-
Enter a name for this element. For example:

-
Enter a description for the element. For example:

-
(Optional) Select a specific tech for this element.
-
(Optional) Select the appropriate priority for this element.
-
(Optional) Enter an asset number linked to this task element.

-
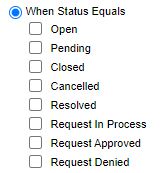
Select an option that controls when the next element is triggered.

The default selection is Select On Creation. This option triggers the next element immediately after the ticket for this element is created. Otherwise, select When Status Equals and then select the appropriate selection to trigger the next element.
-
Click Save.
When completed, the Task Elements tab lists a summary of your task.
After you create your first task elements, add additional elements to create new task elements for your task. For example, for the New Employee task, you can create new elements to create an email account, assign a specific desk in a building, and enroll the employee in on-site new hire classes.
Create new tickets from task elements
To create tickets from task elements, click the Task Info tab, select a task, and then click the arrow next to the Task Name field. To select another task, click the left and right arrows at the top right to scroll through all available tasks.
After you execute a task, click Tickets in the toolbar.
In the Tickets window, verify that the task created the appropriate tickets.