Create the priority types and alerts
Priority types assign due dates to tickets so your techs can process and resolve each ticket within a specific time range. If the ticket is not resolved by the due time in the priority type (for example, eight business hours after the ticket is created), Web Help Desk generates emails to the group manager, supervisor, or technician to initiate support activities as soon as possible.
For example, if you manage an IT help desk at a university, you can create a priority type called Remote Students that expedites a ticket within ten minutes for remote students who cannot log in and access their online classes. In a corporate setting, you can create a priority type called Software Upgrades for software upgrade requests that provide a mutually-accepted amount of time for IT personnel and the targeted teams to complete the upgrade.
You can create and label priority types that help you identify, address, and track other specific issues, such as:
- Users who do not respond to ticket inquiries after three requests
- Events where multiple users experience identical issues, such as a down network
- Hardware repairs that require additional time to resolve
- Executive or management issues
- Meeting room or classroom issues
After you configure the priority type name, display order, and so on, you can configure alerts that notify the group manager, supervisor, or technician when the ticket due time expires. This process ensures that all mission-critical and low priority tickets are processed in the correct order.
Web Help Desk includes four priority types to help you get started. You can modify the default priority types or add new ones as needed.
The following example explains how to set up a priority type for remote college students who log in to the college network to complete their assignments.
Click the tooltips for details about each setting.
- Log in to Web Help Desk as an administrator.
- Click Setup > Tickets > Priority Types & Alerts.
-
Enter a name for this priority type. For example, Remote Students.

-
Click the Display Order drop-down menu and select the order this ticket is listed. Select 1 for high priority and 5 for low priority.
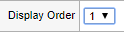
In this example, remote college students receive high priority because the only way they can work on their assignments is if they have a working computer and network connection at their home.
-
(Optional) Select a color for the label background. The default selection is White.

-
Click the Due Time drop-down menu and select the amount of elapsed time until tickets with this priority are due.

In this example, accept the default selection to indicate no due time. Since remote college students need a working network connection to complete their assignments, the issue should be addressed as soon as possible.
You can override the due dates for individual tickets in the Ticket Details page. All due dates will display in your calendar.
-
Click the Client Reminder Interval drop-down menu and select the amount of time to elapse before sending or resending a reminder to the client.

In this example, accept the default selection to indicate no client reminders. Since remote college students need a working network connection to complete their assignments, the issue should be addressed as soon as possible.
Web Help Desk sends reminders only for status types with the Client Reminders checkbox selected in the Status Types tab.
-
In the Alert Level rows, set the conditions for each Alert Level, beginning with Alert Level 1 and ending with Alert Level 3. A ticket meets a given alert level when any of the alert conditions are met.
In this example, accept the default selections in alert levels 1 through 3 to indicate no alert levels because no alert conditions (Due Time and Client Reminder Interval) were selected.

-
Click Save.
The Remote Students priority type displays in the Priority Types and Alerts window with the default priority types.
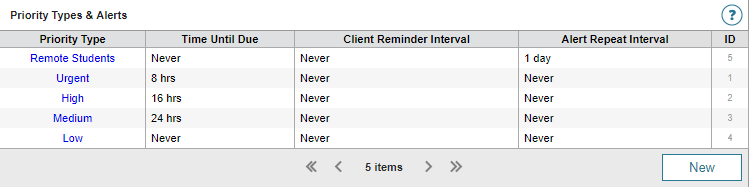
Notice that the Time Until Due and Client Reminder Interval setting are set to Never. This occurs when you accept the default selections for these settings.
Set a due date on a new ticket
- Log in to Web Help Desk.
- Click Setup > Tickets > Priority Types & Alerts.
-
Based on your help desk operations, determine the due dates you want to assign for each value in the Priority Type column.
For example, you can assign Urgent to one day and Medium to one week.
- In the Priority Type column, click a priority type.
-
Click the Due Time drop-down menus and set the values based on your decisions in step 3.

- Click Save.
- Repeat step 4 through step 6 for the remaining priority types.
Restrict client changes to Priority Types
You can configure the ticket options to prevent clients from changing or updating the Priority Types.
- Log in to Web Help Desk.
- Click Setup > Tickets > Options.
-
Under Client Options, set the Client Priority Option setting to None.

-
Click Save.
Clients are now restricted from setting priority for the tickets they submit.
Only the clients will be blocked from choosing a priority. However, the techs can still change the priority type (for example: from Medium to Urgent).