Apply approvals
This section provides information about:
- Ticket approvals
- Approver action
- Email approvals
- Client web approvals
Ticket approvals
When a client or tech logs in, creates a new ticket, and selects a request type assigned to an approval process, the following notification appears:
This Request Type requires approval.
This step begins the approval process.
If you added email notification in the approval process, Web Help Desk sends an email to the approver assigned to the first step of the approval process. To complete the approval process, the first approver approves the change, and an email is sent to the next approver. The process continues until the ticket is approved or declined, as specified in the approval process criteria.
Approver action
An approver views or responds to the approval request in email or the Web interface (based on your approval configuration).
Email approvals
To complete the email approval process, approvers receive an email when a ticket is created with an assigned approval process.
You must add email notification to the approval process. Otherwise, email notification is disabled.
The approver responds by clicking Yes or No. Web Help Desk opens a Web page asking the approver to confirm their decision. If the required number of required approvers choose Yes, the ticket status changes to Approved. If the required number of required approvers do not choose Yes, the ticket status changes to Denied.
If an approver clicks No, the approver receives an Explanation text box where they provide reasons for declining the request. The approver can also select the Display as a ticket note check box that allows the explanation to appear to the requestor.
Client web approvals
- Click Approvals to view New Approvals and vote on each new request and to view Old Approvals.
- Add an explanation (if desired).
- Select the Display as a ticket note check box to share the denial explanation as a note in the ticket.
- Click Save.
Tech web approvals
You can approve client tickets from two locations:
- My Approvals page
- Tickets
Approve tickets from the My Approvals page
- Click Tickets and select My Approvals.
- Click New Approvals.
- Vote on each new request.
- Add an explanation (if desired).
- Select the Display as a ticket note check box to share an explanation as a note in the ticket.
-
Click Save.
The ticket is moved to the Old Approvals page.
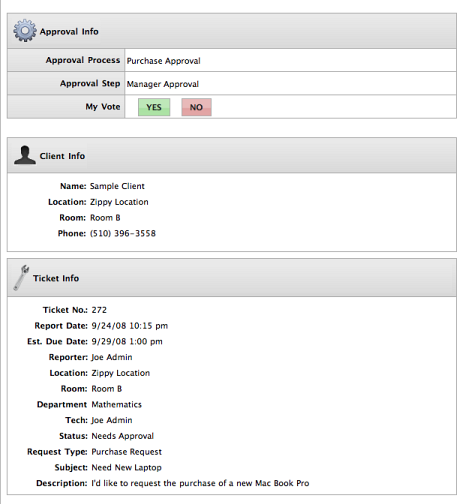
Approve tickets from the client ticket
- Click Tickets and select My Approvals.
- Click New Approvals.
- Click a ticket number.
- Scroll down to the My Approvals tab in the ticket.
- Vote on each new request.
- Add an explanation (if desired).
-
Click Save.
The approval displays in the Status & Schedule tab.
In the My Approvals page, the ticket is moved to the Old Approvals page.