Organization & sites
On this page
Introduction
In SolarWinds Service Desk (SWSD) Organization & Sites, administrators can define the time zones and default language for your organization. Although individual office hours may vary across your organization, it is important to define the hours of operation for which your IT department provides support services.
From the Organization setup page you can also create sites and departments. Per site, you can define the site's location, description, time zone, and business hours.
Navigation
| ITSM customers | ESM customers |
|---|---|
| Setup > Account > Organization & Sites | Organization > Setup > Account > Organization & Sites |
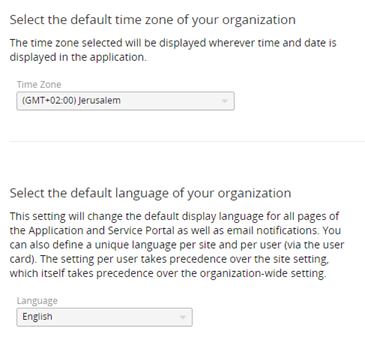
Default time zone
You should set the default time zone for your organization’s SWSD account. The default time zone is managed at the Organization level.
When you create sites you can define the time zone and business hours for each site.
Default language
You define the default language for your organization’s SWSD account.
-
When you create sites and departments, you can define a language for each site.
-
When you set up user accounts, you can define a language for each user. If you do not define a language for each user, SWSD will use your organization's default language.
-
Individual users can select their own language.
With so many options for setting languages, you may have users with different languages even though they are located at the same site.
The site-specific/user-specific time zone and language overwrite the default time zone and default language in incidents.
Sites and departments
Sites and departments are an essential part of your setup and can be used to accomplish many tasks. It is a best practice to link every user to a site and department. By linking users to sites and departments, you can automate assignment of incidents, problems, and changes.
Below are some examples of why linking users to sites and department is so essential. See Users & Groups for instructions on how to import and create new users.
-
When multiple incidents from a single location are created and they all describe the inability to print, that location's IT department can quickly conclude there is an issue with a specific printer (asset) at a specific location.
-
You want to assign Service Catalog tasks and approvals directly to the requester’s site manager.
-
If a user works in the HR Department in the USA site, and the site and department are linked to the user, an incident for that user can be automatically assigned to the USA-based IT department.
-
You don't want a user from HR to see data that should be accessible only to the Finance department. Perhaps you want only HR to be allowed to submit new hire requests, or you want only the Finance department to see solutions related to specific finance software.
-
Your organization has specific departments located in multiple sites. Perhaps you have HR representatives in the USA, Europe, and Middle East offices. You want an HR representative in London to have access to only the employee files in that region. Alternatively, you might want an HR representative from your headquarters location to have access to all employee files.
-
You want to set up auto-routing of incident tickets based on site or department. You can define a default assignee within the site and department setup. A default assignee can be an individual service agent or a predefined group such as HR or Finance.
-
You want to use incident routing analysis to determine whether there are issues related to a new tool being used. You learn that there are multiple incidents from the Facilities department related to the new tool. From that analysis you can conclude that additional training for the Facilities department would be beneficial.
-
You want to review department budgets. Tracking assets per department allows you to see how many years an asset is in use, how often it is used, and whether the asset needs to be renewed.
Sites
Sites let you designate each physical location of your offices as a unique site. As you configure your sites, take into account the makeup of your organization.
SolarWinds recommendations:
-
If you have multiple buildings on a single campus, SolarWinds recommends allocating each building as a unique site.
-
If you service different customers, you may opt to define your sites by customer name.
-
Ensure the setup you select aligns with your reporting measures.
-
Add a site manager and a default assignee to each site to help in automating the flow of your service desk objects.
Departments
Departments describe the organizational structure. Some examples are:
- Human Resources
- Facilities
- Engineering
- Sales
- Information Technology
- Marketing
Define your account
-
Navigate to the Setup > Account > Organization & Sites.
-
On the Organization screen, select the default time zone for your organization, and then the default language.
-
Scroll down. Under Sites, click Add
 on the right.
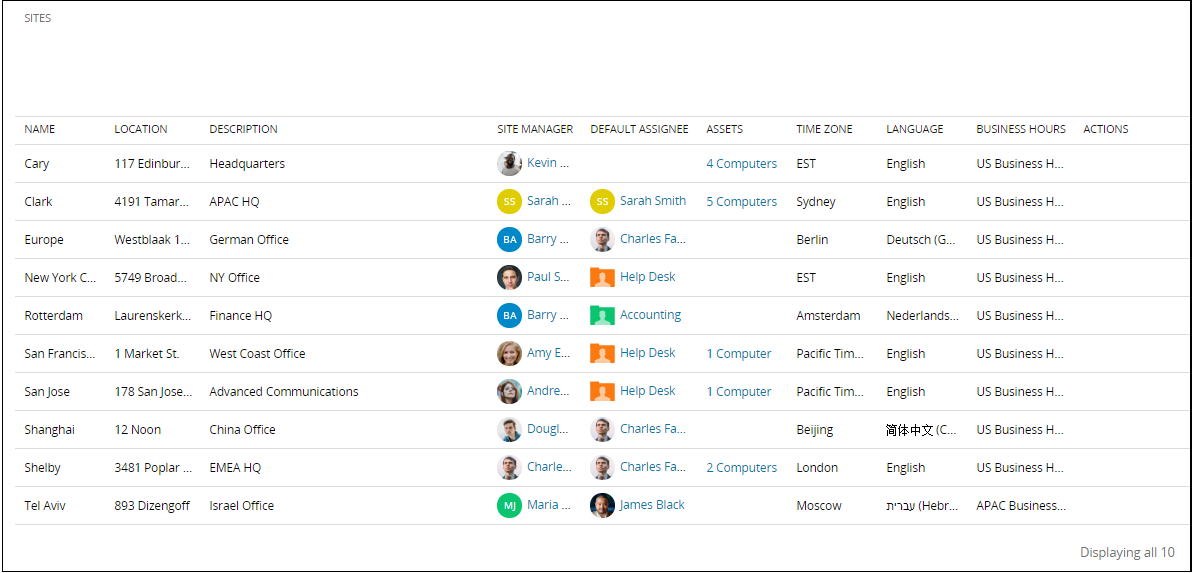
-
Complete the requested information. A red asterisk represents a required field.
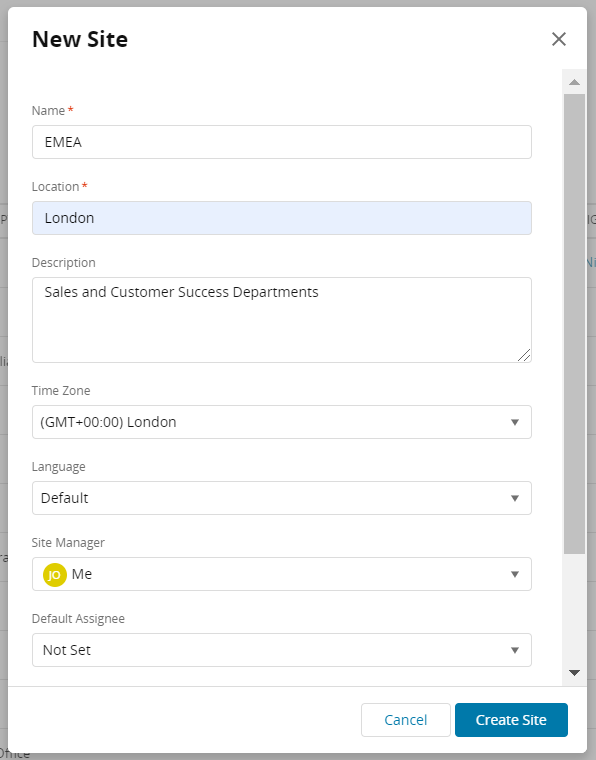
Field
Description
Name*
The name that will display in the Site field throughout your SWSD
Location*
The address of the site
Description
Provide a meaningful explanation that benefits your organization
Time Zone
When no timezone is selected, the default timezone is applied
Language
When no language is selected, the default language is applied
Site Manager
Important when determining approval levels
Default Assignee
Can be an individual user or group to ensure proper Incident routing. ESM customers can only set at the service provider level.
Business Hours
Must be selected out of the Business hours created
-
Click Create Site
 , and then Apply to save.
 -
Scroll down. Under Departments, click Add
on the right to create a new department. -
Provide a name (required field).
-
Optionally, provide a description and default assignee.
-
Click Create Department
 , and then Apply to save.
Edit a site or department definition
After a site or department has been saved, hover over the row, and in the Actions column select Edit  to reveal details.
If you import or manually create users, SolarWinds recommends adding a site manager and a default assignee to each site.