Add a node through Network Discovery in Server Configuration Monitor (SCM)
- In the SolarWinds Platform Web Console menu, navigate to Settings > Network Discovery.
- Click Add New Discovery, and then click Start.
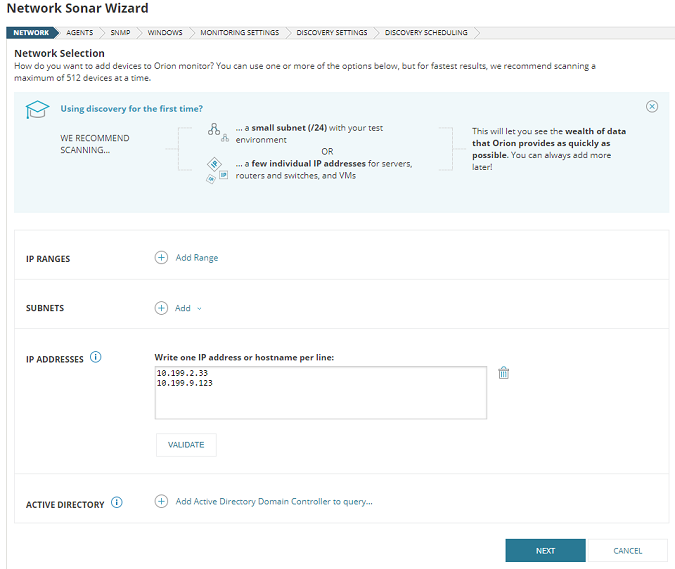
- On the Network panel, if this is your first discovery, add a limited number of IP addresses.
As you scale your implementation, you can use the following scanning options: - If the Agent panel is displayed, you enabled the Quality of Experience (QoE) agent during installation. The QoE agent monitors packet-level traffic. If there are any nodes using agents, select the Check all existing nodes check box. Click Next.
This setting ensures that any agents you deploy, including the one on your SolarWinds Platform server, are up to date. If there are no nodes using agents, you can leave this option unchecked. - On the SNMP panel:
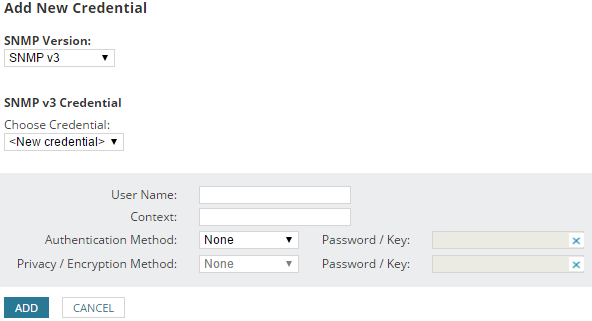
- If all devices on your network require only the default SNMPv2 public and private community strings, click Next.
- If any device on your network uses a community string other than public or private, or if you want to use an SNMPv3 credential, click Add Credential and provide the required information. Click Add, and then click Next.
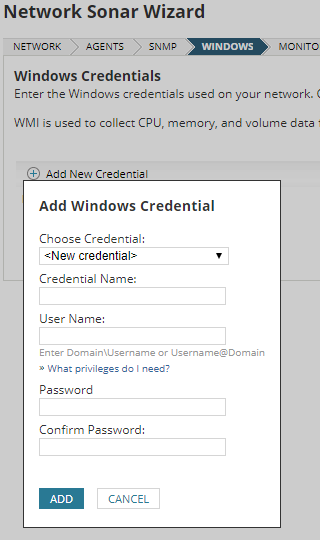
- On the Windows panel, to discover WMI or RPC-enabled Windows devices, click Add New Credential and provide the required information.
Click Add, and then click Next.
To monitor for configuration changes on Windows, you must deploy an agent.
- On the Monitoring Settings panel, you can choose to manually set up monitoring the first time you run discovery, or you can automatically monitor based on settings that you define.
- To manually set up monitoring after devices are discovered, click Manually set up monitoring after devices are discovered, and then click Next.
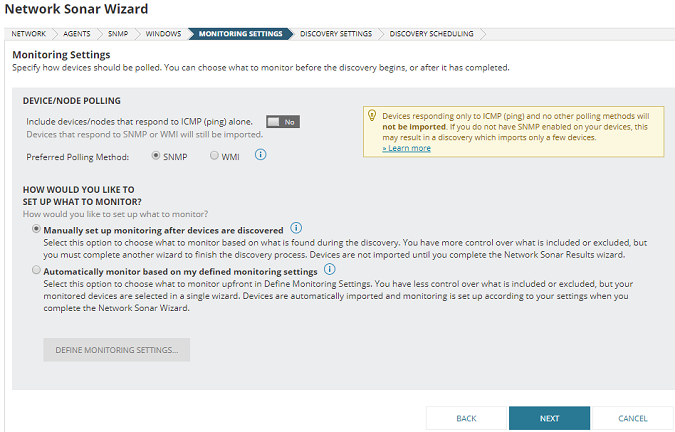
- To define monitoring settings and then automatically monitor based on those settings, click Automatically monitor based on my defined settings, and then click Define monitoring settings. Click Next.

Select the Volume Types to monitor, and then click Next.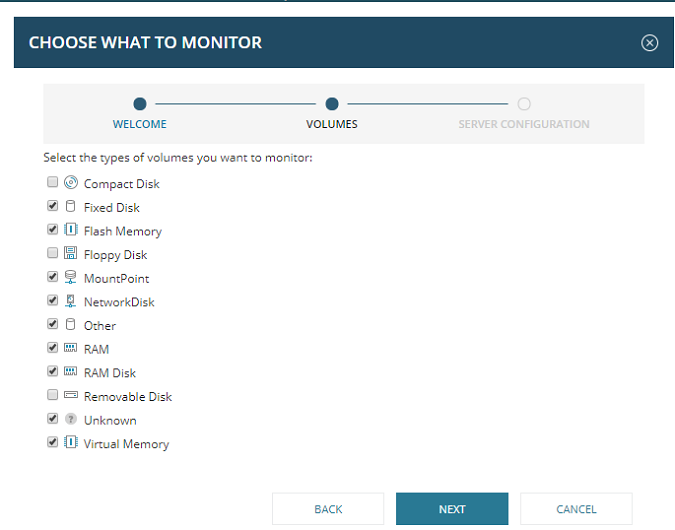
Hardware and software inventory are automatically assigned for nodes with enabled Asset Inventory, and the IIS profile is assigned when IIS is detected on a node.
Select the server configuration profiles to monitor, or if you prefer not to automatically assign profiles to newly discovered nodes, deselect any or all of the profile types. Click Finish, and then click Next.
Only out-of-the-box profiles can be added this way. Selected profiles will be applied to all discovered nodes that are eligible for that type of monitoring. This eligibility is determined by the presence of specific files or registries on the node. For example, IIS configuration files must be present for the IIS profile to be applied. Profiles other than hardware and software inventories require polling via an SolarWinds Platform Agent for Windows or Linux.
- To manually set up monitoring after devices are discovered, click Manually set up monitoring after devices are discovered, and then click Next.
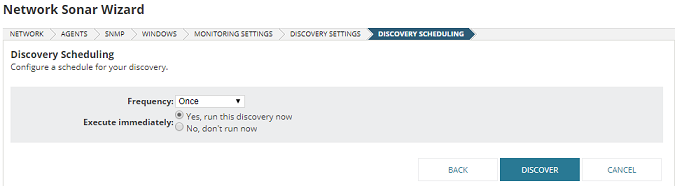
- On the Discovery Settings panel, click Next.
- Accept the default frequency and click Discover to run discovery immediately.
Discovery can take anywhere from a few minutes to a few hours, depending on the number of network elements the system discovers.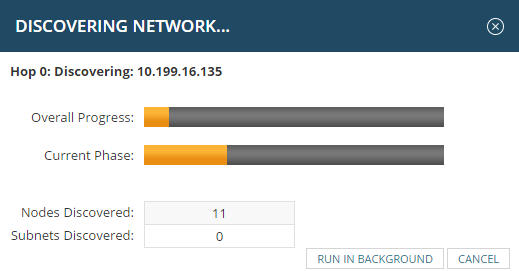
- After discovery has completed:
- If you defined your monitoring settings above, this procedure is complete, and your results are displayed.
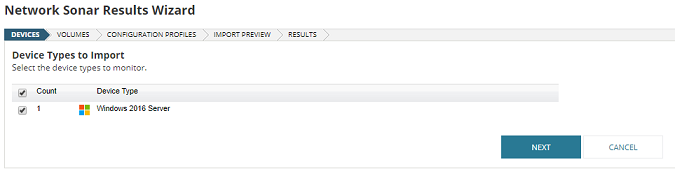
- If you chose to manually set up monitoring after devices are discovered, select the devices types to import, and click Next.
Select the volume types to import, and click Next.
Select the server configuration profiles to import, and then click Next.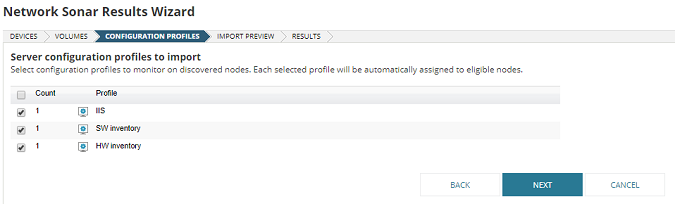
Select the devices and volumes you want to import (or ignore), and then click Import (or Ignore).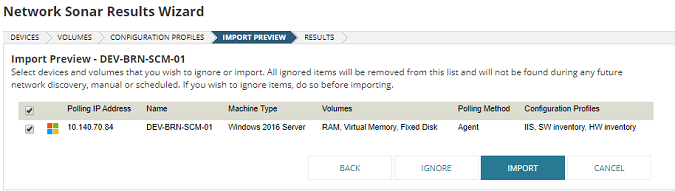
Then click Finish.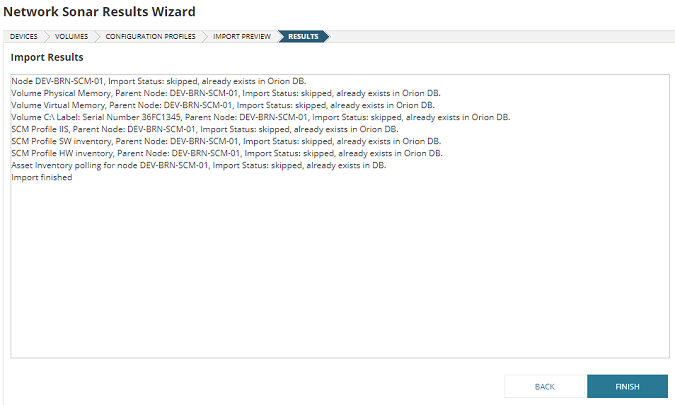
Your results are displayed.
|
Option |
Description |
|||
|---|---|---|---|---|
| IP Ranges | Use this option when you want the SolarWinds Platform to scan one or more IP ranges. If you have many IP ranges to scan, consider adding multiple discovery jobs rather than including all ranges in a single job. |
|||
| Subnets | Use this option to scan every IP address in a subnet. SolarWinds recommends scanning at most a /23 subnet (512 addresses max). Scanning a subnet returns everything that responds to ping, so we recommend scanning subnets only where the majority of devices are objects you want to monitor. |
|||
| IP Addresses | Use this option for a limited number of IP addresses that do not fall in a range. Since a network discovery job can take a long time to complete, SolarWinds recommends using this option when you are first starting out. |
|||
| Active Directory | Use this option to scan an Active Directory Domain Controller. Using Active Directory for discovery is particularly useful for adding large subnets because the SolarWinds Platform can use the devices specified in Active Directory instead of scanning every IP address. |
|||