Scheduling and Notification Options page
After you complete a Patch Manager task, the Scheduling and Notification Options page prompts you to publish a software package to the WSUS server. You can:
- Schedule the day, time, and frequency of when the task runs
- Export the task results to a file format, such as a Microsoft Excel spreadsheet or text file
- Set up an email notification that notifies you when the task is completed
After you complete the Scheduling and Notification Options, click Next to proceed to Summary.
Schedule settings
Use the Schedule Settings box to schedule several Patch Manager tasks to run immediately or on a scheduled day, week, or month.
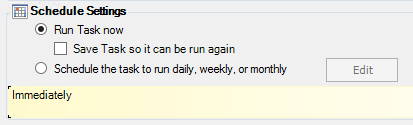
Select Run Task Now to run the task immediately. To run the task at a scheduled time:
- Select Schedule the task to run daily, weekly, or monthly, and click Edit.
- In the Schedule window, enter a start time and date for the scheduled task. To convert the scheduled time to Greenwich Mean Time (GMT), select the Universal Time check box.
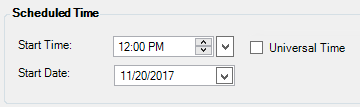
The scheduled time corresponds to the local time on the Patch Manager Automation Server where you created the task. If the targeted computers are located in a different time zone, incorporate the time difference in your Schedule Time settings. If you select Universal Time, calculate the time difference between Universal Time and the time zone of your targeted computers.
-
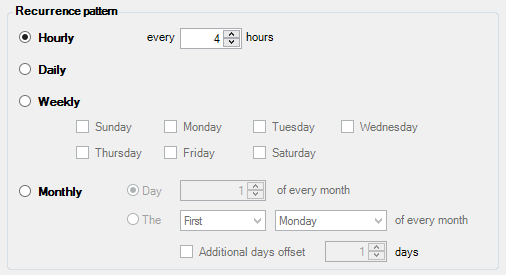
In the Recurrence pattern box, select an hourly, daily, weekly, or monthly task schedule.
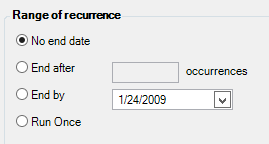
- In the Range of recurrence box, select the end date for the task, and click OK.
Export options
When the task is completed, you can export the task results to a variety of formats, including a Microsoft® Excel® spreadsheet or a CSV file. Select an option in the Export Options box.

- In the Export Options box, select Export results of the task to one of several formats and click Edit.
- Complete the options in the Export Options window.
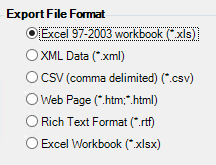
- Select an export file format for the exported results.
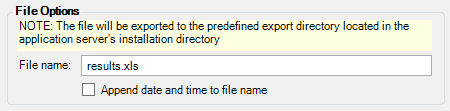
- Select a file name for the export. Select Append date and time to file name to add the date and time to the file name.
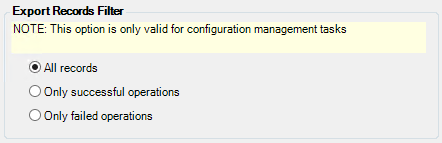
Select Export record filter if you want to export all records or only records that include successful or failed operations.
- Select an export file format for the exported results.
- Click OK.
Email options
You can configure the task to notify one or more email recipients when the task is completed. If you configured the task to export the results to a file, you can include the file in the email.
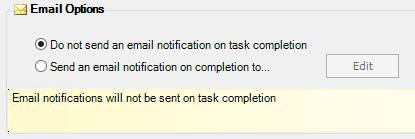
- In the Email Options box , select Send an email notification on completion to, and click Edit.
- Complete the options in the Email Notification Options window.
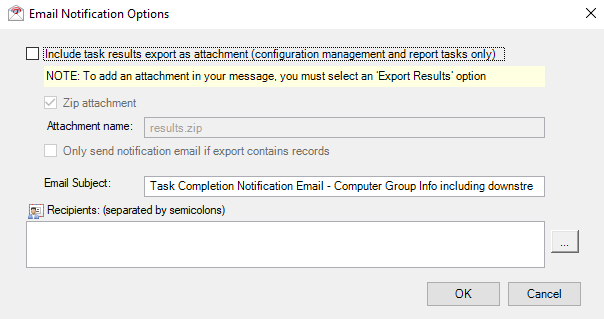
Select Include task results as attachment to include the exported results with the email notification.
Attachments are automatically zipped and cannot exceed 10MB.
- Select Only send notification email if export contains records if you want to suppress task notifications that do not yield results.
This option is only available if you decide to attach the exported results to the email.
- Enter one or more email recipients. Separate multiple entries with commas.
- Click OK.