Deploy third-party updates
After you publish the third-party updates with or without a direct download URL, deploy the third-party updates to your managed computers.
- Log in to the SCCM Console.
- In the navigation pane, click Software Library.
-
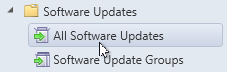
In the Software Library navigation pane, expand Software Updates and select All Software Updates.
-
In the toolbar, click Synchronize Software Updates, and then click OK.
This operation may require several minutes to complete based on the number of updates. You can track the update progress using the
wsyncmgr.logfile in CMTrace. -
In the center console, click the Add Criteria drop-down menu, select Vendor, and then click Add.
-
In the search criteria, click the link following the search condition
AND Vendor.The list of available vendors populates automatically.
-
Select the third-party update vendor you previously published, and click Search.
To save the search criteria, click Save Current Search under the Search tab.
-
Select a previously-published update.
When you select an update, information about the update displays at the bottom of the console.
-
Right click the update and select Deploy.
-
In the Deploy Software Updates Wizard, complete the Deployment Name, Software Update Group, and Collection fields, and then click Next.
-
In the Deployment Settings window, keep the default values, and click Next.
-
In the Scheduling window, set the Time based on setting to UTC (Coordinated Universal Time) and choose an installation deadline, and then click Next.
-
In the User Experience window, define the user experience for your deployment, and click Next.
For example, the following settings force the installation if the deadline is met and prevents a forced server restart.
-
In the Alerts window, set the alert thresholds to alert you if a defined percentage of machines were not updated prior to the deadline, and click Next.
If alert thresholds are not required, keep the default settings, and click Next.
-
Under Deployment Package, select Create a new deployment package and set Package source to your shared source folder on the SCCM server, and click Next.
To prevent the download from failing, verify that the target folder exists.
- Click Add and select Distribution Point.
-
In the Add Distribution Points window, select a distribution point, and click OK.
- Click Next to continue.
-
In the Download Location window, select Download software updates from a location on my network.
- Point to your WSUS Content folder on WSUS or SUP server, and click Next.
-
In the Language Selection window, select English for your select products and click Next.
-
In the Download Settings window, select Download software updates from distribution point and install, and then click Next.
-
In the Summary window, review the settings and save the deployment as a template, and then click Next.
The updates download to the SCCM source folder and deploy to the distribution point.
If the download is successful, the following message displays:
The Deploy Software Update Wizard completed successfully. - Click Close.