Configure recertifications
Activate and deactivate recertifications
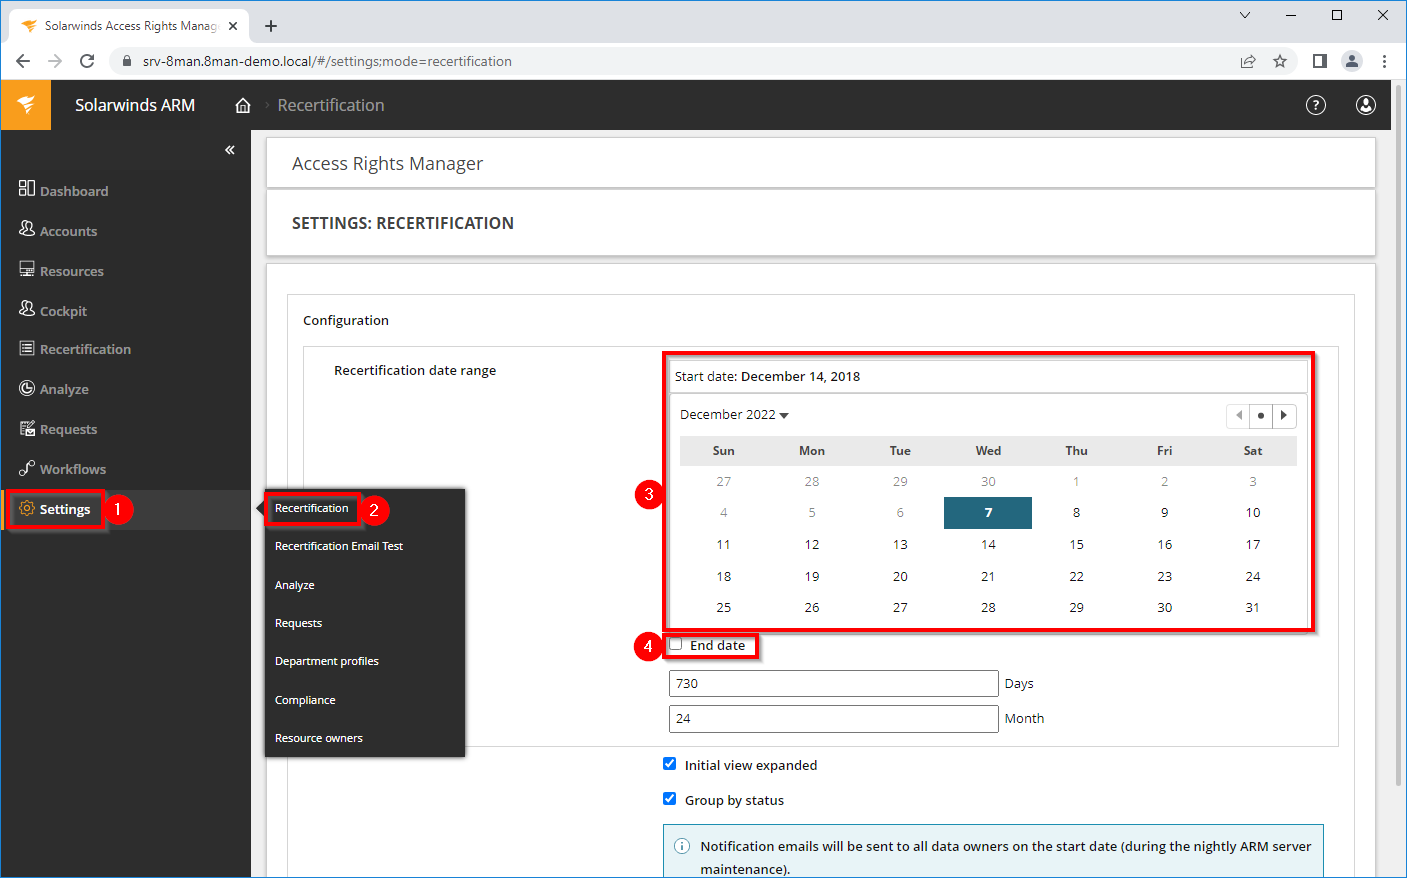
- Login with Access Rights Manager administrator credentials and select Settings.
- Click Recertification.
- Select a start date. Recertification is active from this date on.
Recertification is based on scan data from the date a data owner starts a recertification. Authorization changes that occur after the start by the data owner are not reflected by an active recertification.
- Optional: Select an end date. Recertification is deactivated from this date on. There is no other option to deactivate the recertification. All Data Owners with open recertification requests will be informed by email.
Please note that when setting an end date, choose a date after the start date + recertification period + 2 days.
These settings are valid globally for all Data Owners.
Which resources need to be certified is specified in the DataOwner configuration.
Deadlines and intervals
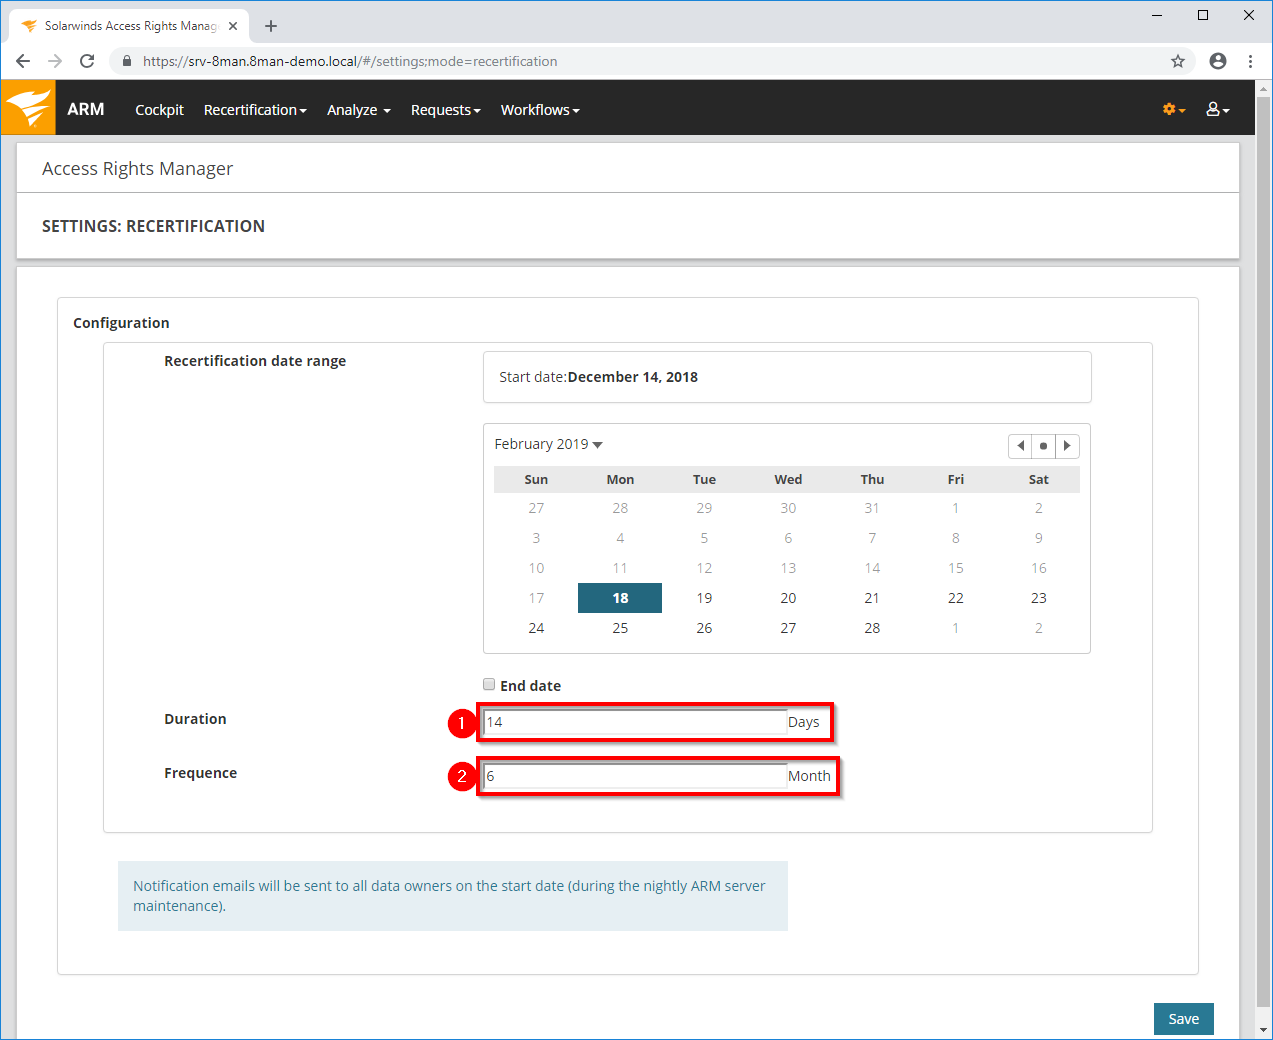
- Determine how long the data owners have time to complete recertification.
- Determine the frequency of the recertification process.
These settings are valid globally for all Data Owners.
Activate recertifications in the Data Owner configuration
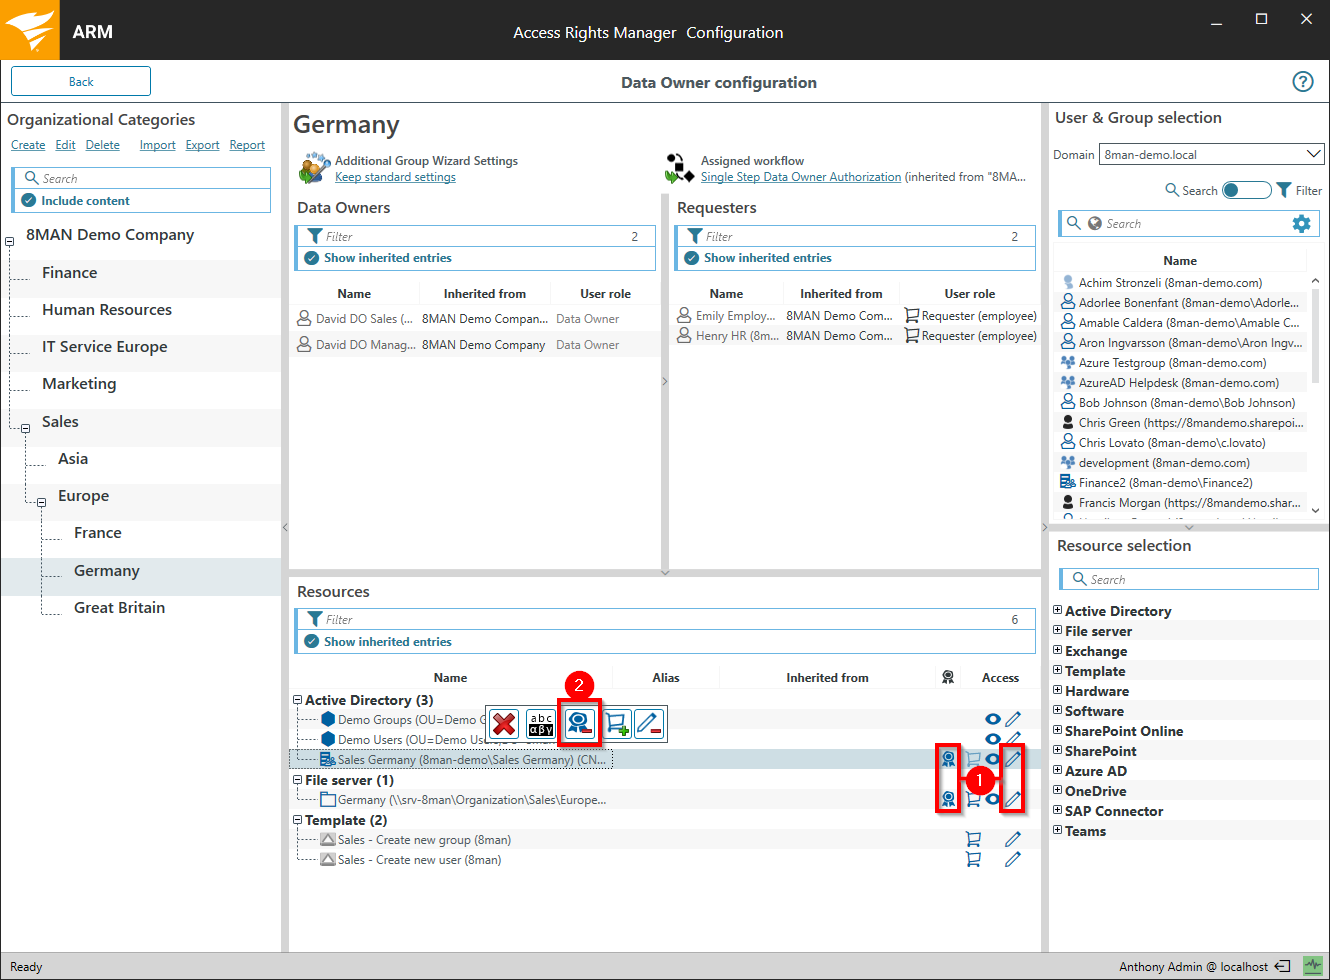
- To make resources such as file server directories or Active Directory groups appear in the Data Owner recertification process, you must mark them as editable and activate the recertification.
- Select a resource and use the flyout menu bar to activate the recertification.
Customize notification emails
Manage the frequency of email notifications
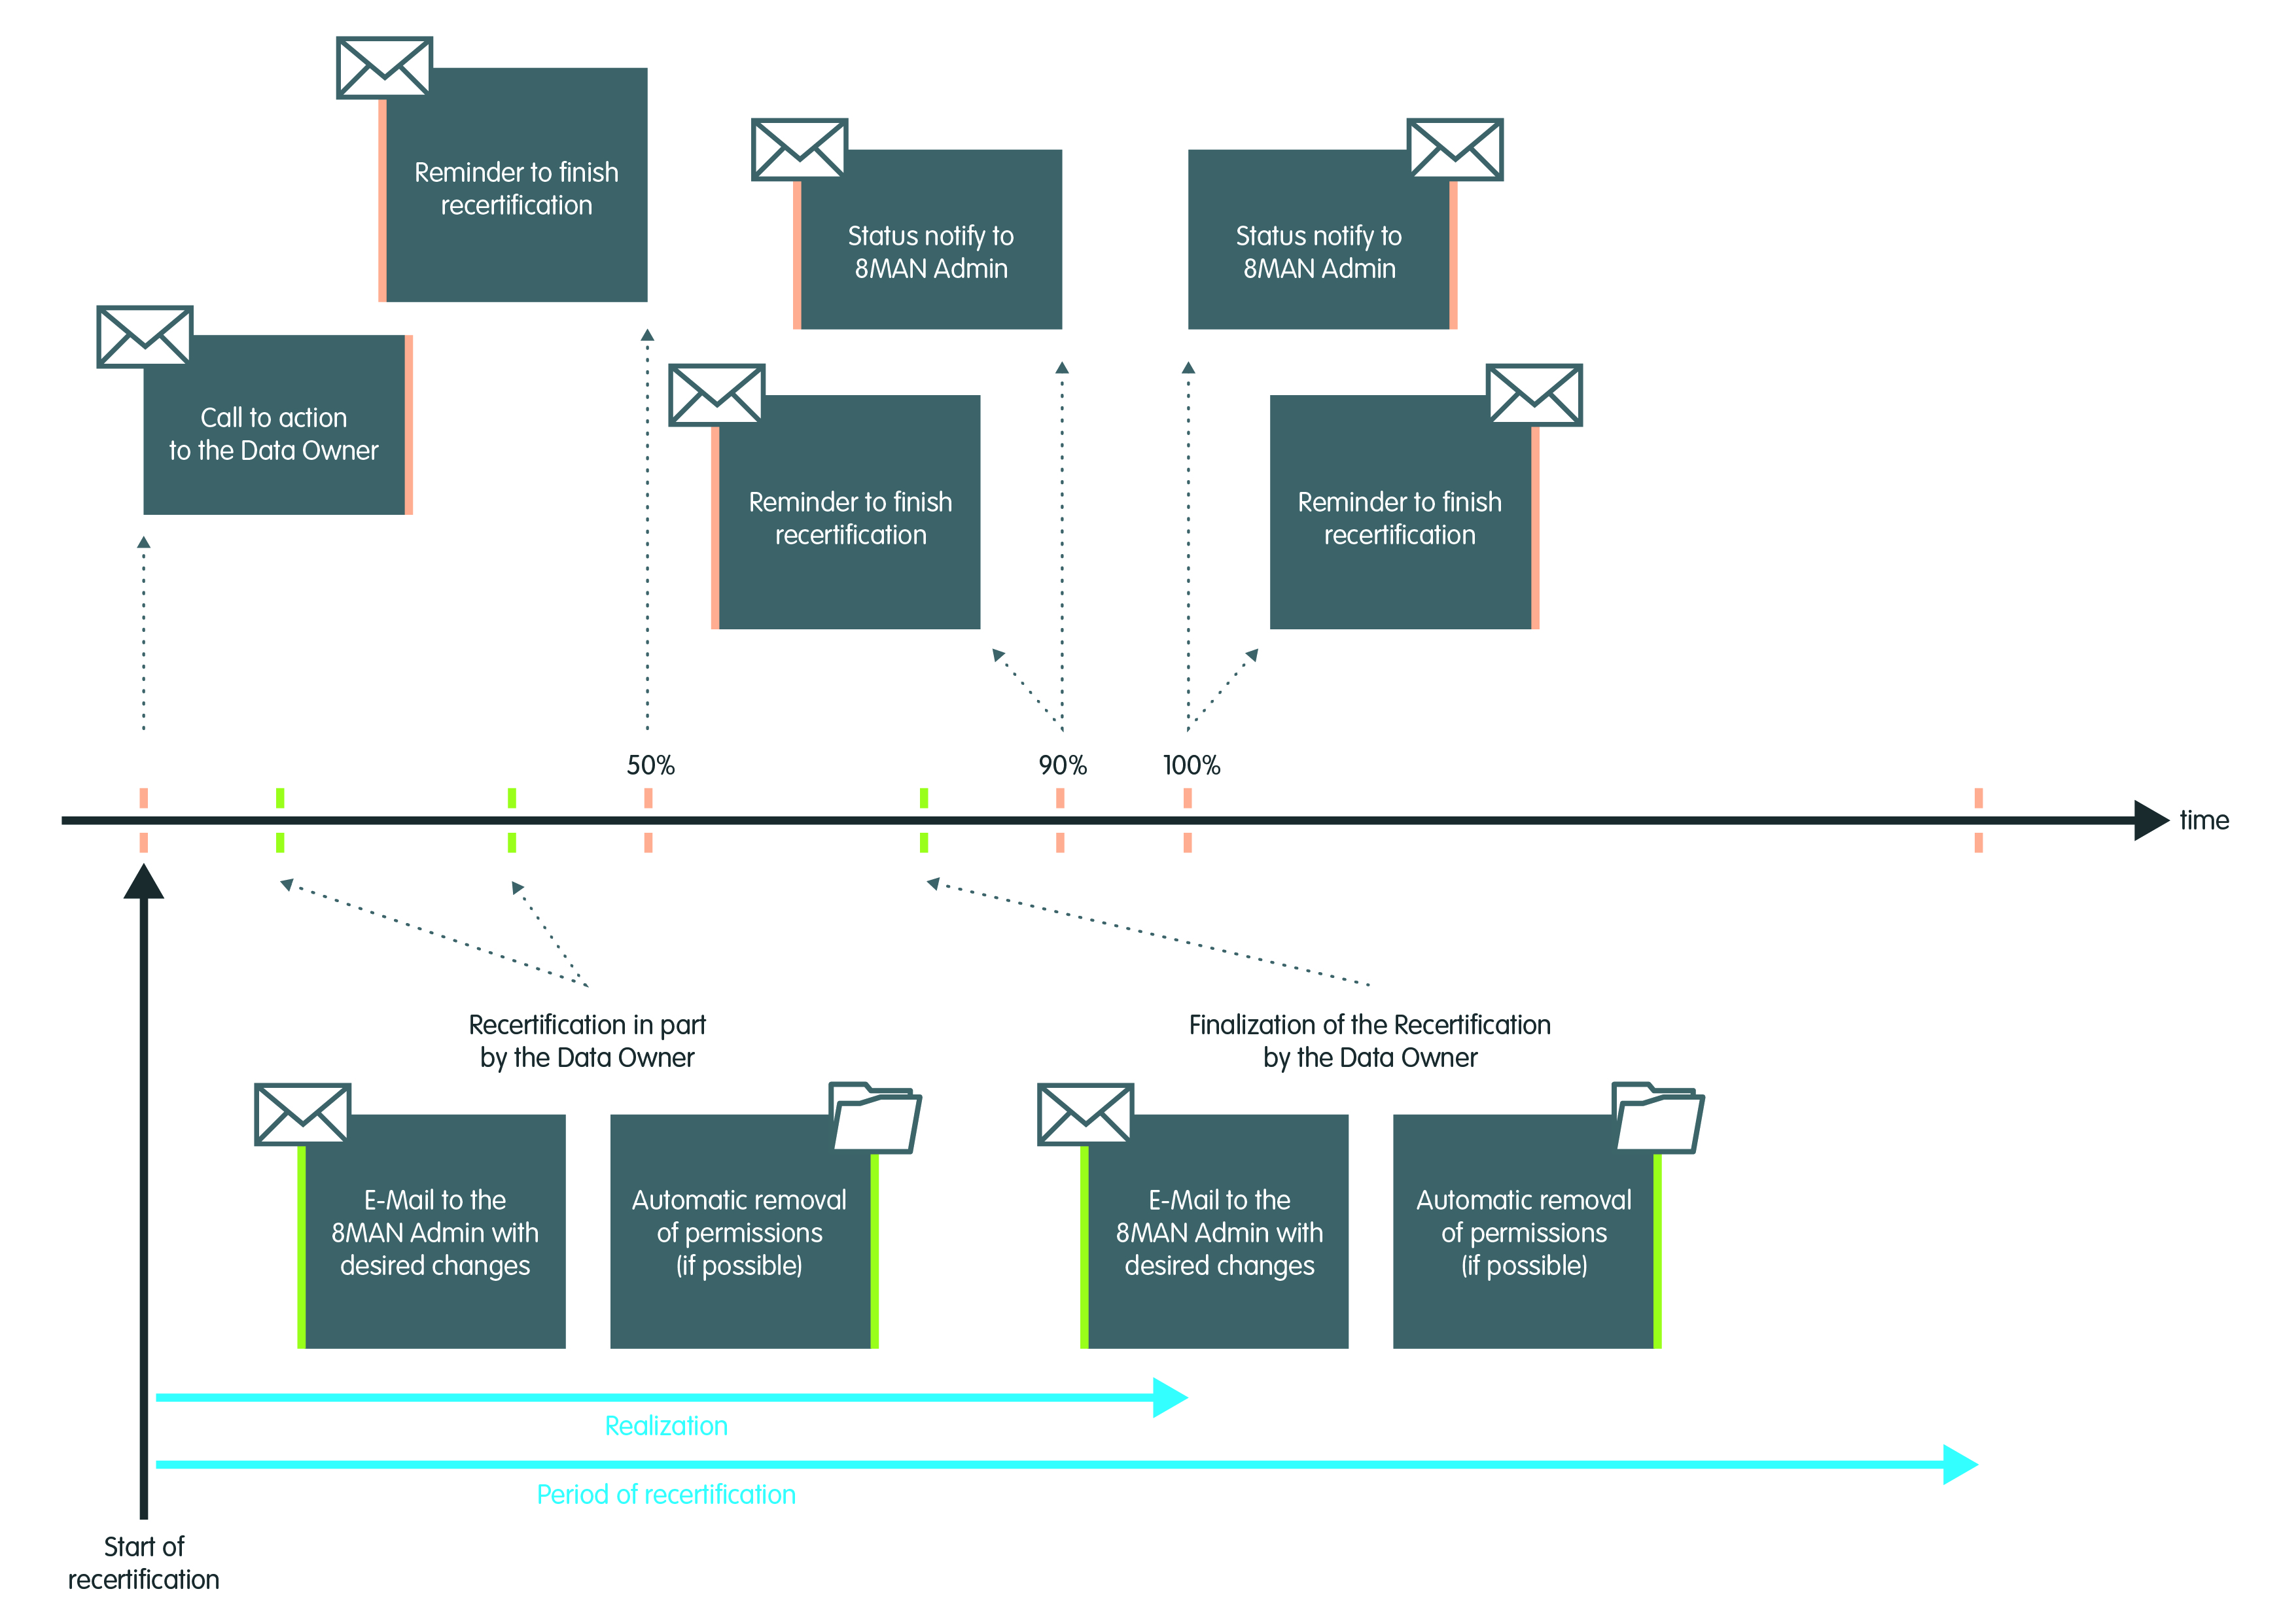
During the recertification process, email notifications are sent frequently to data owners and Access Rights Manager administrators.
The timeline diagram visualizes when emails are sent and whom they are sent to. Every email above the timeline (with an orange marking) can be deactivated.
Adjust content and style of the notification email
Access Rights Manager offers standard templates in XML stylesheet format. You can find them in the following directory:
OLD: %ProgramFiles%\Protected Networks\8MAN\etc\mails\Recertification
NEW: %ProgramFiles%\SolarWinds\ARM\etc\mails\Recertification
In case you want to modify these templates, please copy the files (*.xslt und css.html) to:
%ProgramData%\protected-networks.com\8MAN\cfg\mails\Recertification
The sub-directory "mails\recertification" must be created in advance.
Adjust the templates in "ProgramData". Access Rights Manager primarily uses the customized templates in "ProgramData".
When updating to a newer ARM version the data in "ProgramFiles" will be overwritten.
Test notification emails for recertification
Background / Value
In the stages of recertification, Access Rights Manager sends various notification emails. Test the notification emails - including your adjustments if necessary, before you enable recertification.
Related features
Customize notification emails for recertification (Administrator)
Step-by-step process
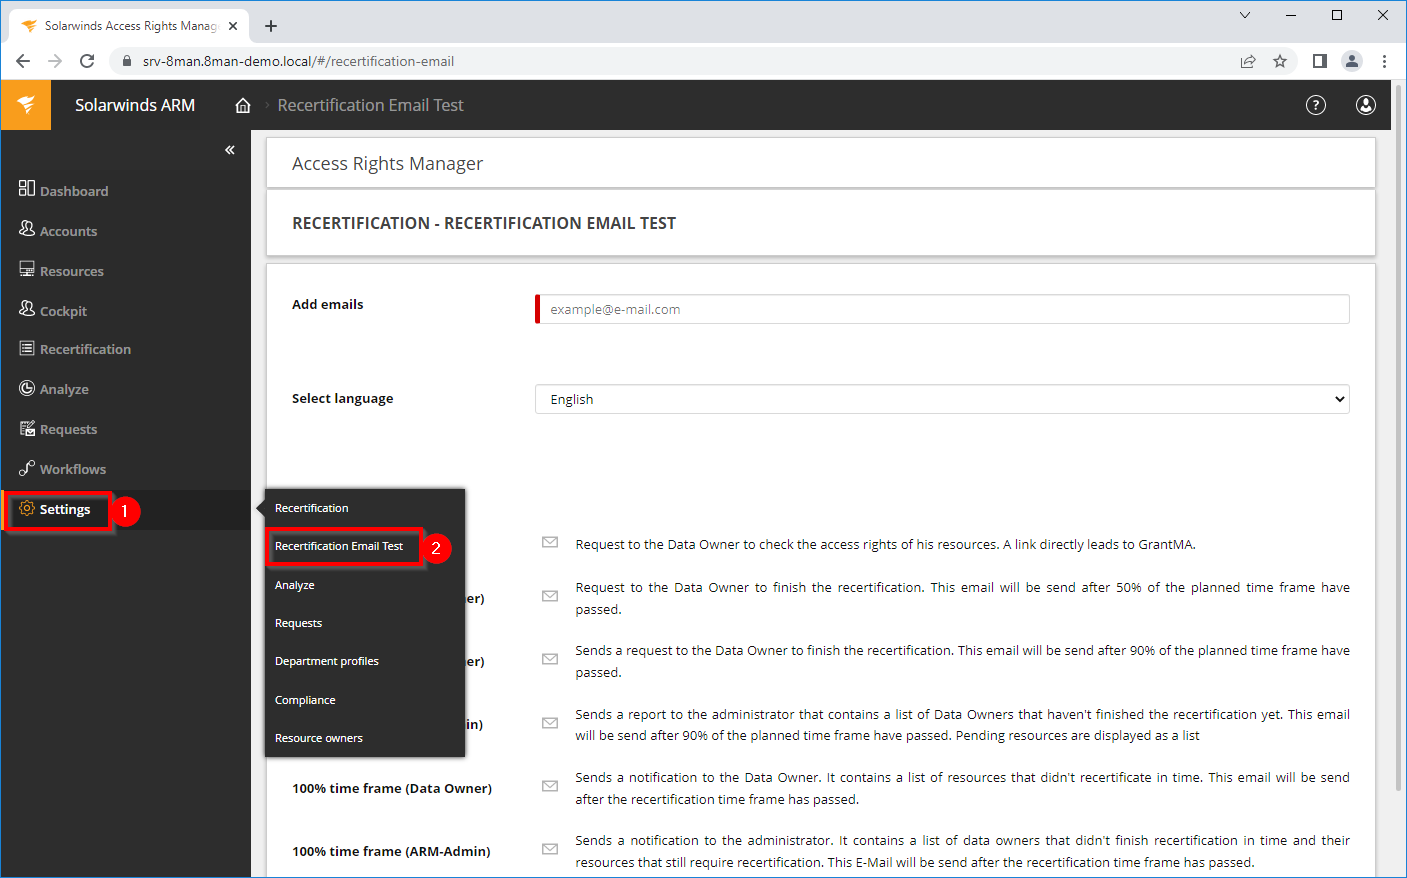
Log into the web client as an administrator.
- Click Settings/the gear.
- Click Recertification Email Test.

- Enter one or more recipients.
- Choose the language.
- Send the desired notification email.
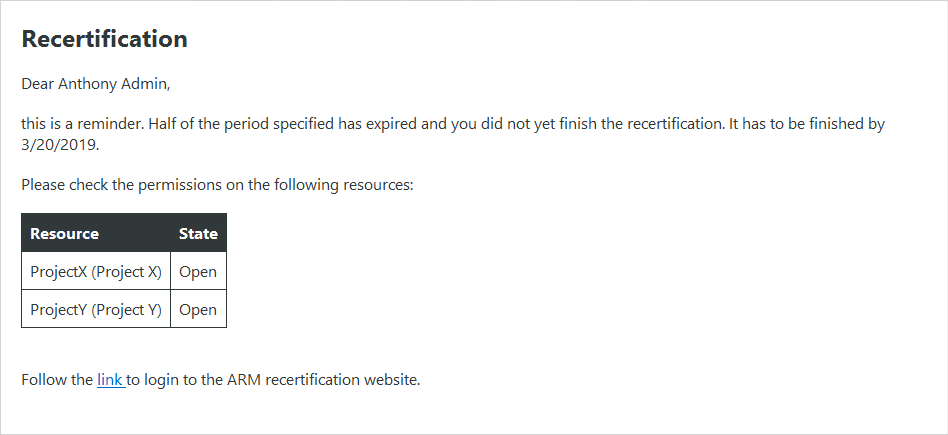
Example of a notification at the beginning of the recertification.
Configure display settings
Eliminate the display of technical accounts
The recertification process has been designed to check the permissions of real users. Technical accounts (see the following list) are not displayed:
- Creator Owner (S-1-3-0)
- Creator-Group (S-1-3-1)
- Creator-Owner-Server (S-1-3-2)
- Creator group-Server (S-1-3-3)
- All Services (S-1-5-80-0)
- RDT (S-1-5-1)
- Network (S-1-5-2)
- Batch processing (S-1-5-3)
- Interactive (S-1-5-4)
- Domain controller (S-1-5-9)
- Local System (S-1-5-18)
- Local Service (S-1-5-19)
- Network service (S-1-5-20)
Manage display settings for resolving group memberships
Recertifications adopt the settings of the blacklist for views and reports. Please see the section "Configure the blacklist for views & reports".