Edit asset properties
-
In the toolbar, click Assets and select Search Assets.

- Click the Basic Search tab.
-
Select and/or complete the appropriate fields to locate the asset.
For additional search options, click Advanced Search and complete the fields in the window.
-
Click Search.
Your search results display in the bottom window.
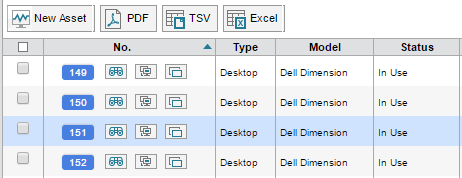
-
In the No. field, click the asset number icon.
The Asset tab windows display.
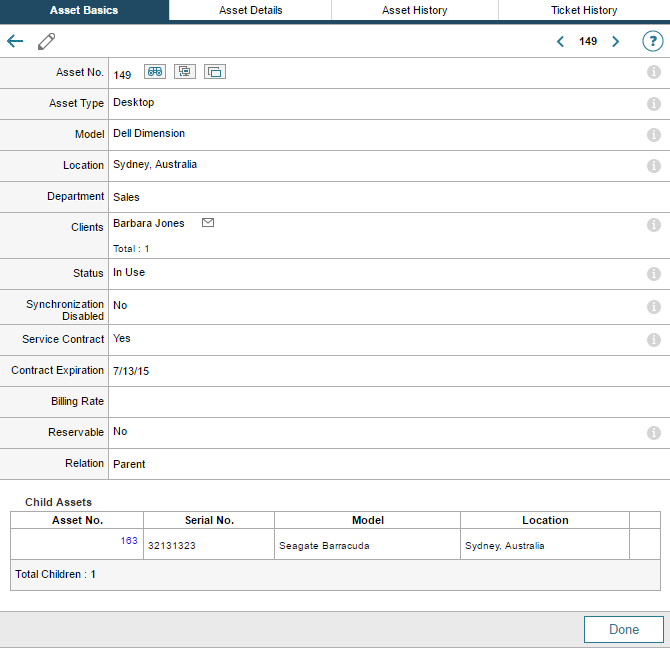
Each tab window provides unique information.
- Asset Basics provides general asset information you can edit, including the asset type, model location, and status.
- Asset Details provides detailed asset information you can edit, including serial number, version, and IP address.
- Asset History provides dates and actions when an asset was removed, modified, or changed status, as well as the associated tech. You cannot edit this information.
-
Ticket History provides the ticket number, date, status, and problem report associated with the asset, as well as the associated tech in each instance. This information cannot be edited.
- In the window, click the Edit icon.
- Make any changes as required. Click the tooltips for details about each option.
- Click the Asset Details tab.
- Make any changes as required.
- Click Save.
Create parent and child associations
In the Asset Basics tab, you can link assets as a parent or as a child of another asset. When you assign parent/child associations to your assets, the following conventions apply:
- A parent asset can have any number of child assets.
- A child asset cannot be a parent to another asset.
- Removing the parent status orphans all the child assets for that parent.
- Child assets can be removed individually from a parent.
- A child asset can have any number of parent assets.
- Child assets inherit priorities from the parent objects including location, status, and other properties.
- Parent/child status is set by adding child assets to a parent asset. You cannot add a parent to a child.
Add assets as children of a parent asset
- In the toolbar, click Assets and select Search Assets.
- Click the Basic Search tab.
-
Select or complete the appropriate field to locate the asset.
For additional search options, click Advanced Search and complete the fields in the window.
- Click Search.
-
In the No. field, click an asset number.
The Asset Basics tab windows appears, displaying information about your selected asset.
The Child Assets box displays at the bottom of the window.
- Click the Edit
 icon at the top of the window.
 -
In the Child Assets tabbed box, click Edit.

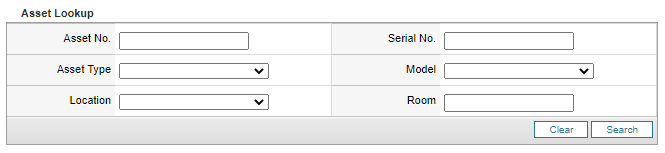
The Asset Lookup box displays.
-
Select or enter the search criteria to locate the appropriate asset, and then click Search.
The Search Results box appears with a list of assets.
-
Under Search Results, click Link to select one of the listed assets as a child asset.

-
Under Child Assets, click Done.

The asset is added as a child asset.
-
Click Save.
The asset is saved as a child asset.
Remove assets as children of a parent asset
- In the toolbar, click Assets and select Search Assets.
- Click the Basic Search tab.
-
Select or complete the appropriate field to locate the asset.
For additional search options, click Advanced Search and complete the fields in the window.
-
Click Search.
Your search results display in the bottom window.
-
In the No. field, click the appropriate asset number icon. For example, 101.
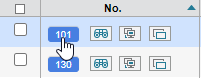
The Asset Basics tab windows appears, displaying information about your selected asset.
The Child Assets box displays at the bottom of the window.
- Click the Edit icon at the top of the window.
- Click the trash can next to the child asset you want to remove.
- Click Save.