Queues
On this page
Introduction
Queues are designed to help manage shared workloads. By giving managers and agents the ability to review and prioritize incoming tickets with a shared workload, queues help ensure you meet Service Level Agreements (SLAs).
Queues aid your teams in working most effectively to provide a satisfying user experience.
Tickets in queues are Pending Assignment, therefore, they are not being worked on by an agent until the ticket is officially assigned.
Navigation
| ITSM customers | ESM customers |
|---|---|
| Setup > User & Groups > Queues |
Service Provider > Setup > User & Groups > Queues |
All Queues index page
From the All Queues index page, you can:
-
Search for a specific queue or a word or phrase contained in a queue name.
-
Create a new queue.
-
See the complete list of queues, with their description, number of queue member, whether the queue is identified as part of a round robin assignment, and whether the queue is active.
-
See the details of a queue by clicking the queue name. There you can edit the details of the queue. You can also see a list of queue members, and click the name of any queue member to see that user's details, including who the user reports to.
You can customize the All Queues index page to a view that best meets your needs. See
Maximize the benefits of using queues
To maximize the benefits of using queues to help with ticket management:
- Create a new queue.
- Set up automatic assignment of items to the queue.
- Create a view of the shared work items.
- Share the view with the queue members.
For example, when your team addresses many Tier 1 Incidents, SolarWinds recommends that you create a new queue for Tier 1.
Step 1: Create a new queue
(Using a Tier 1 Incidents queue as a use case)
- From the All Queues index page, click Add
 to create a new queue.
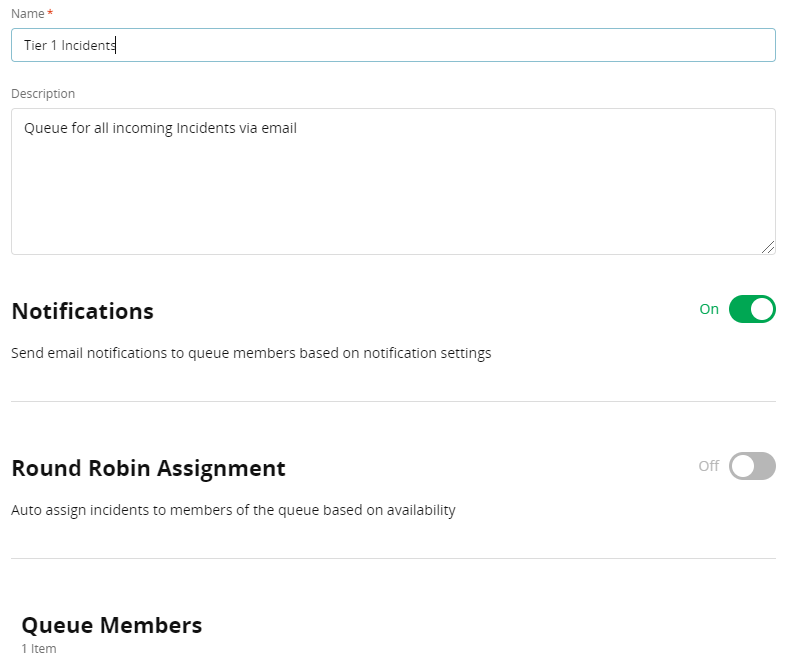
 - Provide a name for the queue, for example, Tier 1 Incidents.
- Provide an optional Description, for example, Queue for all incoming incidents via email.
- Determine whether you want to provide automatic email notifications. The Notifications option is set to Off by default. When you wish to provide automatic email notifications, simply toggle the pill bar to On to inform relevant members that a new Incident has been created.The queue Notification toggle is specific to the queue you are creating and independent of the general notifications toggle you see in Setup > Global Settings > Notification Settings. When the queue toggle is off, queue members will not receive emails notifications regarding the queue.
- Determine whether you want to allow Round Robin Assignment, which auto-assigns Incidents to members of the queue based on their availability. The Round Robin Assignment option is set to Off by default. When you wish to auto-assign based on agent availability, simply toggle the pill bar to On. See Round Robin assignment for more information.If the Round Robin assignment is not selected, incidents stay assigned to the queue in the Pending Assignment state until someone manually assigns the incident.
- Add queue members by clicking the Add Members button. Here you select the members who will have access to tickets in the queue. Members can include individual users and/or groups. When a group is added to a queue, the group and queue are synced. Be aware that if someone is added to or removed from the group, that person will be added to or removed from the queue as well.
- Set a queue manager (individual or group) from the drop-down list of queue members.
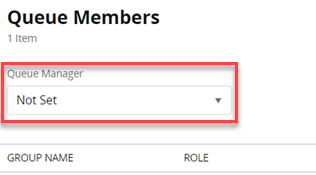 Setting a queue manager ensures that the queue manager receives notifications when an incident is about to breach or does breach an SLA even if the incident is still in a queue.
 - Create and activate the queue:
- Click Create in the upper right of your screen.
After clicking Create, activate the queue via the Activation toggle in the upper right.
All new queues are inactive by default and must be activated via the toggle. After activation, the new active queue displays in the Assigned to fields.
Step 2: Automate assignment of relevant incidents directly to the queue
Make sure you understand the Round Robin ticket assignment described in Step 1 to help with automation of ticket management. (Additional information is available in Round Robin assignment.)
To further automate your tickets, follow the steps below:
- Go to Setup > Service Desk > Automation Rules.
-
Click Add
. 
-
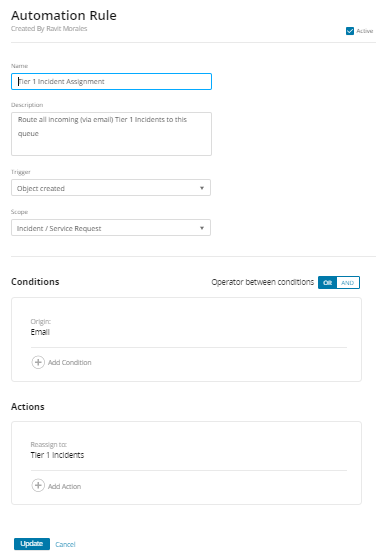
In the Automation Rule dialog, provide a name for the rule, for example: Tier 1 Incident Assignment.
- Provide an optional description, for example, Route all incoming (via email) Tier 1 Incidents to this queue.
- From the Trigger list, select the appropriate option (Object created, Comment added, Object updated, or Custom).
- From the Scope, select the appropriate option (Incident / Service Request, Change, or Computer).
- Optionally, under Conditions, click either +Add Condition or +Add Time Based Condition.
To the right of Conditions, add an operator (OR or AND) between conditions if needed.
Step 3: Create a list view filter based on the new queue
- Navigate to Service Desk > Incidents.
- Select Edit View to filter and edit your view to only display Incidents assigned to Tier 1 Incidents Queue. (For more information regarding filtering, editing and/or customizing your view, see
- Click Apply.
- Notice that the Index title now shows (Edited). Select the ellipsis
 to reveal the dropdown menu.
 - Click Save as New, and then name the new view.
- Click Save.
Step 4: Share the view with queue members
-
With the new view displayed, ellipsis
to reveal the dropdown menu again. -
From the dropdown, select Share.
-
In the Share View dialog, search for the name of an individual and/or group and select from the list. Repeat as needed until all necessary individuals and/or groups are selected.
-
Click Share.
After you share, an email is sent to all individuals and/or groups selected, informing them that the new view is available to them.
You can create as many new queues as needed to manage your service desk.
Edit a queue
-
Navigate to Setup > Users and Groups > Queues.
-
From the All Queues index page, click the link to the queue that needs to be edited.
-
Modify as required.
-
Click Save in upper right.
Implement queues to manage your tickets
Queues can be applied in many areas throughout your SWSD. Below is a detailed list of fields and functions where queues can be applied.
The use of queues is available only after the field is edited.
| Field/Function | Location | Objects |
|---|---|---|
| General Menu | ||
| Assigned to Field |
|
Incidents, Problems, Changes and Releases |
| Default Assignee | Record pages | Service Catalog Items and Change Catalog Items |
| User type variable | Record pages | Service Catalog Items and Change Catalog Items |
| User type custom field | Record pages | All objects |
| Technical Contact field | Record pages | Computers, Printers, Mobile Devices and Other Assets |
| Owner field | Computers, Printers, Mobile Devices and Other Assets | |
| Setup Menu | ||
| Categories: Default Assignee | Categories setup page | |
| Sites: Default Assignee | Organization setup page | |
| Departments: Default Assignee | Organization setup page | |