Create your first application monitor and alert
After being applied to a node, a template becomes an application monitor, which is comprised of component monitors, also known as performance counters. Application monitors created from templates are used to report metrics based on your needs. This example provides steps for creating a template for monitoring WMI.
You will create a template with added monitors, configure the monitors, then apply the template to nodes for monitoring. We also provide information for creating an alert for the WMI application to send email notices based on monitored thresholds.
You may need to log in with an administrator account to perform this action.
Create a WMI monitor template
- In the SolarWinds Platform Web Console, click Settings > All Settings > SAM Settings > Create a New Template.
- Provide a name for the template and click Add Component Monitor.
- Select WMI Monitor and click Add.
- Select credentials or Inherit Credentials from Node.
- In the Query field, enter a WQL query to return a statistic to be reported.
- Enter thresholds or select Use thresholds calculated from baseline data.
- Click Submit.
Apply the WMI monitor template to a node
You may need to log in with an administrator account to perform this action.
- Click Settings > All Settings > SAM Settings > Manage Templates.
- Locate your template and click Assign to Node.
- Select the Windows node from the left pane, click the green arrow to move it to the right pane, and click Next.
- Choose the credentials, click Assign Application Monitor, then click Done.
Alert on the WMI application via email
- Click Alerts & Activity > Alerts > Manage Alerts.
- Click Add New Alert and name the alert.
- On the Properties tab, enter required information, and click Next.
-
For the Trigger Conditions, complete the section as shown:
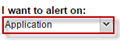

To add the second trigger condition, click [+]. The first trigger condition tests for Status (Down); the second tests for the specific application instance (indicated by 1 Object).
- For Trigger Actions, click Add Action, select Send an Email/Page, then click Configure Action.
- Enter required information and click Next to advance through the wizard.
-
Review and edit the Reset Actions and the Summary, then click Submit.
The Manage Alerts page indicates the alert was created successfully.