VictorOps
With VictorOps integration you can send your AppOptics alerts into your VictorOps timeline allowing you to use all of their Notification Management features.
Enabling VictorOps integration
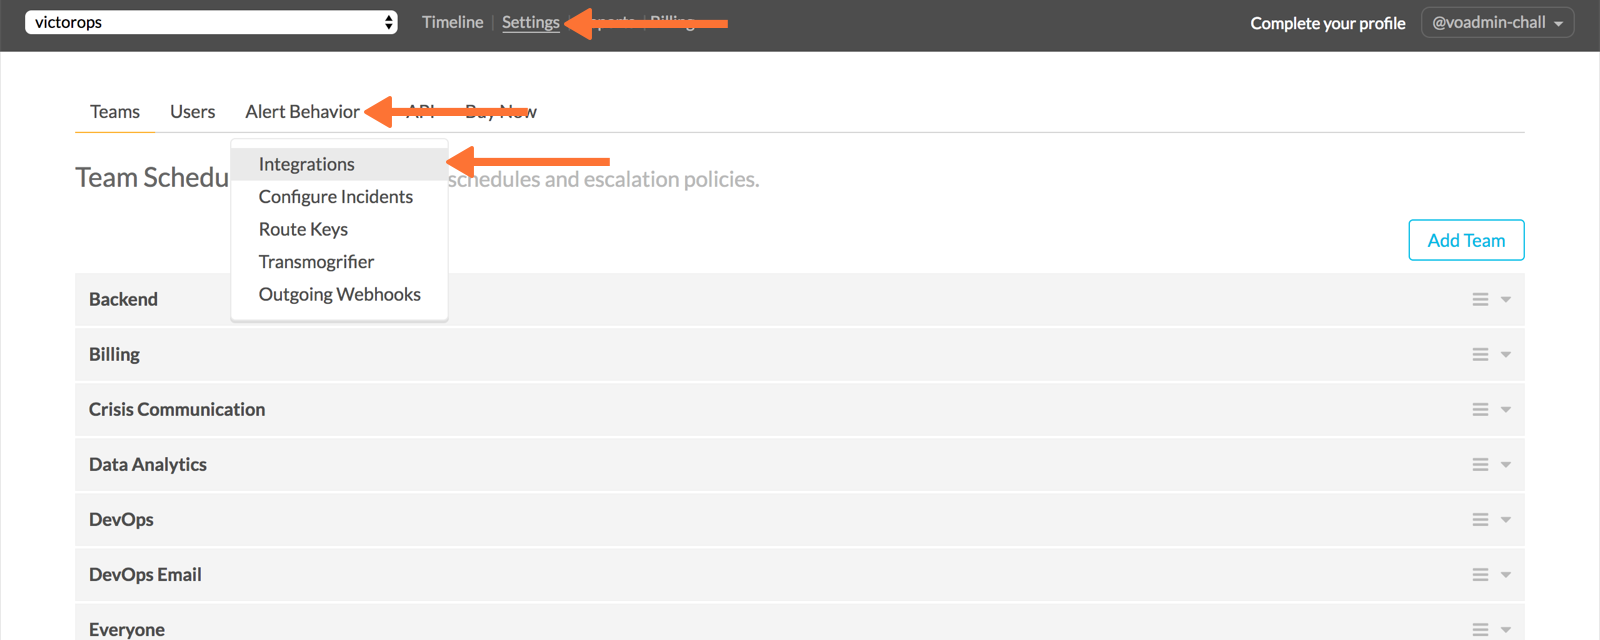
In your VictorOps Main Timeline
Select Settings >> Alert Behavior >> Integrations >> AppOptics.
If the integration has not yet been enabled, click the Enable Integration button to generate your Service API Key.
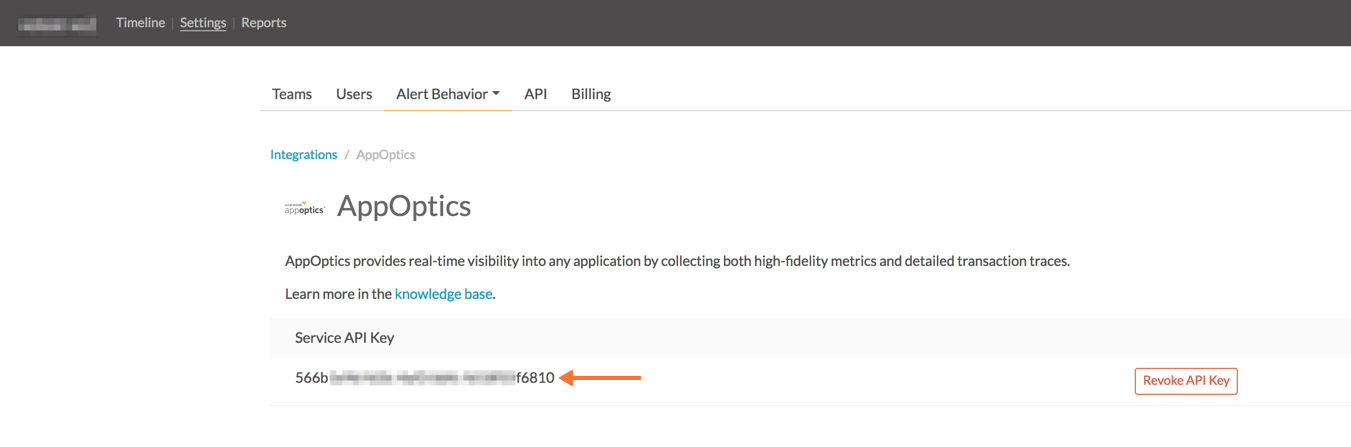
Copy the Service API Key to your clipboard and determine which VictorOps routing-key value will be used for this integration. For more information on VictorOps routing keys and best practices, click here.
AppOptics Configuration
From the Settings section in the navigation menu to the left, select Notification Services. Then, select VictorOps and click Add Configuration.
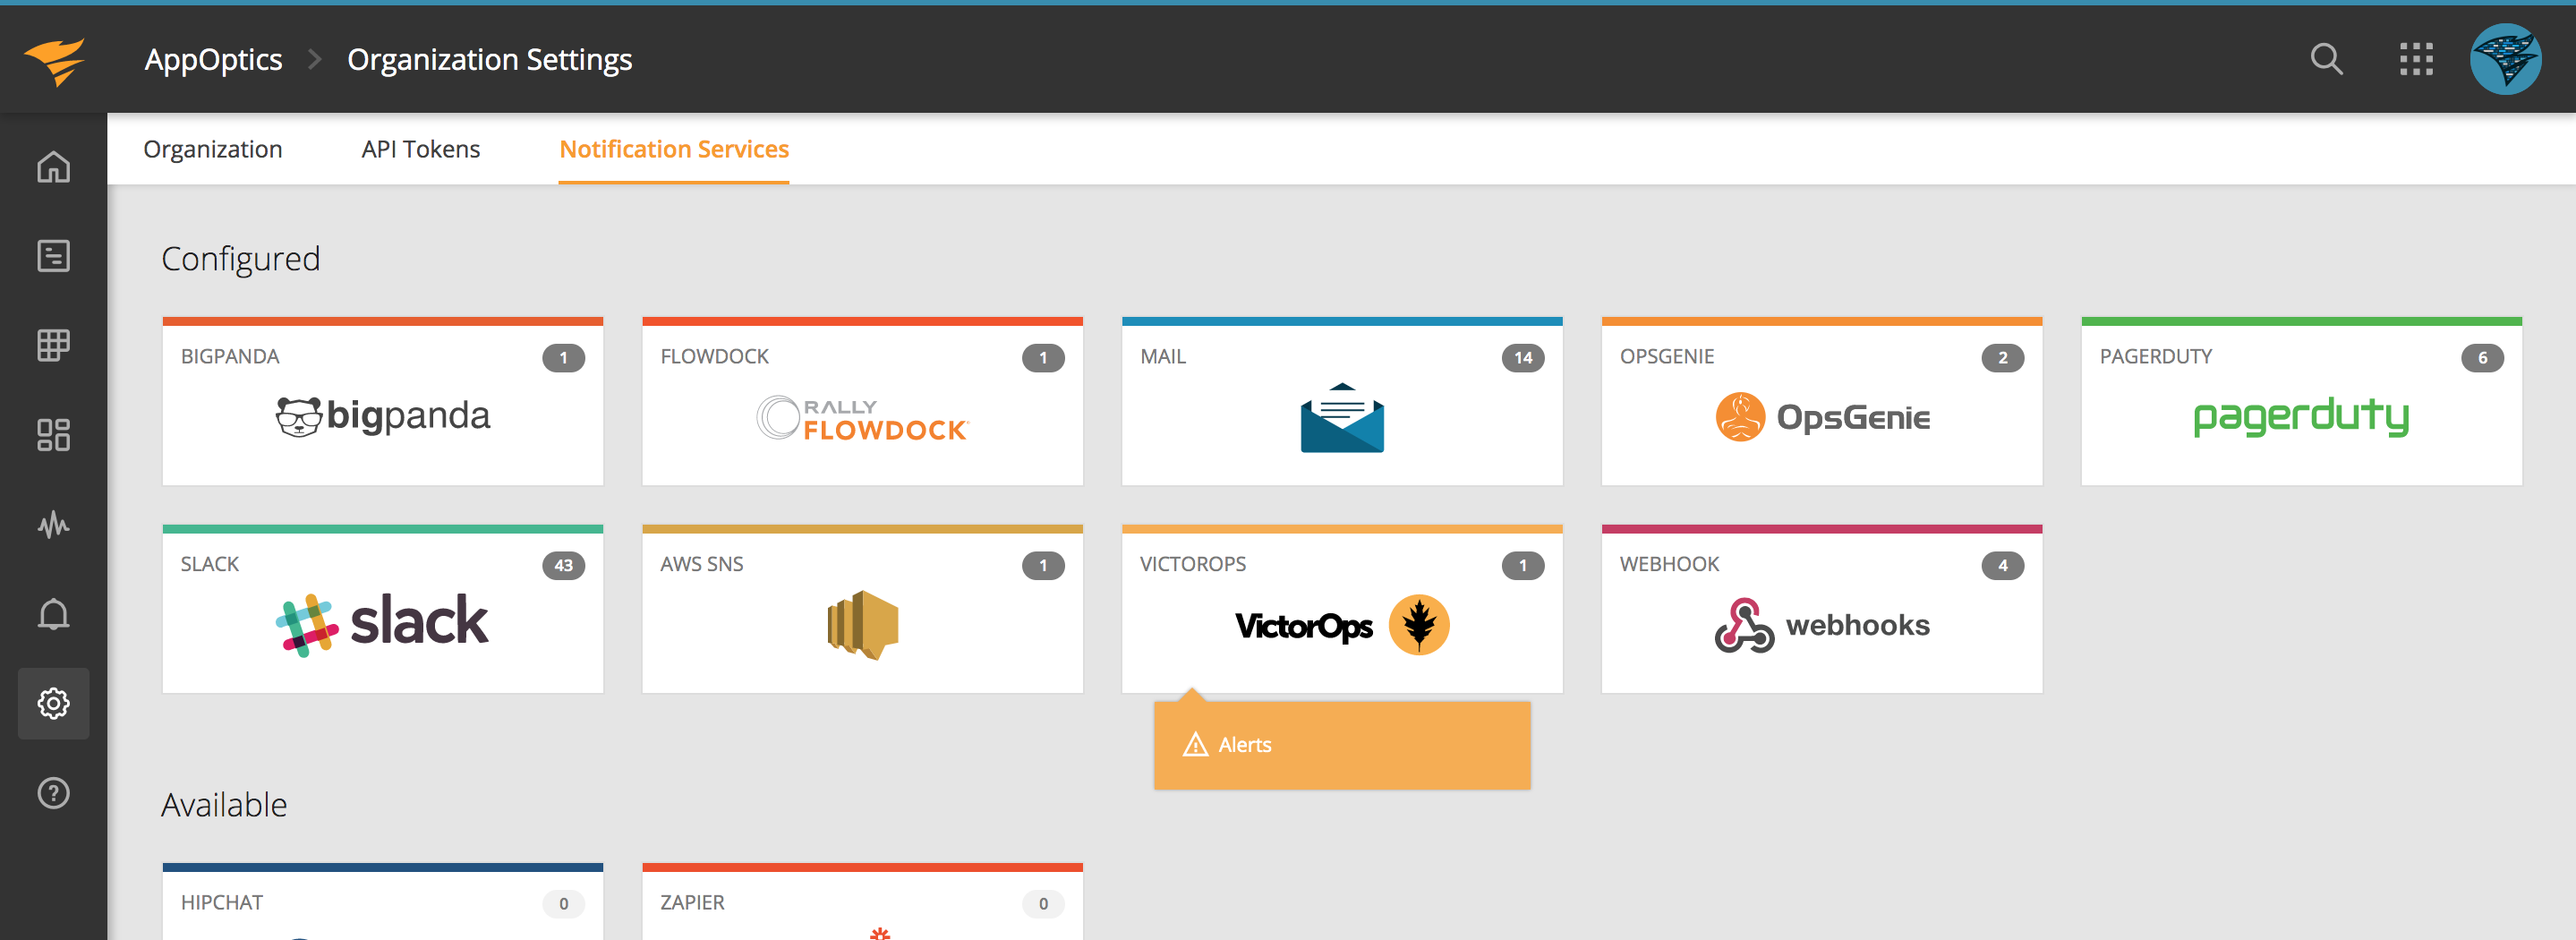
Give the integration configuration a title, then paste in the service API key and routing key you copied from VictorOps, and click Save.

Creating Alerts
After setting up the service you can tie alerts to a service destination. You can read more about creating alerts in the Alerts knowledge base article.
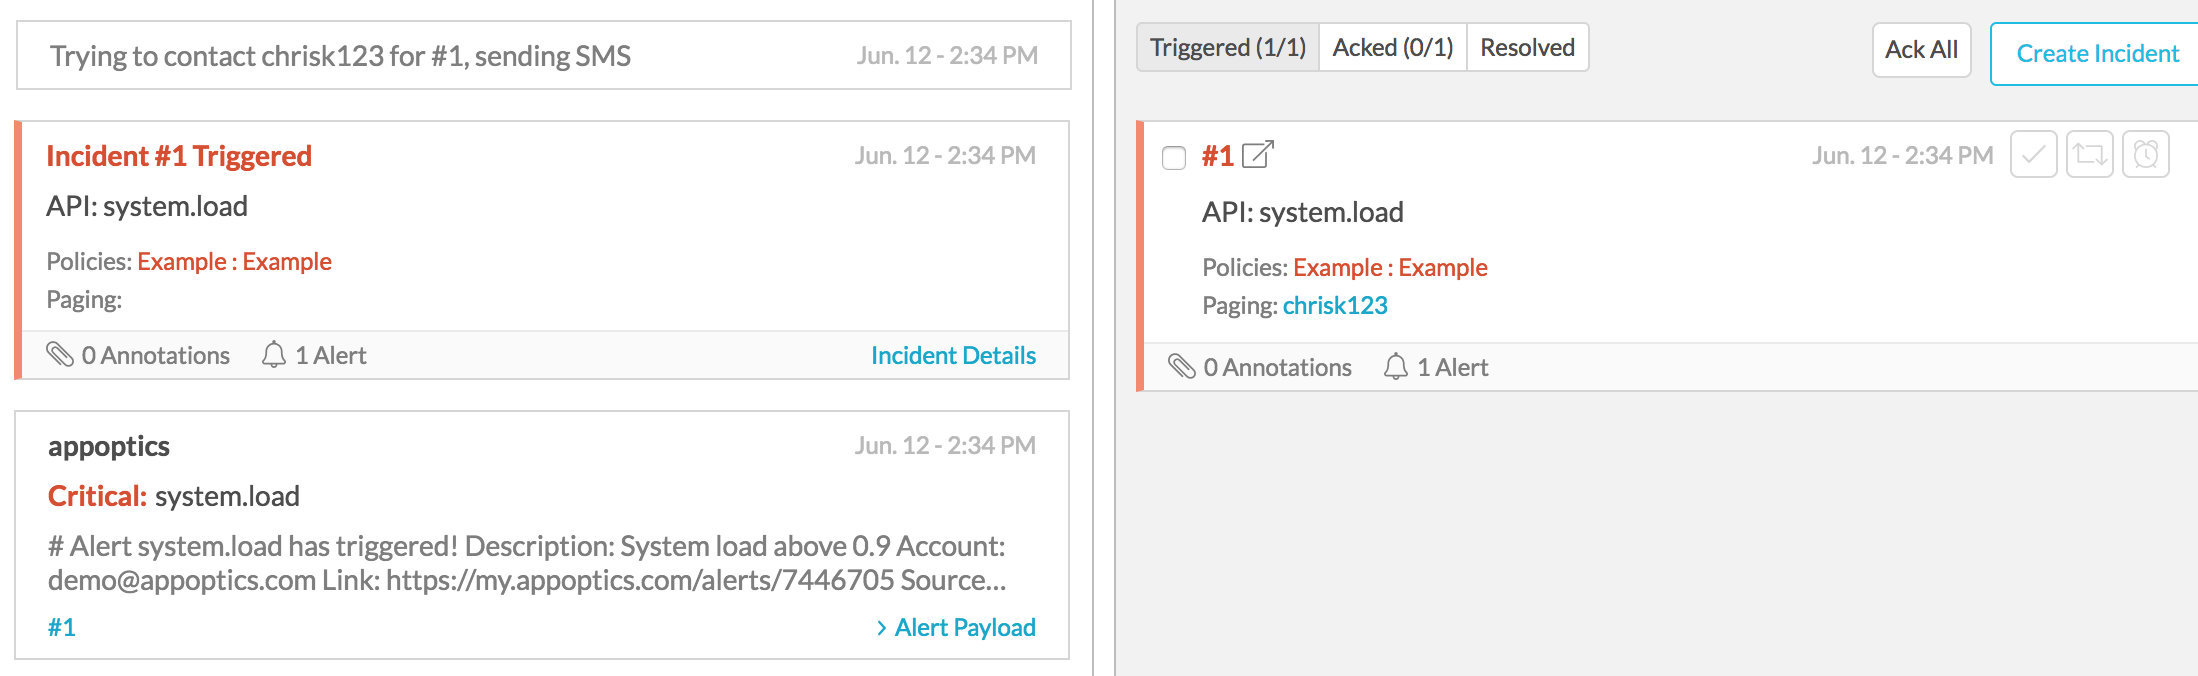
Alert Notifications
When an alert fires the payload is sent to VictorOps. Clicking on the alert will bring up a page with more alert details and links to manage the alert's life cycle:
Navigation Notice: When the APM Integrated Experience is enabled, AppOptics shares a common navigation and enhanced feature set with other integrated experience products. How you navigate AppOptics and access its features may vary from these instructions.