Define the client custom fields
The Client Custom Fields screen allows you to create custom fields in the Client Info tab for each client record. After you create your custom ticket fields, the fields automatically display in each client record. The custom field can be hidden, visible, editable, or required for all clients based on your needs.
You can add a pop-up message to the custom field by entering message text in the Info field. When you add text to this field and click Save, an Information ![]() icon displays in the custom field. When a tech or client (based on your assigned permissions) clicks this icon, the pop-up message displays next to the field.
icon displays in the custom field. When a tech or client (based on your assigned permissions) clicks this icon, the pop-up message displays next to the field.

The ![]() icon displays next to each custom field in the Ticket Custom Fields window that is configured with a pop-up message.
icon displays next to each custom field in the Ticket Custom Fields window that is configured with a pop-up message.

The following table lists all custom fields you can add to your client records. These custom fields display in the Client Info tab for each client.
| Field | Description |
|---|---|
| Text |
Creates a text box for up to 80 characters and up to 15 lines of text in the Client Info tab.
|
| Numbers |
Creates a text box for up to 80 characters and up to 15 lines of text or numbers in the Client Info tab.
|
| Currency |
Creates a text box for up to 80 characters and up to 15 lines of text or numbers in the Client Info tab.
|
| Date |
Creates a calendar field to add a date to the client record (for example, a start date) in the Client Info tab.
|
| Date/Time |
Creates a field with a selectable calendar and time drop-down menus in the Client Info tab.
|
|
Time Period |
Creates a field with days and hours drop-down menus in the Client Info tab.
|
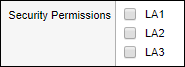
| Multiple Choice |
Creates a field with one or more checkboxes in the Client Info tab. You can select one or more options.
If you want to include only one option (for example, Yes or No), enter the option text in the Option field. Point your mouse arrow over Options for details. |
| Single Choice |
Creates a field with one or more radio buttons in the Client Info tab. You can only select one option.
If you want to include one option (for example, Yes or No), enter the option text in the Option field. Point your mouse arrow over Options for details. |
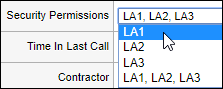
| Popup Menu |
Creates a field with one or more options in a drop-down menu in the Client Info tab. You can only select one option.
If you want to include one option (for example, Yes or No), enter the option text in the Option field. Point your mouse arrow over Options for details. |


To create a custom ticket field:
- Click Setup > Clients > Client Custom Fields.
-
Click New.
The Client Custom Fields screen displays the default values for a new custom field.
-
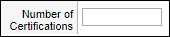
Enter a Label to identify this field.

-
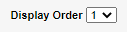
Click the Display Order drop-down menu and select this field's position within the Custom Fields section of a ticket.
-
In the Clients and Techs sections, specify whether clients and techs can see or edit the custom field, or if this field is required.
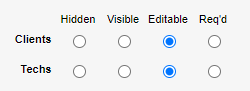
Techs with admin accounts can edit all custom fields.
-
Click the Type drop-down menu and select the appropriate text format type.

Select... To... Text
Numbers
Currency
Create a text box for up to 80 characters. Date Create a calendar field to add a date. Time/Date Create a field with a selectable calendar and time drop-down menus. Time Period Create a field with days and hours drop-down menus.
Select the Use Business Time checkbox to use your normal business hours.
Multiple Choice Create a field with one or more checkboxes. Single Choice Create a field with one or more radio buttons. Popup menu Create a field with one or more options in a drop-down menu. -
For your Type selection, select an available option. Some options may not display for your selection.
- Click Save.