Define the asset custom fields
Use Custom Fields to extend the types properties associated with assets.
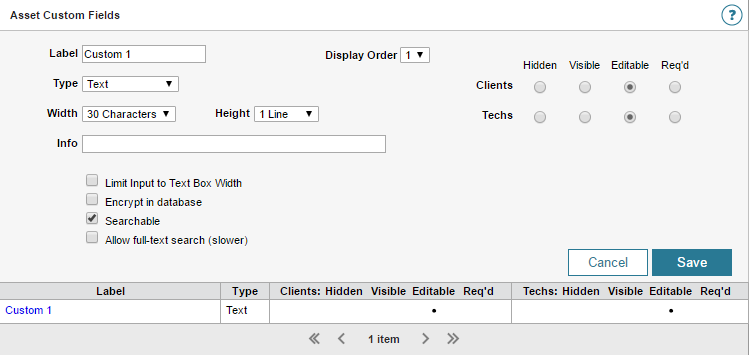
Below is an example of the Asset Custom Fields screen.
Define an asset custom field
- Log in to Web Help Desk as an administrator.
- Click Setup > Assets > Asset Custom Fields.
- Click New.
-
In the Label field, enter a name for this custom field.

-
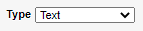
Click the Type drop-down menu and select a display option for the custom field.
See the table below for details.
Selection Description Text Creates a text box up to 80 characters and up to 15 lines of text.
- Select Text in the drop-down menu.
- Click the Width drop-down menu and select the number of characters that can be entered in the field.
- Click the Height drop-down menu and select the number of lines that can be entered in the field.
-
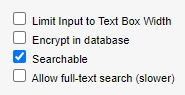
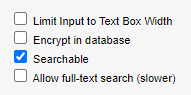
Select a checkbox option.
Select the Limit Input to Text Box Width checkbox to ensure the maximum number of characters does not exceed the number of characters chosen in the Width option.
Select the Encrypt in database checkbox to encrypt the data entered in the custom field before it is stored in the database. If you select this option after you enter the data, the existing values are not encrypted until they are updated.
Select the Searchable checkbox to Include the custom field as a search option in the Advanced Search page.
Select Allow full-text to index only the first 255 characters in a custom field. Select this option when the custom field values could exceed 255 characters. Applying this option reduces your search performance.
- Go to step 5.
Number Creates a text box for up to 80 characters and up to 15 lines of text or numbers.
- Select Number in the drop-down menu.
- Click the Width drop-down menu and select the number of characters that can be entered in the field.
- Click the Scale drop-down menu and select the number of lines that can be entered in the field.
- Go to step 5.
Currency Creates a text box for up to 80 characters and up to 15 lines of text or numbers.
- Select Currency in the drop-down menu.
- Click the Width drop-down menu and select the number of characters that can be entered in the field.
- Go to step 5.
Date Creates a calendar field to add a date.
- Select Date in the drop-down menu.
- Go to step 5.
Date/Time Creates a field with a selectable calendar and time drop-down menus.
- Select Date/Time in the drop-down menu.
- Go to step 5.
Time Period Creates a field with days and hours drop-down menus.
- Select Time Period in the drop-down menu.
- Click the Use Business Time checkbox to select the current business time zone. Otherwise, deselect this checkbox.
- Go to step 5.
Multiple Choice Creates a field with one or more checkboxes.
- Select Multiple Choice in the drop-down menu.
-
In the Options field, enter the multiple choice names separated by a semicolon.
For example:
Option1;Option2;Option3 - (Optional) Click Choose file to select and upload a file.
- Go to step 5.
Single Choice Creates a field with one or more radio buttons.
- Select Single Choice in the drop-down menu.
-
In the Options field, enter a name for each radio button, separated by a semicolon.
For example:
Option1;Option2;Option3 - (Optional) Click Choose file to select and upload a file.
- Go to step 5.
Popup Menu Creates a field with one or more options in a drop-down menu.
- Select Popup Menu in the drop-down menu.
- (Optional) Click Choose file to select and upload a file.
-
In the Options field, enter the pop-up menu item names separated by a semicolon.
For example:
Option1;Option2;Option3 - Go to step 5.
-
In the Info field, enter the text that can be entered in a tool tip for the custom field.

The custom field will have an info icon next to it. When a user hovers over the icon, the tooltip displays the text you entered.
-
Select the Searchable checkbox to include the custom field as a search option in the Advanced Search page. Otherwise, leave the checkbox blank.
-
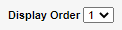
Click the Display Order drop-down menu and select the custom field order.
-
In the Clients section, select the appropriate permissions, defining whether the field is hidden, visible, editable, or required for the clients.
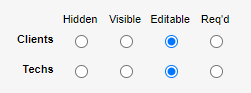 The custom field is disabled when the field is not visible in the client interface.
 -
In the Techs section, select the appropriate permissions, defining whether the field is hidden, visible, editable, or required for the techs.
Administrators have at least Editable access to all custom fields. The Required fields are required for administrators. -
For your Type selection, select an available option. Some options may not display for your selection.
Select... To... Limit Input to Text Box Width Ensure the maximum number amount of characters allowed does not exceed the number of characters selected in the Width drop-down menu. Encrypt in database Protect the data entered in the custom field using AES 256 encryption before it is stored in the database. If you select this option after you enter your data, the existing values are encrypted not encrypted until they are updated. Searchable Enable the custom field to display as a search option in the Advanced Search page. Allow full-text search (slower) Search for more than 255 characters.
For performance reasons, only the first 255 characters are indexed. Selecting this option reduces your search performance.
- Click Save.