Configure the Database Table or View settings
To create a discovery connection for a Database table or view:
- In the toolbar, click Setup > Assets > Discovery Connections.
- Click New.
-
In the Connection Name field, enter a name for this connection.

-
Click the Discovery Tool drop-down menu and select Database Table or View.

-
Click the Database Type drop-down menu and select the type of database that contains the table or view used to retrieve asset information. For example, Microsoft SQL Server.

If you are using the embedded PostgreSQL database, select the Use Embedded Database checkbox.

If you select Oracle, select the Use Custom JDBC URL checkbox to enter a custom Java Database Connectivity (JDBC) URL. This option supports Oracle Real Application Clusters (RAC) configurations. Otherwise, leave this checkbox unchecked. See the Oracle documentation for details about creating a custom JDBC URL.
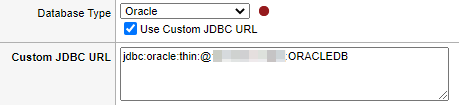 If the red indicator displays, Web Help Desk cannot locate the JDBC driver required for the database connection. If you selected MySQL or Microsoft SQL Server as your database connection, see WHD error: Unable to connect to database located on the SolarWinds Support website to troubleshoot the issue.
 -
In the Host and Port fields, enter the database IP address and port number.

If you select Oracle as the database type, enter the port used by the database to listen for connections and the Oracle System Identifier (SID) for the database. The SID is defined in the Oracle
tnsnames.oraconfiguration file.
-
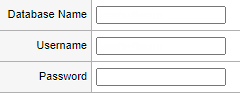
Enter the database name, user name, and password used to access the asset information tables.
-
Click the Table or View drop;-down menu and select the name of the table or view that synchronizes with the asset information.

-
Click the Sync Column drop-down menu and select the table column specified in the Table or View drop-down menu used to match Web Help Desk assets with assets in the database table or view.

The column value is stored in the Web Help Desk database for each Asset connection. If the Asset synchronizer encounters a database record with a sync value that is not stored the Web Help Desk asset database, it will attempt to match the database record with existing assets by comparing the following values, in order of precedence:
- Asset Number
- Serial Number
- MAC Address
If no match is found, a new asset record is created and given the sync value.
The Sync Column is not used to compare against asset number, serial number, or MAC address unless it is mapped to one of these attributes in the Attribute Mapping tab. It is used internally to identify previously synchronized assets, and does not be mapped to any Web Help Desk asset attribute.
You can synchronize against the asset number, serial number, and MAC address only if no existing Web Help Desk asset was matched with the sync column value. As a result, once an asset is synchronized, the changes to the asset number, serial number, and MAC address are reflected in the Web Help Desk asset record. -
Select a synchronization schedule that determines how often Web Help Desk collects properties from the discovered endpoints. To disable automatic synchronization, select Every but do not select a day of the week.

-
Select the checkbox to ignore blank values encountered mapping fields of the discovery tool. Otherwise, deselect this checkbox.

-
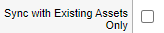
Select the checkbox to synchronize assets found in the discovery connection with the existing assets in Web Help Desk. Otherwise, leave this checkbox unchecked.
-
Select an action when the discovery tool locates a new client association that is different from what is stored in the Web Help Desk database.

Select Add Clients to add new client associations. Select Replace Clients to replace all existing client associations for the Web Help Desk asset. Select Ignore Clients to do nothing.
-
Select an action to take if an asset currently in the Web Help Desk database is not found by the discovery tool.

Select Delete Asset to delete the asset from the database. Select No Action to leave the asset in the database. Select Set Status To if you want to leave the asset in the database but set its status to another value.
- Click the Attribute Mapping tab.
- Click Edit.
-
Map the desired custom asset fields to the database attributes.
The asset attributes are different for each discovery tool, mapping directly to the values in the discovery tool’s database.
- Click Save.
- Click Assets > Search Assets to view your imported assets.